Showing posts with label crafting. Show all posts

Tuesday, November 26, 2019

Fabric Christmas Trees

Pin It
I saw some really cute fabric Christmas tree decor at Walmart this year--I like them, and they are only about $5 each--BUT--they are all the same size.  I like having some variety/depth if I'm grouping things together.  This post is not sponsored at all by Walmart, but wow, they've had some pretty great decorations and craft supplies this year.


Walmart version


When I wandered past the crafting section at the same Walmart, I saw some fat quarter fabric for only $1.47 each and thought they'd make awesome craft projects. Fat quarters are pieces of fabric that are 18x22 inches.  You could use any fabric (or cut up an old piece of clothing).  The nice thing about fat quarters is you don't have to wait in line to get fabric cut.


Also down the craft aisle at Walmart are some pre-cut dowels, only $1.27 for a package of 16.


Once I had my supplies at home, I poked around in the garage for something to work as the base--a tree "cookie" would be great, but I didn't have any of those, but I did have a leftover bit of 1x2 lumber, so I cut it into about 1.5" lengths.  I used my drill to make a 3/16" hole to receive the dowel.

I used a simple tree outline (you could also just make a plain triangle with no branches) and enlarged and reduced it so that I had multiple sizes.  I printed them on cardstock and cut them out as patterns.  My biggest tree is 7 inches tall and 6 inches at the base.  I also did a 6 inch tall and 5 inch tall.  I have a pattern for a 4 inch, but it seemed too small for what I wanted.


With some careful planning, I was able to cut 4 Large, 4 Medium and 4 Small trees from each of my 3 fabrics.  That meant 36 pieces which equals 18 trees.  I had to really layout the pattern carefully to get this many.  I laid the fabric out flat and traced and cut each piece.  It would be way faster to fold the fabric and cut more than one at a time, but you won't get as many pieces.


I chose to sew mine.  I also chose a "rustic" look, so I sewed them with wrong sides together and left the edges a bit ragged (instead of sewing with the right sides together and then turning it out to hide the stitching).  I started my seam about 1/8 of the way in on the bottom edge of the tree and then went around every branch until I was back at the bottom of the tree--and went in about 1/8 inch.  That left me a wide opening to insert a bit of stuffing.  I used the dowels to poke the stuffing into all the branches (I went with a slightly stuffed look, but you could really pack it in there).  You could probably do this as a no-sew craft if you used fabric glue and let it dry for several hours before stuffing.  I just liked the look of the stitching around the edges.  The sewing was the longest part of the project.

Once the trees were stuffed, I closed up the bottom seam with my machine (skipping over about 1/4 inch in the center so I'd have space to insert the dowel).  Run the dowel all the way to the tip of the tree.  Place the dowel in the base and you are set.

Materials
fat quarters of different fabrics (or if you like them all the same, just the one kind)
3/16" wooden dowels
wood block or tree cookie for base
polyfill stuffing (or an old pillow you can cannibalize)
matching thread/sewing machine or glue


My total investment was under $6 for all 3 fat quarters and the package of dowels.  I already had the other supplies.  I was able to get 5 sets (actually 6, but the dowel package leaves you short two dowels, so I went into the yard and cut a couple sticks off a shrub...it will do--if you have some small, straight tree branches, you could skip the dowels altogether).

You could do the same tree pattern for ornaments, or decorations on a wreath instead of on dowels.  I thought I'd gift each set along with the story of the Three Trees. 

Tuesday, April 10, 2018

Baby Diaper Balm and Lip Balm for Mom

Pin It


Want a great baby shower gift that is useful and easy to make?  I stumbled across a site for lots of homemade beauty products--and they all look awesome, but some are complicated.  This one is not!

Diaper cream.  Have you ever gotten some of that white stuff from the tube on your hands?  Its sticky, hard to wash off and it stains clothes!  Although it is very effective at helping protect a baby's skin.  The active ingredient in the store bought stuff is zinc oxide.  In this homemade version you also use zinc, but you also use organic olive oil and beeswax, chamomile and calendula petals.  Makes for a soothing balm that feels good on skin, isn't sticky and is all organic! 

You'll need:
zinc oxide powder
organic olive oil
organic beeswax pellets
organic chamomile tea bag and dried calendula petals (optional)
tin or jar
jelly jar or glass measure cup
scale


I'll send you back over to Humblebee and Me for all the details on crafting the diaper balm--but it takes me about 10 minutes from start to finish to make a single tin (and yes, you can double the recipe and make a large tin).


Coconut Oil Lip Balm

Also from Humblebee and Me--I ordered my balm tubes from Amazon.  You'd think a funnel would help on this project--but it does not.  The beeswax cools super fast, so using a funnel just clogs up and makes things harder. 

5 grams beeswax pellet
5 grams coconut oil
2-3 drops almond oil or vitamin E oil


Melt everything in a glass jar or measuring cup set inside of pot of water (on medium/low).  When its all melted, pour into your tubes (don't delay, just quickly pour).  This makes 2 tubes.  You can double the recipe.

Friday, June 30, 2017

Magnetic Pin Cushion

Pin It


I've been down in my sewing room quite a bit lately, and one thing you'll notice is that my straight pins are in a tomato pin cushion.  I think my mom gave it to me when she gave me my first sewing machine 20+ years ago.  It does the job of holding the pins, but I've eyed the magnetic ones at the sewing store--but never got around to replacing the perfectly functional tomato with a $20 magnetic one.

Inspiration struck one day when I was looking at the grocery ads.  Harbor Freight Tools always has a coupon ad that comes with my grocery fliers.  One of the items that you could get for free with any purchase was a magnetic screw/nut/bolt holder.  I went to Harbor Freight and the magnetic tray was already on sale for $2--so I bought one and used the coupon to get another one for free.


I could have just opened them up and started using them as is, but I have a love for all things rose gold these days, and I had a can of spray paint in the garage.  I washed them with dish soap to remove the residue of oil that was on them, used tape to cover up the rubber base (I probably could have just left it) and then put 3 light coats of paint on it.  I let it cure/dry for a couple days and voila, magnetic pin cushion.  I like it.  It doesn't seem as strong as others I've seen, but I can turn the dish upside down and the pins stay put.  I might take a neodymium magnet (aka rare earth, super strong mini magnet) and stick it to the side just to see what happens.  


All in all a quick, cheap and easy project that has a useful function.

Friday, September 30, 2016

Quick Door Decor Upcycle

Pin It
Super easy project!  I love pineapples--I've been on quite a kick lately (on my last trip to Hawaii I tried to find a cute skirt with a pineapple print with no luck--I went to all the fabric stores and found hardly ANY pineapple fabric, and none of it cute--but I did find a fun t shirt at Ann Taylor Loft).  Anyway...I'm always on the lookout for cute pineapple stuff.  I saw this plaster door medallion at the High School Yard Sale for $1.  Nice.  

30 minutes later and it fits my door decor much better.  I used acrylic craft paint and then a bit of silver Rub N' Buff to give it a nice sheen.  


Friday, September 16, 2016

Faux Canvas Wall Art

Pin It


As part of my living room redecorating I put up a new shelf, and then I had to figure out what would go on the shelf and on the rest of the wall.  I spent lots of time surfing Pinterest for wall art ideas, for quotes etc...  I finally decided that I needed a piece that was about 2 feet across and about 30 inches long (I could have probably done closer to 3 feet...maybe next time).  When I looked at stores for art, I didn't find what I wanted.  I considered buying a canvas at the craft store and using paint and my vinyl cutter.  But I thought maybe I could do a faux canvas instead--and for less! 


I have been wanting to try out the Engineering prints from Staples since I read about a blogger who did a large print of the Death Star for her boys' room.  The engineering prints are inexpensive, but they are in black and white and lower resolution.  For the one I did, it cost about $3.50 (I uploaded the .jpg and an hour later got a call from Staples that it was ready for pick up).

Next, I had to figure out how to make the photocopy look like it was canvas.  I like the wrapped canvas look, so I decided I needed something that was about 1 inch thick. I thought about foam core board or cardboard, but I'd have to put layers together.  I considered plywood or particle board (and if I had had a scrap big enough in my shed I might had gone that route).  Then I landed on rigid foam insulation--cheap, easy to haul home and cut! I didn't want a big sheet of it, but luckily, Home Depot sells it in small 2x2 and 2x4 panels.  I chose the 1" thick and it was about $3.50.

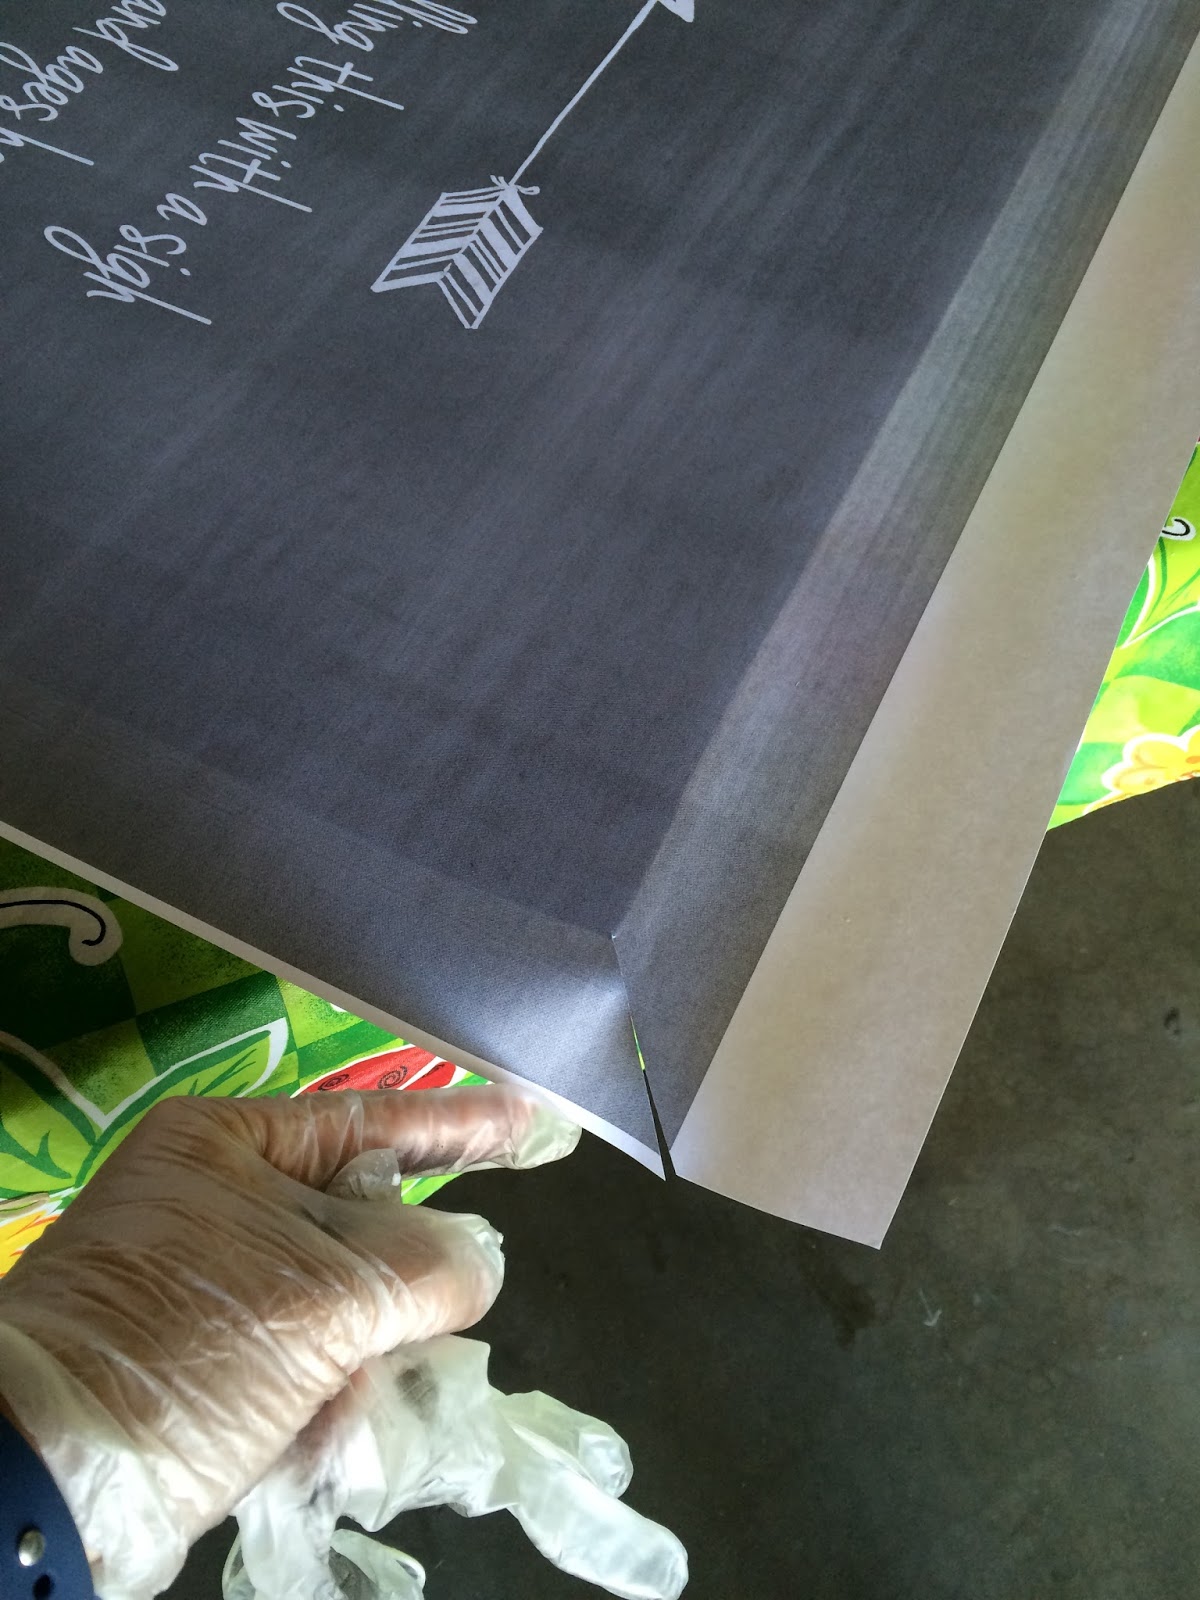
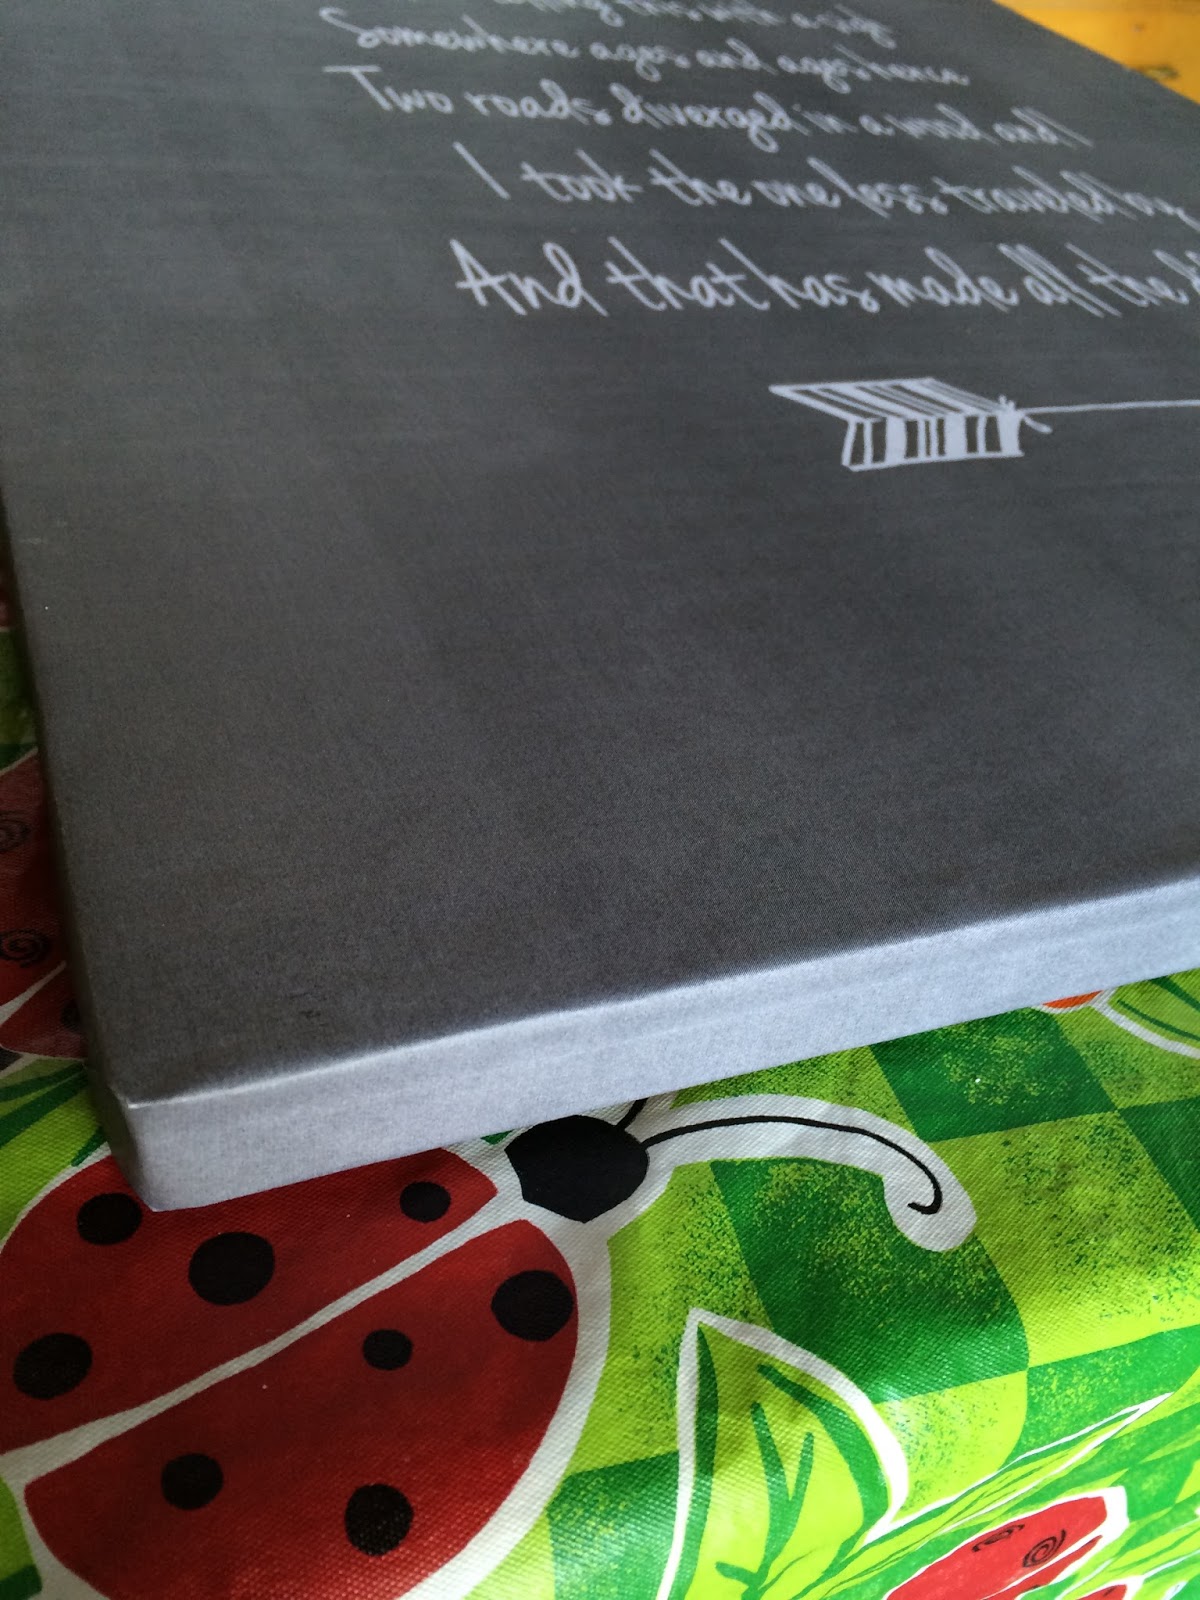
So, I brought home my print and my foam.  I used a straightedge to trim the foam and sprayed the surface with adhesive.  I centered the print over the foam and carefully smoothed it down.  I cut the corners of the paper at an angle and flipped the whole thing over and sprayed a bit more adhesive on the foam edges and the paper.  I slowly and carefully wrapped the paper around the edge and the back.  It looked a lot like a wrapped package.


 To get the illusion of canvas, I used a big paintbrush (the super cheap bristle brush from the Dollar Store) and dry brushed a bit of Modge Podge in long sweeping strokes both vertically and horizontally.  Don't use much of the glue--dab it on the brush, tap most of it off on a rag or paper towel and then lightly brush (if you get heavy handed with the liquid glue, the thin paper will wrinkle up). 

Since the foam is so light, I used a loop of twine and some duct tape to make the hanger (tie a knot in the end so the twine doesn't slide out of the tape). 


For my quote, I went with Robert Frost's The Road Not Taken.  We had sung it at choir a couple months ago and it has just stuck with me.  

Two roads diverged in a yellow wood,
And sorry I could not travel both
And be one traveler, long I stood
And looked down one as far as I could
To where it bent in the undergrowth;

Then took the other, as just as fair,
And having perhaps the better claim,
Because it was grassy and wanted wear;
Though as for that the passing there
Had worn them really about the same,

And both that morning equally lay
In leaves no step had trodden black.
Oh, I kept the first for another day!
Yet knowing how way leads on to way,
I doubted if I should ever come back.

I shall be telling this with a sigh
Somewhere ages and ages hence:
Two roads diverged in a wood, and I—
I took the one less traveled by,
And that has made all the difference.

Tuesday, September 6, 2016

Patio Chair Re-do

Pin It
 

I was visiting my parent's home in Idaho and went out for a Saturday morning run and the neighbors were having a yard sale.  I've been wanting to change my plastic patio chairs to something more interesting, and these metal bistro chairs caught my eye.  They only wanted $2 a piece, so I bought 4 of them and hauled them home (well, I brought two home with me and my mom was nice enough to bring the other two the next time she came to Utah in her RAV 4). 
I have recovered chairs before, so I know that taking off the current cover and using it as a pattern is the way to go.  I had to laugh when I took off the brown vinyl--it was covering...brown vinyl.  Although one of the chair still had the original vinyl underneath both brown layers; a mustard/floral (which was kinda cute in a retro way, but only one of the chairs still had it). 
I got lucky at JoAnn on the fabric.  The Red Tag fabrics were an extra 50% off and I used a 20% off your entire purchase coupon.  I bought 2 yards of outdoor canvas fabric for only $5.80 

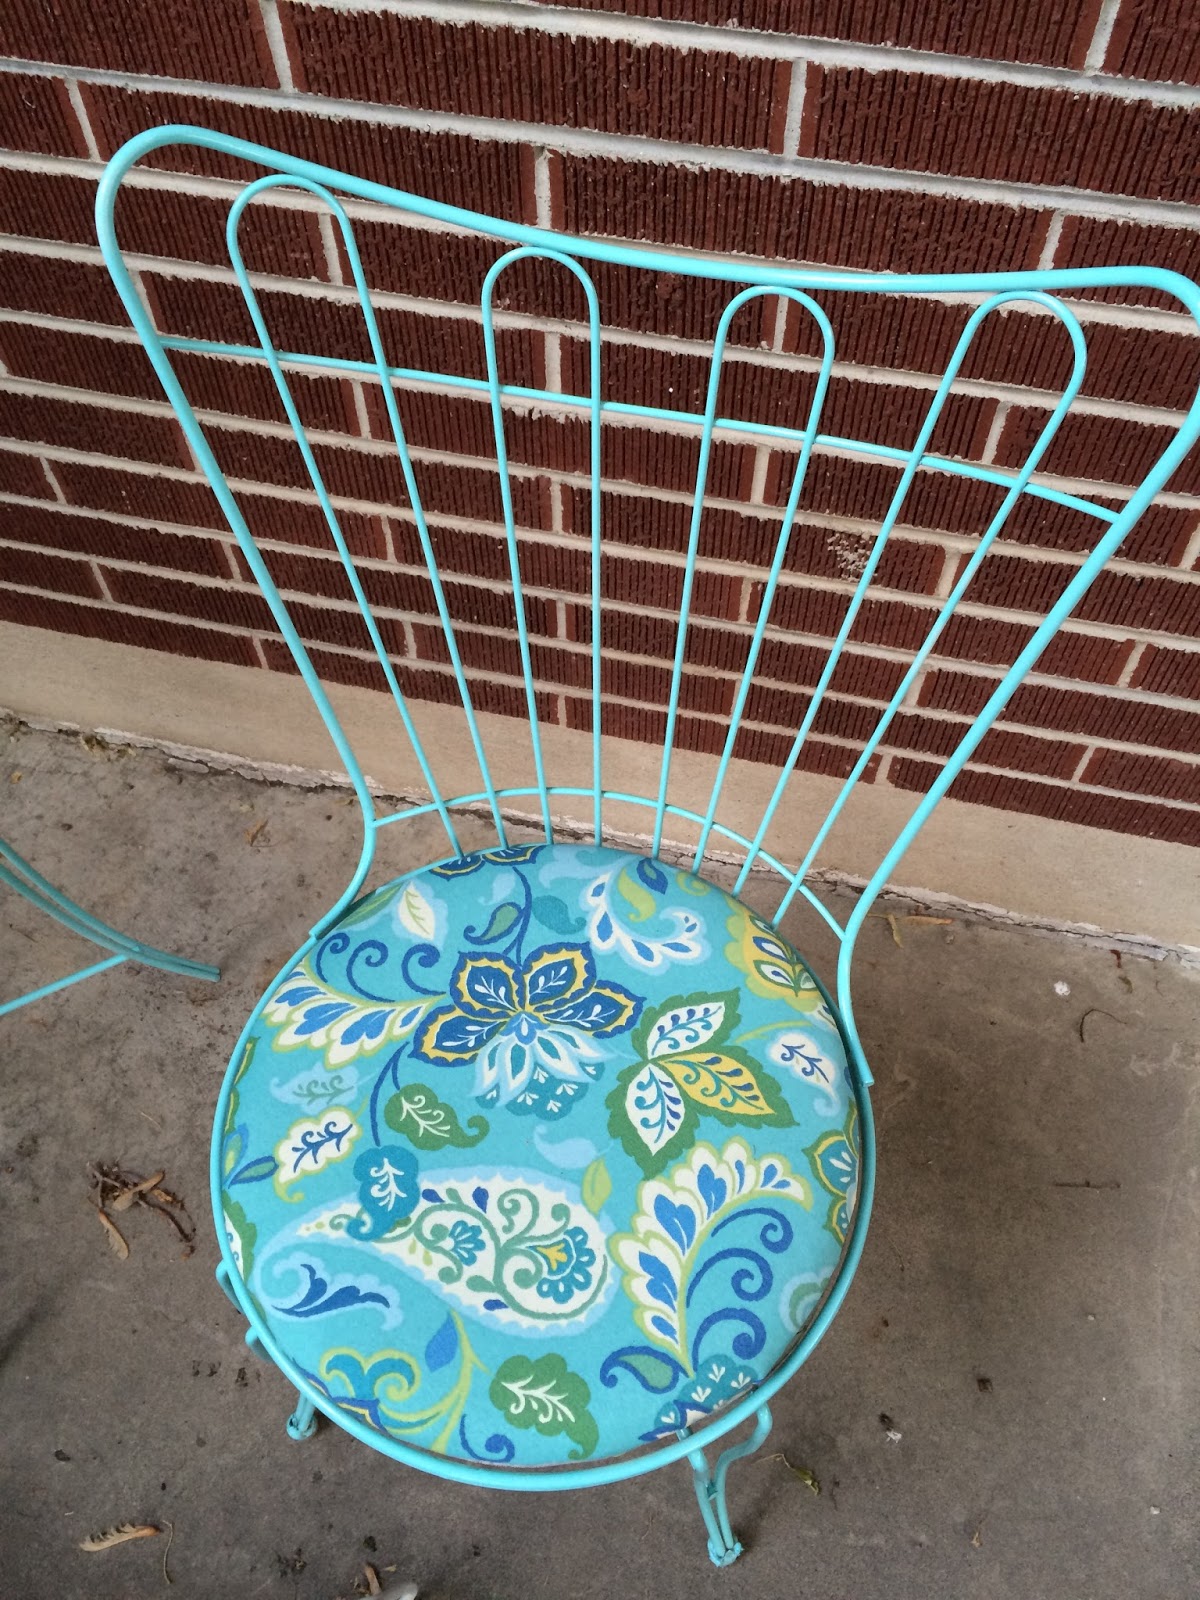
I pulled off all the old vinyl, cut out the new circles and stapled it on to the cushions.  I find that kneeling on the cushion helps you pull the fabric super tight while you staple.  I staple one side, then do the opposite side (basically I divide the circle into 8 sides).  
Next was painting the chairs.  I ordered the paint from Amazon (hello Prime, all the colors, delivered right to my door).  Only $3.68 a can for this fun Aqua color--I bought 2 cans.  I did get 2 chairs done with one can of paint, but I skimped on areas underneath that no one would see.  I probably should have had 1 more can of paint.  


Now I've got some bright patio chairs and I love them.  I also love that my total investment was only about $6 per chair.


Sunday, September 25, 2011

Interchangable Magnetic Necklace

Pin It

I've had some fun making magnets or necklaces using Diamond Glaze and scrapbook paper (or photos)--so why not combine the two? A co-worker had some earrings that had the same premise (although fancier than a bottle cap) that I used as inspiration. Now I can switch out my necklace depending on my mood or outfit :)

You'll need:

Bottlecap necklace blank (Hobby Lobby)
Round magnets
Diamond Glaze
Patterned paper or photo


This was a super fast, super easy project (and very inexpensive--the magnets were 1.99 for 6, but I had a 40% off coupon and the bottlecap necklace was on sale for 4/$1). I looked at some other necklace blanks that were flat, but I was concerned that the magnet could get knocked off.


First, find the scrapbook paper that you like and roughly cut out a circle a bit larger than the magnet. Flip the piece of scrapbook paper upside down and spread a thin layer of the Diamond Glaze (you could use any glue here, but to keep things simple, I just use the glaze). Press the magnet into the glue. Let it set for about a minute, then use scissors to trim around the edges.


Make sure you don't have any excess glue dripping down and flip the magnet over so that the paper side is now up. Puddle some Diamond Glaze on top of the patterned paper and smooth out (I use a bit of cardstock, or in this case packaging from the bottle caps) as a spreader. Go slow and make sure that you don't have any air bubbles. Careful, if you are doing more than one pendant at a time, keep them apart--if two magnets with wet Diamond Glaze get close together...not so good (not that I learned that the hard way or anything). Let dry for a couple hours (or overnight).


Thread a chain through the bottlecap and decide which magnet to pop in! That's it :) Try it out for different holidays (or make an advent necklace!) or to switch up between favorite sports teams or your school mascot.

Thursday, August 4, 2011

Quatrefoil Jewelry Box

Pin It


I have been itching to do a fun painting project and I found the perfect inspiration in this photo of storage boxes. Don't you just love these boxes. I am a HUGE fan of that color of green, if I were to spot them at my Home Goods store, no doubt they would come home with me.


http://tracizeller.com/blog/2010/fabulous-and-frugal-a-visit-to-homesense/

I had picked up this jewelry box at a thrift store and hoped to do something fun with it! Ta-da--Quatrefoil jewelry box in Tiffany blue and silver :)


Before: First, sanded it up and washed it.

The jewerly box top veneer was in pretty bad shape, so I used some 1/8" hardiboard to cut a new top (its thin enough that a straight edge and utility knife were enough to get the cutting job done). Glued it up with wood glue and placed a heavy box on it overnight to dry.


Next, I used Kilz gray primer (used a foam brush), 3 coats and then 3 coats of some leftover turquoise paint, mixed 1/2 and 1/2 with white semi gloss (the Turquoise is a Martha Stewart called Aruncana Teal). I used my Silhouette to create a stencil of the quatrefoil pattern.

I took my time and stenciled the top and sides with silver paint.


So what do you think? The drawer has lots of curve and so I skipped stenciling it...and I'm still thinking about doing a bit of distressing/glazing.