Showing posts with label Disney. Show all posts

Sunday, March 22, 2020

Amigurumi Patterns

Pin It  

I learned to do some basic crochet from my mom and grandma when I was in junior high.  I did the usual scarf and dishrag.  I even got fancy enough to do some bookmarks and baby blankets--and then I put it away for a very long time.  When the Disney+ series The Mandalorian came out and there were no baby Yodas to be bought anywhere, I started thinking I could make one--and lo and behold, several other folks thought so too.  There are many patterns out there for making "The Child"--some were so good and so popular the big corporate Disney sent cease and desist notices.  I ended up making about 5 Baby Yoda crochet dolls (aka Amigurumi crochet), and I am finding it very satisfying to make them.  I picked up a kit at Sam's Club for Harry Potter and was debating the Disney Princess kit when I came across a pattern online.  


These are the only 2 dolls I've made so far, but they sure are fun.  If you want to try your hand at Baby Yoda, check out Hooked On Fandom's excellent pattern (free!).  I've tried it with a hook a size up as well as a size down and liked both results.  I tinkered with the pattern to make a 2/3 size "pocket" Yoda, and it was fun...but I have not developed good pattern making skills yet...too many errors in mine (which I've hidden with clothes).  For Baby Yoda, I decided I liked his robe being made out of fleece rather than crochet--which is probably not allowed in amigurumi, but I don't care.  It's my craft right?   


With Cinderella (which could also be Belle or Tinkerbelle pretty easily), the pattern of stitches is really good, however, the order of the instructions for construction/sewing was not good.  It looks like the original pattern was in Russian, and someone translated.  Even with some experience with the Yoda dolls, I found Cinderella and some of her construction pretty challenging (the hair band and the white dress flounce were the very hardest part).  

For both dolls, you will need to know how to do the Magic Circle--which is how you start any sphere shape.  I found the tutorial at Winding Road Crochet to be super easy to follow.   As a general tip for any project, make your first row, the chain-on row fairly loose.  Not sloppy, just not as tight as you would for any other row.  Otherwise its tough to get your hook back into those loops again. 


Here is my reorganization of the Cinderella pattern (check out her website for some great pics):
Materials:
  • Yarn:  dress (blue), trim (white), black, flesh, hair (yellow)
  • Safety eyes 6 mm
  • Fiberfill
  • Beads for a hair band (optional)
  • Embroidery needle (long with large eye)
Abbreviations:
R = row
mc = magic circle
ch = chain
st = stitch
sc = single crochet
sk=skip stitch
DC = double crochet
TR = treble crochet
hdc =  half double crochet
htr = half treble crochet
sl st = slip stitch
inc = 2 sc in the next stitch
dec = single crochet 2 stitches together
BLO = back loop only
FLO = front loop only
( ) = number of stitches you should have at the end of the round/row
( )x6 = repeat whatever is between the brackets the number of times stated
 
Body + legs
With white yarn:
First leg
R 1. 6 sc in mc (6)
R 2-6. 6 sc (6)
Second leg
R 1. 6 sc in mc(6)
R 2-6. 6 sc (6)
Don’t cut the yarn! Just leave it hanging so you can pick it up again later in the body.
R 7. Crochet 3 ch from the second leg and join it with the first leg, 6 sc on first leg, sc in next 3ch, 6 sc on second leg, sc in next 3ch (opposite side) (18)
R 8-10. 18 sc (18)
With DRESS yarn color:
R 11-12. 18 sc (18)
R 13. BLO 18 sc (18)
R 14. 18 sc (18)
With BODY color:
R 15. 18 sc (18)
R 16. (dec, 1 sc) х 6 (12)
With BLACK yarn make the necklace (if no necklace, continue with body color):
R 17. 12 sc (12)
Stuff the leg and body and set aside. 
Head
R 1. 6 sc in mc (6)
R 2. inc x 6 (12)
R 3. (inc, 1 sc) х 6 (18)
R 4.  (inc, 2 sc) х 6 (24)
R 5. (inc, 3 sc) х 6 (30)
R 6-13. 30 sc (30)
Find eye placement at the level of Rnd 10-11, at the distance of 5 stitches from each other. Don't attach eyes yet, first you should Embroider eyelashes, then put the backing on the eyes.  Stuff the head.
R 14. (dec, 3 sc) х 6 (24)
R 15. (dec, 2 sc) х 6 (18)
R 16. (dec, 1 sc) х 6 (12)
Finish stuffing the head. Leave a long tail of yarn for sewing head on much later. 
Dress
Go to the center back of the body – R13:
R1. FLO: 3 ch, (4 DC in next st, 2 DC in next st) x repeat to the end of row, sl st (54).
R2-5. 1 DC in every st to the end of row, sl st (54). 1 hdc, 1 sc to make hem look even. Finish off by slip-stitching around the entire dress.
Arms (make 2)
With WHITE yarn:
R 1. 6 sc in mc (6)
R 2-4. 6 sc (6)
With body colour:
R 5-7. 6 sc (6)
Leave a long tail. Don’t stuff arms! Sew onto body.(if your doll doesn't have white gloves, use another color OR just body color)
Sleeve (make 2)
With WHITE yarn:
Make 9 ch.
From the 2nd ch from hook: 2 sl st, 4 sc in next 4 st, 2 sl st.
F.o., leaving a long tail. Sew sleeves to the body.
Dress band
With WHITE yarn:
Make 26 ch
From the 2nd ch from hook: sl st, (2 sc, 1 hdc and 1 DC in next st, 1 DC, 2 htr in next st, 3 TR in next st, 2 htr in next st, 1 DC, 1 DC and 1 hdc in next st, 1 sc), 3 sl st, (2 sc, 1 hdc and 1 DC in next st, 1 DC, 2 htr in next st, 3 TR in next st, 2 htr in next st, 1 DC, 1 DC and hdc in next st, 1 sc), sl st.
F.o., leaving a long tail. Sew to the dress.
Hair
R 1. 6 sc in mc (6)
R 2. inc x 6 (12)
R 3. (inc, 1 sc) х 6 (18)
R 4. (inc, 2 sc) х 6 (24)
R 5. (inc, 3 sc) х 6 (30)
R 6. (inc, 4 sc) х 6 (36)
R 7-10. 36 sc
As you continue to the next round, you will start the flap that will become the bangs:
R 11. (sk st, 5 DC in next st, sk st, 1 sc) x 5, 16 sc, turn.
R 12. 1 ch, 15 sc, turn. (repeat this row 6 times).
Make a roll and sew roll up.

Bun
R1. 6 sc in mc (6)
R2. inc x 6 (12)
R3. (inc, 1 sc) х 6 (18)
R4. (inc, 2 sc) х 6 (24)
R5-9. 24 sc (24)
Stuff. F.o., leaving a long tail.
Hair band
With blue yarn:
Make 25 ch
From the 2nd ch from hook: sl st, 3 DC, 2 sc, hdc, 10 DC, hdc, 2 sc, 4 sl st.
F.o., leaving a long tail. Sew to the hair.
Decorate with 2 beads.
Assemble Hair 
Place bun on the top-center of the hair and sew the bun to the hair cap. Now place hair on the head and find the position of the headband.  Once you are sure of the headband, remove the entire hair and sew the headband to the hair.  Once entire hairpiece is complete, sew to the head. 
Attach head to body
This is the most challenging part.  Center the head on the body and start sewing it in place.  You may need to use stitches that go from the head all the way through the body and then back up.  Just keep stitching until the head feels stable. 

Sunday, January 29, 2017

RunDisney: A runner's review

Pin It
I like running races--it helps keep me motivated to run regularly and keep up my training.  The 5K is my favorite distance, but a 10K is a nice challenge and I try to do at least one half marathon a year.  My very first half marathon was the Disneyland 1/2 Marathon--which was super fun, but I have to say, not a wise choice for my first 13.1 mile run (it was far from home, had 17,000 or so runners and really threw my training off).  But...it hooked me on the RunDisney races.  I already love Disneyland--so it shouldn't be surprising that the House of Mouse makes even running more fun.

Since that first 1/2 marathon, I've done a few more RunDisney races and I'm scheduled to do another one in May.


Check out all the different races that are available at RunDisney.com


In General, no matter which park  you are running at:

  • Registration is usually 9 months out and they don't have deferrments if your plans change.  Sign up for email alerts at RunDisney.com for reminders about registrations (Annual Pass holders can register before the general public). Races sell out quickly.  Shorter races sell out the fastest.  Be online the moment registration opens and be prepared with your credit card.
  • Speaking of credit cards, these races are spendy.  5K's are around $85.  The registration does NOT include a park pass--if you want to play after the race, you'll need to buy a park pass. 
  • Costumes are encouraged.  Pick your favorite character or quote and wear it while you run.  There are some guidelines like no masks or really long costumes--but I wouldn't want to run in that kind of get up anyway (I like to run in a costume that is a nod to a character, but that won't wobble, rub, slip, jingle, bonk or otherwise annoy me or others while I run).  
  • Its one big photo shoot.  If you care about how fast your time is, you'll have to set that aside for a Disney Race (probably).  There are thousands of runners, and you'll get assigned a corral and each corral will start about 5-10 minutes after the previous group.  There are characters and photo ops along the course, so you may want to stop and take advantage.  
  • The medals and t-shirts are really fun.  Pay attention when you register to the shirt size options (some are men/women sizing, others will be unisex)--its tricky to change a shirt if you don't like the size you get.  Feel free to wear the shirt and the medal in the park after your race, LOTS of people do and cast members will offer you a congrats (and at my last race, several stores in Disney Springs offered free swag or discounts to runners with their medals).  

  • When you cross the finish line, you'll get a snack box.  There will also be stations for water, or bags of ice for any sore spots.  

  • You will get crazy enough to do more than one race in one weekend.  Disney even has a name for it--the Dopey Challenge (5K, 10K, 13.1 and 26.2 all in the same week).  I've done two in one weekend.  I'm setting the goal to do the Coast to Coast (a half or full marathon in each of the parks in the same calendar year).


Disneyland Races
  • Transportation is a breeze here--stay at a hotel within walking distance and you can arrive at your required 4:30-5:30 am check in time easily. 
  • For the 5K and the 10K, your run will be almost entirely within the two parks (a little bit of run around the parking lot and the plaza between the parks).  The Half Marathon is a little less magical with the majority of the race out on the roads of Anaheim--but the run through Angel Stadium was fun. 

Disney World Races
  • Stay on a Disney property if you can--all of them provide bus transportation to the race expo and starting line.  There will be road closures, so why add to the stress of running by trying to drive and park (at 3:30 in the morning).  
  • There are tons of volunteers to help you figure out the transportation, how to find the Race Expo, how to pick up your stuff and how to get to your corral.  
  • It is humid and the potential for lightening is high.  Races can be cancelled, delayed (or shortened) if lightening is going on. 


Tuesday, December 13, 2016

Mickey Mouse Rice Crispy Treats

Pin It

You may have noticed my Disney theme lately...a recent trip is still in my memory and I'm trying to relive my vacation.  Tis the season for gifts for friends, neighbors and co-workers.  In my office, it can be comical how quickly a small gift shows up on your office chair when you've been around the corner only a moment (I have really great co-workers).  I decided to do some tasty treats for everyone (I have nearly 35 people in my department)--one treat is healthy clementines and the other is less healthy but very tasty: rice crispy treats. 

In the cafeteria in my building, they make the most delicious crispy treats.  Soft and chewy and buttery--oh so good (if you really want one, you have to wander down by 10am or risk them being all sold out by the time you get down to lunch).  I asked the Queen Crispy Treat Maker (Jamie) what the secret was--more marshmallow?  or butter?  or secret sauce?  Nope, she says.  Just don't melt all the marshmallows.  Instead reserve some of the marshmallows and stir them in with the cereal and the melted marshmallows.  Genius.


Ingredients
5 C. rice crispy cereal
16 oz pkg mini marshmallows (about 10 cups)
5 Tbs. butter
1/8 tsp salt


Before you start, line an 8x8 pan with parchment paper that you've sprayed with non-stick spray. (I used my 9x13 pan but didn't fill it on one end).

In a large pot melt the butter over medium heat then add 8 cups of the marshmallows and the salt.  Stir constantly until all melted and smooth.  Pour the cereal into the pot and stir a couple times, then dump in the rest of the marshmallows and stir everything up.


Dump the sticky mix onto the parchment lined pan and use a measuring cup or back of a big spoon to press into the pan (spray the cup/spoon with non-stick spray first).  Don't press too hard, just enough to have it stick together.  Cool completely.  Flip the cooled treats out of the pan and then use a Mickey Mouse sandwich or cookie cutter to make your cute treats.  I had to spray my hands and the cutter to keep them from sticking.


Tuesday, December 6, 2016

Mickey Mouse Caramel Apples

Pin It


Do you love Disneyland like I do?  They just make everything so much fun.  I love wandering through bakery and sweet shops to see the adorable treats that they hand craft right there in Disneyland.

On my last trip, I fell in love with all the variety of caramel apples in the shapes of many of the characters--but nothing beats a classic Mickey Mouse.  They are priced around $15 a piece, which seems high--but its cheaper than a price to Disneyland, so if you are at home and want to take on a tasty--but time consuming--project, then this one is for you.


Supplies:

12 Small/medium size apples
2 lbs Peter's Caramel, cut into squares (I bought mine at Orson Gygi)
1 lb White chocolate coating
1.5 lbs Milk chocolate coating
1/2-1 c. Red Decorating Sugar
24 Yellow or white jelly beans
24 big marshmallows
12 caramel apple sticks

Prep
Scrub the wax coating off the apples (or the caramel won't stick).  I filled a sink with hot water and a bit of white vinegar and soaked the apples, then used a paper towel to wipe them down.
Line a baking sheet with parchment paper (not wax paper)

  • Push the stick into the apple, but don't let it go through the other side.
  • Melt the caramels in a microwave dish--I did one pound at a time.  Microwave in 30-60 bursts, stir and microwave again until all hot and melty.
  • Dip the apple into the caramel and swirl or use a silicone spatula to coat.  Lift the apple out and use the spatula to scrape caramel from the bottom of the apple.  Keep dripping, twirling and scraping the bottom and then place on the parchment sheet (that is so you don't end up with a puddle at the bottom of the apple).  Do 6 apples, then put in the fridge and get the rest of the caramel melted and do the last 6 apples. 
  • Add the "ears"  by heating up the caramel so its hot and sticky and dip one long side of the marshmallow to use as "glue" to hold the ear on the apple.  Repeat for the other ear.  You may need to hold the marshmallow in place for a minute to set. 
  • Let the caramel and marshmallow ears set up 10-15 min in the fridge.
  • While caramel is setting, clean out the bowl and get the milk chocolate coating melted.  Again, microwave in 30-60 second bursts until smooth and melted.  
  • Dip the caramel apple into the chocolate and swirl, spoon the chocolate over.  Pull the apple out and twirl/scrape the bottom and place back on the parchment.  Repeat until all apples are done.  Let cool completely.  
Now you have some decorating choices. 
To make the red shorts version:
  • Melt white chocolate in microwave
  • Dip the apple into the white chocolate so that it goes just about halfway up the apple.  
  • Shake off the excess white chocolate and scrape the bottom (Warning:   You will probably get some of the milk chocolate bleeding into the white chocolate bowl--no worries, its will get disguised with sugar). 
  • Do a second apple and then get ready to sugar the first apple (I discovered that if I worked with 2 at a time the chocolate was always soft enough to adhere the sugar--you don't want it to dry, otherwise the sugar won't stick)
  • Hold the first apple over a bowl with the  red decorating sugar, use a spoon and your fingers to roll the apple in the sugar and press it up to cover the white chocolate--then do the second apple.
  • Press the jelly beans into the still wet/soft red sugar and return it to the parchment.

Drizzle version:
Hold the milk chocolate coated apple over the bowl of melted white chocolate and use a fork or spoon to drizzle a string of white chocolate over the apple.

Package it up with a cellophane bag and some ribbon and yours are just like Disneyland's


Monday, March 7, 2016

Magical T-Shirt Makeover

Pin It


I love Disney-especially princesses, so I'm not sure why it took me so long to see the Cinderella remake last year.  Anyway, I finally got around to seeing it and loved it (ah, that ballgown!)  It was then that I discovered that Kohl's and the LC Conrad clothing line had some Cinderella inspired clothes--but it was too late to find anything but a few clearance items at my store. I really wanted this adorable graphic t-shirt, but there were none to be had. So, I took it as an opportunity to break out the Silhouette cutter and re-learn how to use it, and try heat transfer vinyl.

Inspiration T-shirt
Inspiration T-shirt from Kohls
I chose Ballerina Script.  I bought a 100% cotton tee (the vinyl works on poly/cotton too) and shiny gold Siser EasyWeed heat transfer vinyl.

Decide on the size of the graphic, pick your font (you can use a picture too) and type it up in Silhouette software.  Get it sized the way you like and then use the Mirror feature to reverse your graphic (super important, otherwise your letters will be backwards when you go to iron it on).


Set up your vinyl in the cutter. I set the cut settings for a blue blade (because that is what I have), speed 5 and depth of 24.  I did a test cut with depth 20 and it wasn't quite right and 22 seemed ok--but 24 worked just perfectly.  I used Expressions Vinyl's info sheet to figure out settings.

The vinyl has a clear transfer sheet over the finished face of the vinyl.  On my shiny gold, the back was a less shiny silver color.  I loaded the vinyl gold side down, then let the machine do its job.

Gold side down


Silver side was the back

You'll have to pull away or weed the unwanted vinyl.  Weed slowly, especially if you choose a text or design with lots of curves or small pieces.  You'll probably want a weeding tool (looks like a dental pick) to get at the small bits inside letters.  It took me about 30 minutes to weed the design.

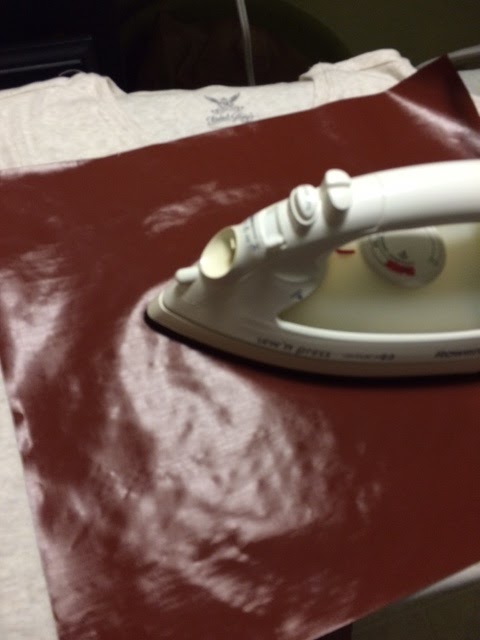
I don't have a big heat press, just my regular Rowenta iron.  The Wool setting is supposed to be around 300 degrees.  The vinyl manufacturer recommends 305-320 for proper adhesion.  I used a laser thermometer to check the temperature of the iron surface (about 315 when I pushed the dial a smidge past "wool").  I pressed down hard for 15 seconds on each section.  My ironing board does not have a padded cover, so I just used the board--but video tutorials I watched suggested using a hard table or board under the iron.  Spend plenty of time with a ruler planning the placement of your decal.  Iron out your shirt before you adhere the vinyl--also make sure there are no fuzzies, specks, hairs etc... on the shirt. 


 I used a teflon sheet between my vinyl and the iron, but I hear parchment paper works too.