Showing posts with label vinyl. Show all posts

Saturday, November 18, 2017

DIY Family Thanksgiving Fun Run

Pin It
If you've been to my blog before, you know I'm a runner.  I enjoy 5Ks the most--they are fast and don't require the weeks of training that 1/2 marathons and marathons do.  I like themed runs the best--and I do like Thanksgiving Fun Runs--helps me justify the 2nd piece of pie.  My extended family is large and has quite a few little kiddos-enough that an organized race is probably more effort than everyone wants  on a holiday (wrangling strollers, babies, toddlers, teenagers)-especially since I know we will try and do a whole family photo this weekend.  Best to save the "be on your best behavior" bribes and threats for that event and not an early morning run.  So I thought it might be fun to have just our family do a run.  It means no traveling to a race early in the morning with little kids, no finding parking or waiting in the cold for the race to start. We'll just start at Grandma's house and run to a nearby park and back.  Cocoa for when we get back. I'm guessing we'll have about 16 people in our group--no bigger than a run club--and we won't be on busy streets, so I'm not worried that we will cause a safety hazard for ourselves or drivers.

The best part about races is usually the t-shirt and the medal--so I made sure to get them for our race too--and they were cheap! For about the cost of 1 registration, I got everything for the entire group (well, I only did t-shirts for kids.  I offered the vinyl decal for any adult who wanted to bring their own shirt).

I ordered some inexpensive finisher's medals from Crown Awards, made a simple design for a t-shirt on my Silhouette SD and designed some race bibs in Word.

Did you know that Dollar Tree has t-shirts?  They are not usually high quality (although I have occasionally found overstocked nice tech shirts).  For a family race, $1 shirts are perfect.


I found a clip art I liked and added some race numbers to the bib, which I printed on cardstock at home.


I'm off to the Dollar Store to find a couple prizes.  Happy Thanksgiving everyone!

Monday, March 7, 2016

Magical T-Shirt Makeover

Pin It


I love Disney-especially princesses, so I'm not sure why it took me so long to see the Cinderella remake last year.  Anyway, I finally got around to seeing it and loved it (ah, that ballgown!)  It was then that I discovered that Kohl's and the LC Conrad clothing line had some Cinderella inspired clothes--but it was too late to find anything but a few clearance items at my store. I really wanted this adorable graphic t-shirt, but there were none to be had. So, I took it as an opportunity to break out the Silhouette cutter and re-learn how to use it, and try heat transfer vinyl.

Inspiration T-shirt
Inspiration T-shirt from Kohls
I chose Ballerina Script.  I bought a 100% cotton tee (the vinyl works on poly/cotton too) and shiny gold Siser EasyWeed heat transfer vinyl.

Decide on the size of the graphic, pick your font (you can use a picture too) and type it up in Silhouette software.  Get it sized the way you like and then use the Mirror feature to reverse your graphic (super important, otherwise your letters will be backwards when you go to iron it on).


Set up your vinyl in the cutter. I set the cut settings for a blue blade (because that is what I have), speed 5 and depth of 24.  I did a test cut with depth 20 and it wasn't quite right and 22 seemed ok--but 24 worked just perfectly.  I used Expressions Vinyl's info sheet to figure out settings.

The vinyl has a clear transfer sheet over the finished face of the vinyl.  On my shiny gold, the back was a less shiny silver color.  I loaded the vinyl gold side down, then let the machine do its job.

Gold side down


Silver side was the back

You'll have to pull away or weed the unwanted vinyl.  Weed slowly, especially if you choose a text or design with lots of curves or small pieces.  You'll probably want a weeding tool (looks like a dental pick) to get at the small bits inside letters.  It took me about 30 minutes to weed the design.

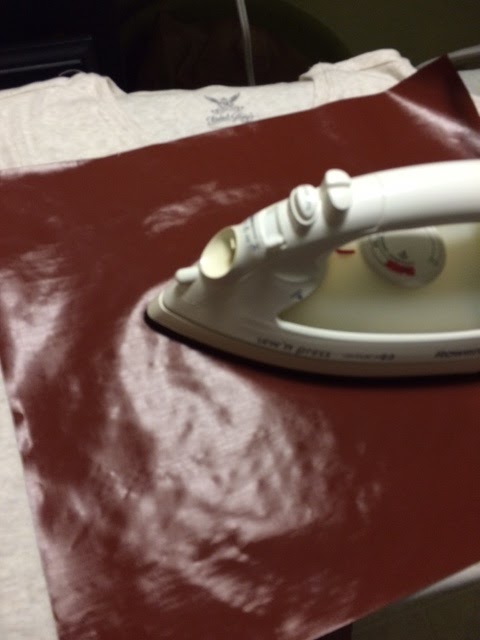
I don't have a big heat press, just my regular Rowenta iron.  The Wool setting is supposed to be around 300 degrees.  The vinyl manufacturer recommends 305-320 for proper adhesion.  I used a laser thermometer to check the temperature of the iron surface (about 315 when I pushed the dial a smidge past "wool").  I pressed down hard for 15 seconds on each section.  My ironing board does not have a padded cover, so I just used the board--but video tutorials I watched suggested using a hard table or board under the iron.  Spend plenty of time with a ruler planning the placement of your decal.  Iron out your shirt before you adhere the vinyl--also make sure there are no fuzzies, specks, hairs etc... on the shirt. 


 I used a teflon sheet between my vinyl and the iron, but I hear parchment paper works too.

Monday, May 28, 2012

Garbage Can Planter

Pin It


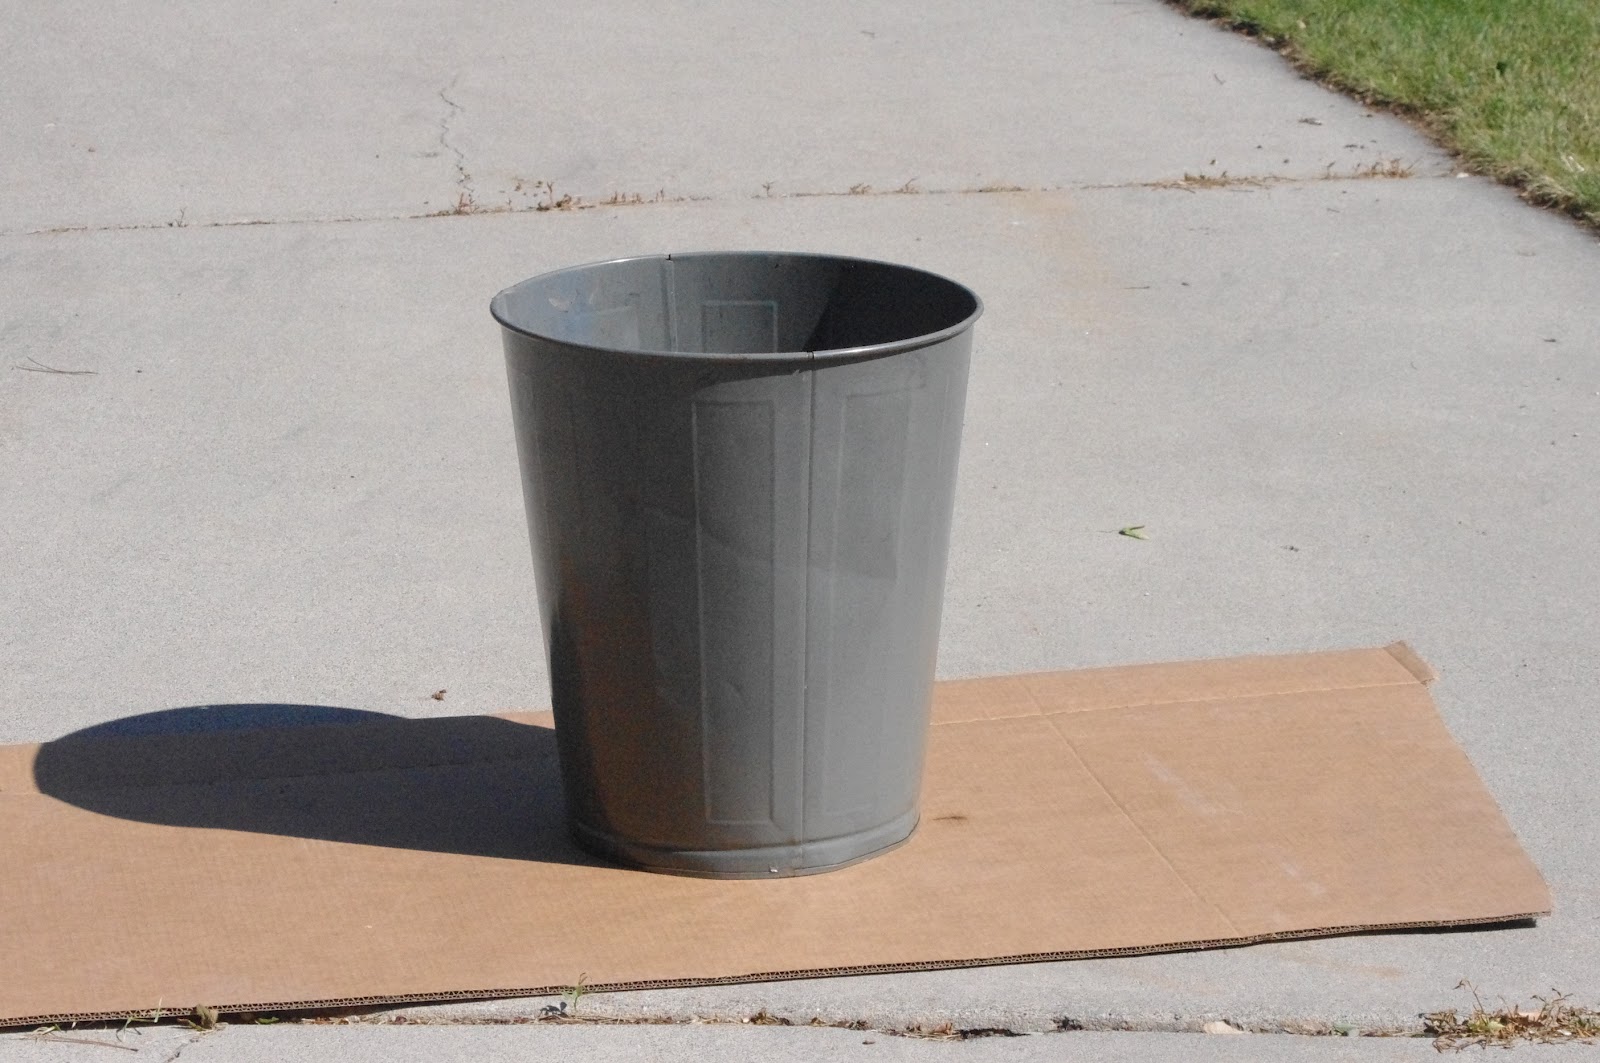
Last year I picked up several  metal garbage cans from a sale from an elementary school that had been closed.  I think they were about .10 each, so even if all I used them for was trash, it would be ok.  Today I finally had the time to do a quick make-over on one.  I sprayed it with Rust-oleum High Gloss Black and then used my Silhouette to cut out the house number and name.  I spent about 10 minutes on the painting and about 10 minutes on designing the house label.  After that, it was up to the Silhouette to get the job done.  The lettering is about 8 inches x 11 inches total.  Pretty quick project.

I like it so well, that I may do one for my own house.

Before:

After:

Note: I didn't fill the can directly with dirt, I just stuck the flowers that I bought in a plain plastic pot in it (the pre-done pot of flowers is from Walmart).

Friday, September 2, 2011

Metal cabinet repaint

Pin It


I work in a cubicle. A gray cubicle. I do have a window, which is great, but my view is of the wall of the other building. Oh well. So, in my gray cubicle is a metal cabinet that I thought could use some sprucing up! So, I hauled it home and went to work on it.


First, I used my sander to scuff up the surface then I washed it really well and dried it. I took the doors off and the hardware and used painter's tape to cover the brand name label (Steelcage) on the bottom. I used Krylon Fusion paint in Hot Pepper. It took about 1 1/2 cans. I did not paint the inside, so I used some newspaper to cover up the door track and block overspray from getting inside.

After I let it dry (had to go grab it out in the yard in the middle of the night when the thunder storms were threatening-ha ha, me in my PJ's dragging it back into the garage) for a couple days I got to getting the vinyl ready. I had a hard time deciding what to do on the doors. I thought about quatrefoil, or intersecting circles or maybe some typography or even scientific formulas (since I am a science nerd for work)--but things are always a bit crazy around my office with huge projects, tight deadlines and low funding, so this one seemed most appropriate. I measured the space on the door (decided that I'd just do one door, 2 seemed like overkill) and left space at the top, bottom and sides for the tracks. I planned it out in my Silhouette software and let it cut while I waited for the cable man to show up (yup, 15 minutes before his 2 hour window was up, he came. Typical). I used a yardstick and chalk to mark my lines.


So it adds a nice pop of color to my office (I should probably work on getting the piles of papers taken care of, but oh well). I love the transformative power of spray paint!


Wednesday, April 27, 2011

Royal Wedding Celebrations

Pin It


Do you remember the 1981 royal wedding (have a scrapbook perhaps?) So, its 30 years later, gulp, how did that happen? Friday is a National Holiday in England so that folks can celebrate the wedding of Wills & Kate--so at the very least, I had to do some crafting. Last week, for spring break, I was in Arizona and stopped in a cute little shop in Carefree, AZ (home of the World's 2nd Largest Sundial!) that had decked itself with all things royal or British. Check out this cute pillow. This cue'd my crafting mode. OK, I'm finally done, the wedding is in the morning and we're doing "crowns and cupcakes" tomorrow!

Inspiration pillow that started my royal crafting frenzy!

Printable
I started with the easy project...a quick sign for my frame that usually has my subway word art. Super easy and just cheesy enough right? (If you're going to print, remember to click on the thumbnail to bring up the full size image).


Princess Pillows and Freezer Paper

Next, an excuse to really make myself learn how to use my Silhouette SD...which I think I'll probably love, eventually, but the learning curve is STEEP (and it isn't the software that is the hard part...its getting the vinyl or paper to thread through, cut correctly and not get all jammed up). Argh. But after a few fits and starts I did manage to get a design of my own choosing loaded, cut on freezer paper and ready for use. Tip: set the thickness to 1 and the speed to 2 or 3 and place the paper on the carrier shiny side UP.


The freezer-paper-as-silk-screen-template is brilliant! You cut your shape out so that the shiny side of the paper will be face down. Place your cut out over your fabric and iron it in place. There is just enough wax on the paper to hold it in place. Since this project won't be going through the wash, I just used acrylic craft paint. Go super light on the paint and just go over the spots multiple times (this will help prevent paint from seeping under the edges of the template). I put some newsprint between layers of fabric to avoid bleed-through. I pulled the paper off when the paint was dry enough not to smear. I had so much fun I did it again (but I used an old skirt for the fabric and blinged it out with some rhinestones!).


Go slowly with the paint, especially around the edges.

I sewed up around the edges, leaving a gap for stuffing, then used a needle and thread to stitch the hole closed.

Burlap remnant from JoAnne's $1.43 (enough for 4 pillows), stuffing I already had.
Ivory/green printed linen skirt a $4 thrift store find, pillow form I already had.


London Bobby Pins


Next-I love hair accessories, so when I spotted some blank bobby pins with a bezel (shallow pad that you can add decorations to) at the Hobby Lobby (on sale! $1.19 pkg) I knew I needed some--and I'll be wearing mine tomorrow for sure. I printed some royal graphics with my laser jet. I used Microsoft Word to insert the images and re-sized them. The square is 5/8", so re-size the image on your computer to .625 for both the width and height. The round one is 1/2", BUT I had to re-size the circle to .55 inches. Cut out the images, brush a thin layer of glue on the back of the image (not in the box on the pin) and press it into place--I needed to use a small rectangle of plastic to get the corners in firmly. Let dry, then fill the wells up with Judy's Diamond Glaze and let dry (I used some playdough as a base to keep the pin level and unmoving). Ta-da! Office appropriate wedding celebration accessories :)


Above: Before I added the Diamond Glaze


Above: After I puddled the Diamond Glaze (fill it up so that it nearly spills out of the top)


Here are some graphics that you can print and use:


Royal Cupcakes


OK, this was my first experience with marshmallow fondant, and it was pretty nice to work with but I wish I had come up with the ring cupcake first--so, so much easier and faster than the Union Jack. Oh well...they taste yummy too! If you want to do some of your own tasty treats, you really should make the fondant the day before, so here's the link to the recipe


Little Princesses

Wait, we're not done yet! I got a link from my Disney Rewards account with a couple of super cute printables for the younger princesses at your house. Check out the Princess Kate paper doll and tiara

Friday, March 25, 2011

Bedroom Update

Pin It

I've been continuing to tweak my bedroom remodel. I thought I was going to get all new bed linens, but the new headboard made things look so much better, that I decided to recycle what I already had.
I have also been trying to figure out if I could put some kind of photos or pictures above the bed, and then I ran into these "wall stickers" at TJ Maxx. I haven't ever done any of the vinyl decoration around the house, but this set of stickers was only $9.99 and in the perfect colors, so I thought I'd give it a shot.

Couple of things about the stickers. The package says they are repositionable, but they are not. The pieces that I placed exactly in the right spot the first time are doing great, but the ones I moved around a couple times gave me some grief.


I picked up the silver-tone frame from my mom's house, now I just need to decide what to put in it.