Showing posts with label furniture. Show all posts

Monday, November 4, 2013

Rustic wood nightstand

Pin It


I've been a fan of a blog called Liz Marie...and she has a great way of blending traditional, modern and rustic styles all together, and it all looks great mixed up!  Taking some inspiration from her designs and another blog  I decided to give this project a try.  A co-worker was kind enough to bring me some slices of a tree that he was taking out.  They were beautiful rounds of wood back in June...and when I came home from a trip, both slices had split as they dried (I think a possible solution would be to use older wood...a log that had dried for a year before being sliced into rounds).

My tree slice is cherry, and may I say cherry is HARD wood.  I started by using my nail gun to make sure the bark was firmly attached (not that it seemed like it was coming off, but just to be safe).  I also used a stiff brush to clean up any stuff on the bark--I wasn't gentle with the bark at all--I figured if it was going to come off, now would be the time to address that.  Next, I started the sanding with 36 grit sandpaper and my palm sander.  You know its super hard wood when hardly any sawdust is created.  I eventually got to 80 grit, but I didn't think it was going to get any smoother (took about 1 1/2 hours of sanding).  I had hoped to sand out the lines from the chain saw, but seriously, cherry is hard.  I guess that bodes well as a table top though.  It is very smooth to the touch and has no slivers.


Using the IKEA marius stool ($5.99) as my base, I flipped the legs of the stool upside down and attached the wood to the legs.  I replaced the screws that came with the stool with 3" wood screws.  I did pre-drill the holes since the wood was SO hard there was no way I was going to be able to muscle in the screws without the pre-drilling.  Did I mention cherry is hard?  Maybe next time I'd use pine :) As my one mistake in the project, I was using a 5" bit and drilled all the way through the log in one of the holes, so I had to fill that in.  Darn it.
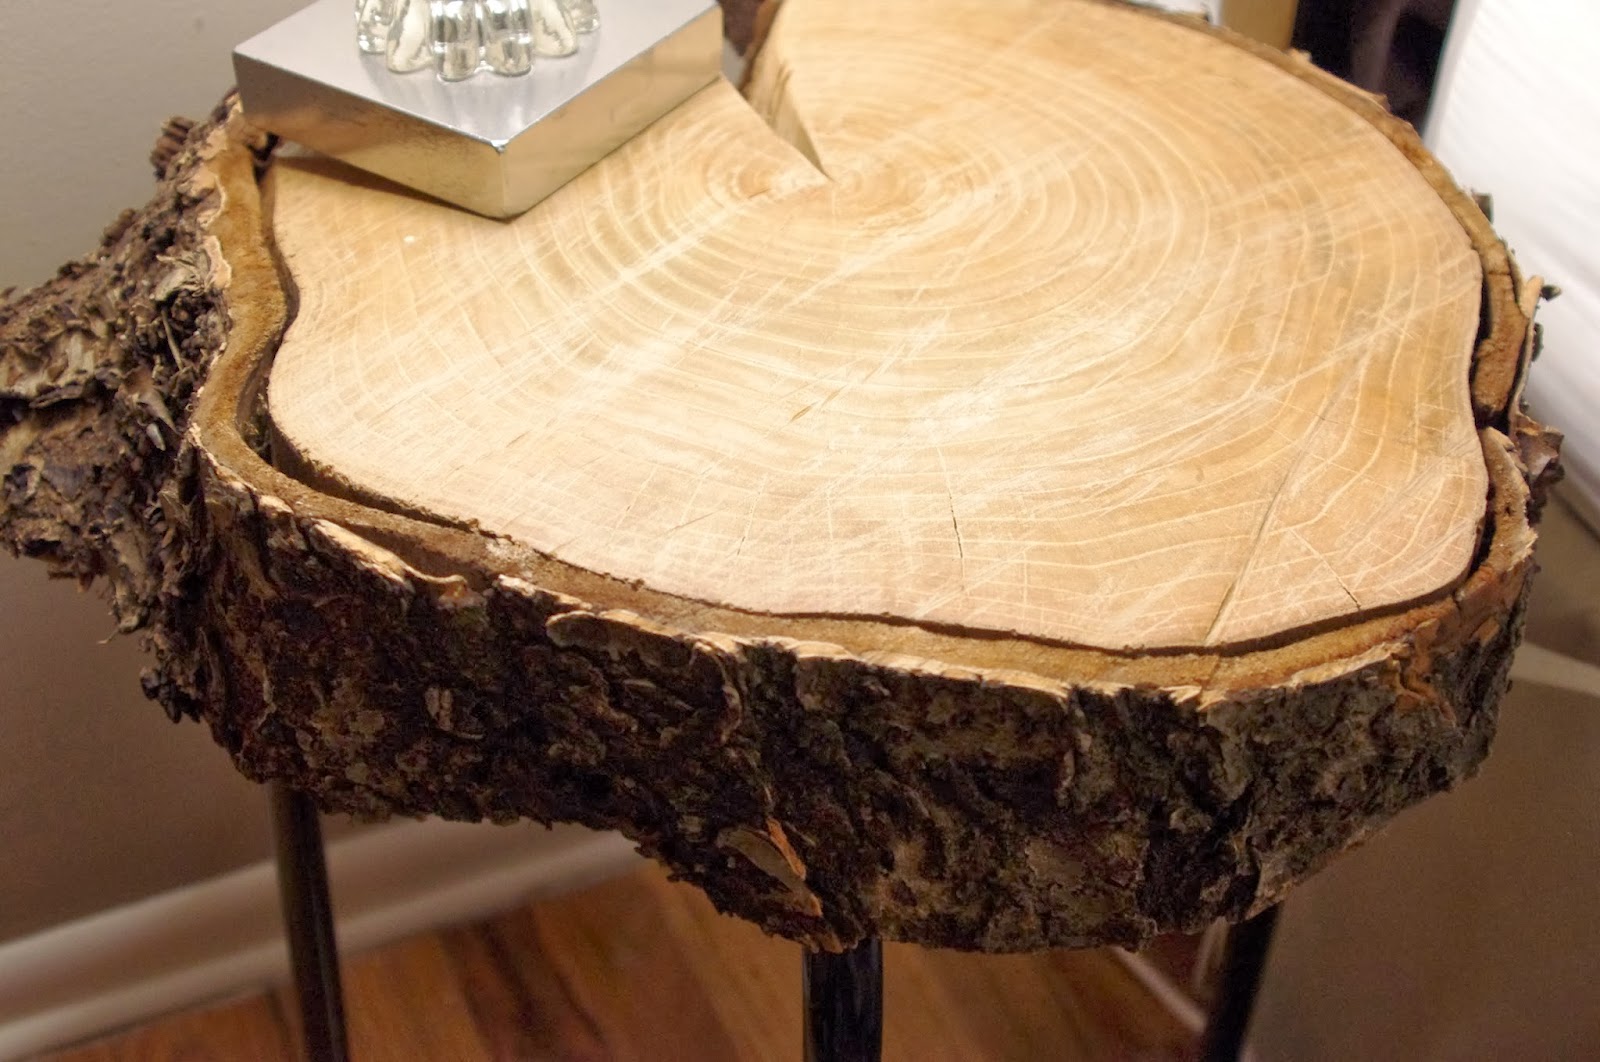
I coated the top of the log with Minwax paste wax and buffed it the next day.  I decided that the split just adds rustic character (which I could also cover with a lamp).  This table is super stable and could be used as a stool if you wanted, but its pretty heavy. 

Really, it wasn't a difficult project, just lots of sanding.  I like it-how about you?

Wednesday, July 31, 2013

Coffee Table Re-do

Pin It  
The industrial rustic decorating style has been holding some appeal for me lately.  I had been looking for the right project to tackle and finally found it!

This was one of the easiest and fastest furniture makeovers ever.  Really. It started with this clearance Target table (11.00).  The faux wicker and glass had to go, it was the metal base that I was interested in.
 

Next, the new top.  I headed to Home Depot and the "cull" bin at the back of the store.  I scored two pieces of lumber for only 1.01 each.  I measured the length of the old top and cut the boards to be about the same, 41 inches.  The old top was 20 inches wide, but with my lumber it was 22...close enough.


Some sanding and then I clamped the two boards together.  I cut 3 wood pieces (scraps from my shed) to connect the two pieces together.  I used the nail gun to tack them in place, then used screws to make the connection more secure.
 

More sanding with the palm sander.  I applied the stain (a mix of golden oak and kona black-it was what I had in the garage) and let it dry.  I finished it with some Minwax Finishing Paste, let it dry overnight and buffed it out.

I attached the table top to the base frame using some screws from underneath.

Total investment: $13 and 1 day of working time and a day of drying time.


Sunday, April 28, 2013

Easy Rustic Headboard

Pin It

I was in the mood for building something, and my brother had recently move into a new place and needed some grown up furniture--so I decided on a headboard.  I was really inspired by the planked walls I have seen around on Pinterest made out of pallets-but no way am I going to nail and glue boards up on the wall...especially for my brother since he's in a rental.

I found the plan on Ana White's website, where all the plans are free!  I didn't take any pictures of the process, but the plans on the website are pretty useful.  I used a nail gun to make this task go super fast.  Really.  Once the boards were cut, it was about 15 minutes. 

Tip #1-Don't use fencing unless you want to spend a lot of hours sanding (sure its super cheap, but dang, I spent a couple hours with the palm sander).  I spent about $12 in materials, but I think I should have splurged to the $20 it would have cost to buy slightly nicer lumber.

Tip #2-Don't cut the trim pieces that go around the front until AFTER you've got the horizontal boards all assembled.  Ditto on the extra support piece for the leg.  I cut all my wood in advance, and perhaps its my novice skill, but things didn't line up the way I would have liked.  I ended up cutting a couple new pieces because the pre-cut ones were too short.

Finish-I tried what I had hoped would be a cool method for making a grey/weathered stain, but it didn't work.  I put a piece of steel wool in a mason jar with white vinegar for 2 days.  It ended up a nice rust color, but not grey.  Maybe if I had used it sooner.  Oh well.


Friday, August 24, 2012

Shabby Nightstand with Blue Interior

Pin It


I've had the twin nightstand to the one I painted earlier this summer just waiting for me to decide what to do. I finally found a great inspiration picture on Pinterest and set about making mine just as fun.


This stand needed more repairs than the other one. The pins at the base of the front door were missing and a chunk of wood in the front right corner needed to be repaired. I used some wood filler resin (2 part putty) to fill in the missing wood and hit my local Ace Hardware for the small pins (my Ace has a wall of bits and bobs that you can buy just one at a time, including hardware for furniture). I lightly sanded all the surfaces before priming it with one coat of Kilz.


I painted the interior of the drawer and cabinet Aqua Smoke from Home Depot, still from the sample can from the previous project. The outside is crisp white-also a Behr Ultra Premium sample, just no color added. I distressed it a bit with my palm sander and finished it with a coat of wax. Glass knobs from Hobby Lobby fancy it up. (I'm still thinking about what to do with the super fun fabric I found at HobLob while picking up the knobs).


Wednesday, July 25, 2012

Table re-do with French graphic transfer

Pin It


I've had this little table in my garage for a while, and it needed some love.  I know it is solid, but someone did some tole painting on it many years ago, and then it looks like it spent some time outside before I found it.


I knew that removing paint would be a really trying job considering all the curves and crevices, so I decided to get the top looking great and let the legs be a bit shabby chic.

Using some of the "less toxic" paint stripper (the kind that is orange scented) I coated it thickly and laid the plastic tarp over it to let it do its work for about 50 minutes.  Some scraping and most of the paint came off, revealing what appeared to be walnut!  Another coat of stripper and another 30 minutes and the top was pretty clean.  I let it dry and sanded the top clean.  The legs, I used the palm sander to remove some of the paint, but left some too.


I re-stained the top using a dark walnut stain and let it dry.

To do the image transfer, first I picked out a graphic from The Graphics Fairy.  This one is a chocolate label, so of course I love it! I had to flip the image so that the words were backwards (I resized the image in Word, then used the Rotation menu to flip it).  I printed out my image on freezer paper.  I tried it on wax paper and my ink jet printer DID NOT like the light weight of wax paper (it just ate it).  Freezer paper has paper on one side and wax on the other. So just cut a piece of freezer paper to the same size as regular printer paper.  Just set it up so that the image will print on the waxy side.  Be super careful when you remove the paper from the printer that you don't smudge it.

I wiped the table top down with a damp paper towel before I laid the graphic down, waxy side down (the side with the ink on it).  If I were doing it again, I'd cut away all the extra paper from around the image so that it would be easier to center.  Once you set down the image, don't move it.  The ink jet ink will start to transfer to the slightly damp table.  I used a credit card to smooth down the image and get a good ink transfer.


I wiped the table with wax and called it good.  Cute huh?

Friday, June 29, 2012

End table makeover-lovin' this blue

Pin It


I go through color crushes...red, green, gray...now aqua blue!  I've had a pair of these end tables in my garage for a year and this week was the week that they got some love.  They are not high quality furniture-just veneer, but they have nice lines and a delicate quality that I liked.


I have to say that I really love how this color blue turned out.  Its  Aqua Smoke from Home Depot.  While I was working with it outside, it seemed too light, but once I brought it inside, I just loved it!

First, a very light sanding on all but the table top (decided to leave it) and a good cleaning.  Next, 2 coats of Kilz primer.   I love how quickly it dries.  I used a foam brush for most of the job, but I brought out my 1/2" craft painting brush to get at the detail work on the spindles and door.

Two coats of the Aqua Smoke were just right.  Today I did two coats of water-based polyurethane in Satin (the paint was a sample, so it was flat-sheen, so I really needed the poly in order to give it the right look).


Now, what to do with this table's twin?  Do it up the same?  A different color?  I'll admit I bought these tables with the intention of turning them into mini play kitchens for nieces and nephews...but now I'm not so sure.  What do you think?

Saturday, October 22, 2011

Vintage French Grain Sack Dining Chair

Pin It

I suppose other people have been tuned into the vintage french style way before me, but when Target had those cute dishtowels earlier this fall, it got me crushing on the trend too. A little Googling and all kinds of cute stuff made with "vintage" grain sacks pop up. So, I decided to try all kinds of crafting. The best part? Except for the Citra Solv, I already had everything I needed in the house!

The chairs were in need of some re-gluing and some sanding. I used some Gorilla Glue and clamps to tighten up joints that probably came loose from a boy leaning back on the chair whenever his mom wasn't looking. My palm sander made short work of the already worn finish.


A debate waged in my mind over whether to paint or stain the chairs (the wood appears to be maple and it cleaned up very nicely--I could almost see my dad cringe over the thought of covering up nice wood with paint), however, I opted for paint, sorry Dad. I used Ralph Lauren in Oatmeal-I could still do the second chair hanging out in the garage with stain right?

Here's where the vintage French grain sack comes in. I got inspired by The Graphics Fairy's project, here. I'd heard about doing ink transfers using paint thinner, but I loved the idea of using something less dangerous like Citra Solv. I won't explain the transfer process here since she explains it so well on her blog (even the Citra Solv website has craft ideas for you).


I found the Citra Solv at Whole Foods (eek, expensive at 8.99 a bottle, but its enough for a decade of projects and price sticker removal, so I guess that's ok). I have no idea if other goo gone products work, but try it out and let me know what you come up with. I practiced the image transfer process 3 times on an old flour sack dishtowel before I did the fabric for my chair. What I discovered: 1-The photocopy from the machine at the grocery store worked great, the copy from the machine at the library did not--so, something in the toner or ink in that machine made it not work. 2-Less Citra Solv is better than more. My first try I taped the image on and generously dabbed at it with a foam brush, which resulted in the ink getting a bit smeary and blurry. The next time I used less solvent and more rubbing and it was PERFECT.

I was probably a bit timid with the transfer process on my actual fabric, so its a bit more "faded" than I would have really liked, but then again, if I were really re-purposing a vintage grain sack, it might be faded right?


Here's the graphic that I created. I inserted it into Word and resized it, then flipped it horizontally so that the words are backwards--so that when you lay it face down it will be correct after the transfer. I used the fonts Leander and Chenier. (And I made up the name of the grain mill and address...I used the Restoration Hardware linen pillows as inspiration).

Sunday, September 25, 2011

Washstand Repaint

Pin It
I ran across this sturdy table at a thrift store and decided I could probably put it to use. After scrubbing, I debated whether or not to leave it stained or painted. It was pretty rough, so I tried some wood restorer that did wonders on another project...but it didn't look right on this project. So, paint it is. That $3.00 sampler of Martha Stewart teal paint sure has gone a long way (this is project #3).

Before:


A couple coats of paint. Then some sanding (all the paint covered up some of its "character"). Then I used some chocolate brown glaze to tone down the color and emphasize some of the dings and dents. Really, it turned out great.


I haven't found a permanent place for it yet. I've got some ideas, like as a storage station for a basket of socks, or as a stand for drinks at a party, but right now its a charging station for my iPad.

Friday, September 2, 2011

Metal cabinet repaint

Pin It


I work in a cubicle. A gray cubicle. I do have a window, which is great, but my view is of the wall of the other building. Oh well. So, in my gray cubicle is a metal cabinet that I thought could use some sprucing up! So, I hauled it home and went to work on it.


First, I used my sander to scuff up the surface then I washed it really well and dried it. I took the doors off and the hardware and used painter's tape to cover the brand name label (Steelcage) on the bottom. I used Krylon Fusion paint in Hot Pepper. It took about 1 1/2 cans. I did not paint the inside, so I used some newspaper to cover up the door track and block overspray from getting inside.

After I let it dry (had to go grab it out in the yard in the middle of the night when the thunder storms were threatening-ha ha, me in my PJ's dragging it back into the garage) for a couple days I got to getting the vinyl ready. I had a hard time deciding what to do on the doors. I thought about quatrefoil, or intersecting circles or maybe some typography or even scientific formulas (since I am a science nerd for work)--but things are always a bit crazy around my office with huge projects, tight deadlines and low funding, so this one seemed most appropriate. I measured the space on the door (decided that I'd just do one door, 2 seemed like overkill) and left space at the top, bottom and sides for the tracks. I planned it out in my Silhouette software and let it cut while I waited for the cable man to show up (yup, 15 minutes before his 2 hour window was up, he came. Typical). I used a yardstick and chalk to mark my lines.


So it adds a nice pop of color to my office (I should probably work on getting the piles of papers taken care of, but oh well). I love the transformative power of spray paint!


Wednesday, July 20, 2011

Step Stool Rehab

Pin It


First, I cannot find my "before" picture. I know I took one, and I know I've seen it, but I don't know where I filed it, so this one is as close as I could find (mine was in about the same sad shape, but the supports were white rather than red). When I track it down, I'll replace the picture.


I picked up 2 Cosco step stools at a yard sale for $1 each, one was more modern and in great shape, the other one, it had been well-used and but not well cared for--but it reminded me of one from my grandma's house (although hers had a seat that flipped up). So, I brought them home.

First some washing with water and dish soap to get rid of the grime and spider webs.

Next, some steel wool and WD-40 on the rust spots on the chrome.

Next, some more steel wool on the painted sections to get rid of the rust.

I took off the old vinyl and kept it as a pattern for the new vinyl (the wool batting seemed just fine, so I kept that).


I took out all the screws/bolts so that I could prime and spray paint all the white pieces without having to worry about getting paint on the chrome or seat. I used a couple coats of gray primer, then 2 coats of Rustoleum white enamel spray paint.


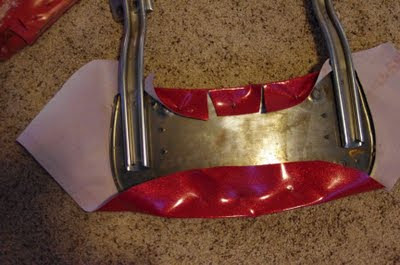
Replacing the vinyl on the chair back turned out to be very easy (I found the sparkly red vinyl at JoAnne's in the Red Tag area on sale for $5 a yard, and I only bought 1/2 yard and didn't use all of it). I laid the old seat back on the new vinyl and cut out a football/oval shape with plenty of extra around the edge. The seat back had sharp hooks on the back to grab the vinyl, so just pull it tight (do opposite sides, then move to another set of sides, etc...until you've done the whole thing).


The vinyl on the seat was tricker. It didn't have the hooks, so I ended up using hot glue to get the vinyl to stay in place until I could connect it back to the seat support. Worked great.


Putting it all back together probably would have gone better with an extra set of hands, but I managed by using my head and shoulders and a fair amount of balance to get it done. Ta-da!