Showing posts with label upcycle. Show all posts

Friday, September 30, 2016

Quick Door Decor Upcycle

Pin It
Super easy project!  I love pineapples--I've been on quite a kick lately (on my last trip to Hawaii I tried to find a cute skirt with a pineapple print with no luck--I went to all the fabric stores and found hardly ANY pineapple fabric, and none of it cute--but I did find a fun t shirt at Ann Taylor Loft).  Anyway...I'm always on the lookout for cute pineapple stuff.  I saw this plaster door medallion at the High School Yard Sale for $1.  Nice.  

30 minutes later and it fits my door decor much better.  I used acrylic craft paint and then a bit of silver Rub N' Buff to give it a nice sheen.  


Friday, September 23, 2016

DIY Barn Door

Pin It
 

I have been in my house for about 13 years and I've always wished I had a door to the laundry room in the basement.  I have a TV downstairs and my sewing area, so it was noisy when the washer was running and I wanted to use the family room. The door to the laundry was framed out without a door--and a traditional swinging door would take up precious space in the narrow room (or make it really hard to move the washer out should I ever need to replace it).  

I decided to give the barn door trend a go.  I went to Habitat for Humanity's ReStore and picked up a hollow core sliding closet door and painted it with chalkboard paint (with white trim).  It was a steal since the door was only $5 and I had the paint left over from other projects. I had to build my own track because my ceiling is only 7 feet and all the hardware I could find needed a bit more headroom than I had. 

Next, I added a wooden header across the whole opening and screwed it into the studs (which are not 16" on center...darn old houses).  Then I undid my work because I realized that the trim around the door stood out further than my bracket.  I put in spacers and hung the wood back up. 


My friend made me some J track with holes for screws, which I screwed into the wood header.  
To hang the door, I used closet door hardware as well as a couple of casters on the bottom of the door.  The hanging closet hardware keeps the door on the track; the casters hold all the door's weight. It rolls across the carpet fairly easily--if I were doing it again, I'd probably use larger casters. 


Tuesday, September 6, 2016

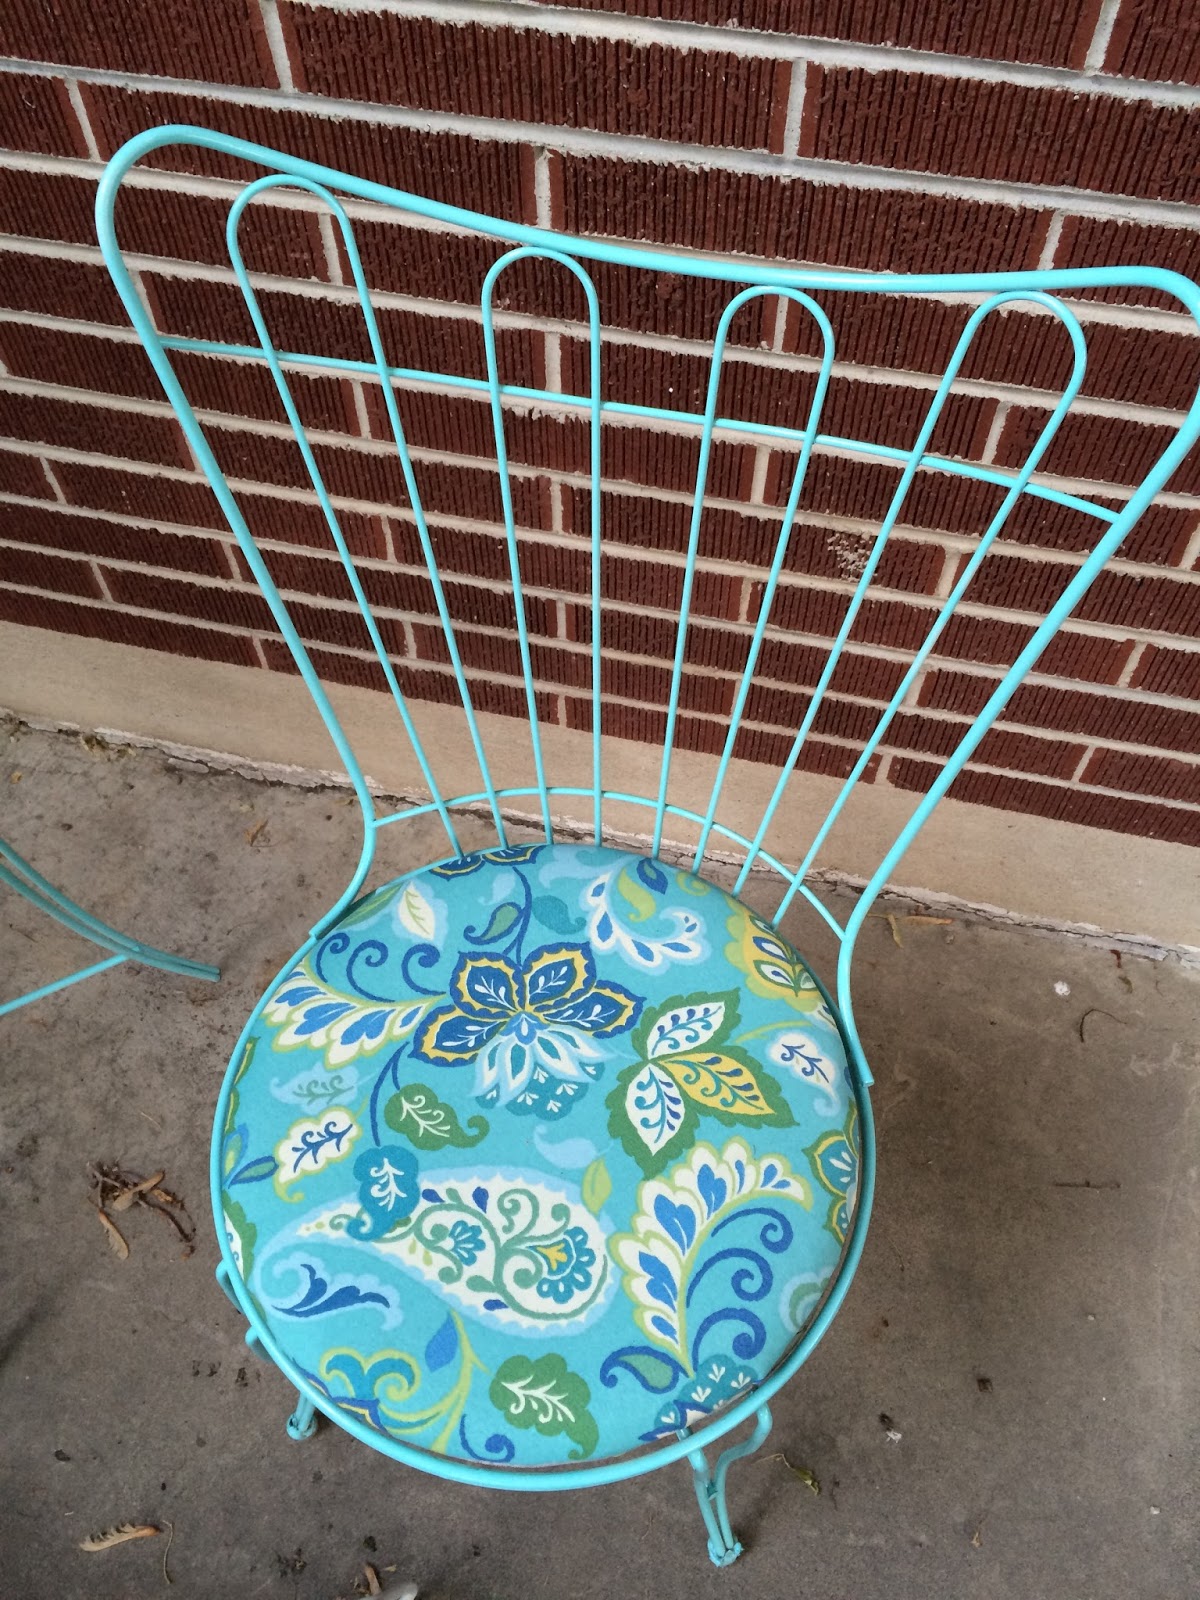
Patio Chair Re-do

Pin It
 

I was visiting my parent's home in Idaho and went out for a Saturday morning run and the neighbors were having a yard sale.  I've been wanting to change my plastic patio chairs to something more interesting, and these metal bistro chairs caught my eye.  They only wanted $2 a piece, so I bought 4 of them and hauled them home (well, I brought two home with me and my mom was nice enough to bring the other two the next time she came to Utah in her RAV 4). 
I have recovered chairs before, so I know that taking off the current cover and using it as a pattern is the way to go.  I had to laugh when I took off the brown vinyl--it was covering...brown vinyl.  Although one of the chair still had the original vinyl underneath both brown layers; a mustard/floral (which was kinda cute in a retro way, but only one of the chairs still had it). 
I got lucky at JoAnn on the fabric.  The Red Tag fabrics were an extra 50% off and I used a 20% off your entire purchase coupon.  I bought 2 yards of outdoor canvas fabric for only $5.80 

I pulled off all the old vinyl, cut out the new circles and stapled it on to the cushions.  I find that kneeling on the cushion helps you pull the fabric super tight while you staple.  I staple one side, then do the opposite side (basically I divide the circle into 8 sides).  
Next was painting the chairs.  I ordered the paint from Amazon (hello Prime, all the colors, delivered right to my door).  Only $3.68 a can for this fun Aqua color--I bought 2 cans.  I did get 2 chairs done with one can of paint, but I skimped on areas underneath that no one would see.  I probably should have had 1 more can of paint.  


Now I've got some bright patio chairs and I love them.  I also love that my total investment was only about $6 per chair.


Monday, March 7, 2016

Magical T-Shirt Makeover

Pin It


I love Disney-especially princesses, so I'm not sure why it took me so long to see the Cinderella remake last year.  Anyway, I finally got around to seeing it and loved it (ah, that ballgown!)  It was then that I discovered that Kohl's and the LC Conrad clothing line had some Cinderella inspired clothes--but it was too late to find anything but a few clearance items at my store. I really wanted this adorable graphic t-shirt, but there were none to be had. So, I took it as an opportunity to break out the Silhouette cutter and re-learn how to use it, and try heat transfer vinyl.

Inspiration T-shirt
Inspiration T-shirt from Kohls
I chose Ballerina Script.  I bought a 100% cotton tee (the vinyl works on poly/cotton too) and shiny gold Siser EasyWeed heat transfer vinyl.

Decide on the size of the graphic, pick your font (you can use a picture too) and type it up in Silhouette software.  Get it sized the way you like and then use the Mirror feature to reverse your graphic (super important, otherwise your letters will be backwards when you go to iron it on).


Set up your vinyl in the cutter. I set the cut settings for a blue blade (because that is what I have), speed 5 and depth of 24.  I did a test cut with depth 20 and it wasn't quite right and 22 seemed ok--but 24 worked just perfectly.  I used Expressions Vinyl's info sheet to figure out settings.

The vinyl has a clear transfer sheet over the finished face of the vinyl.  On my shiny gold, the back was a less shiny silver color.  I loaded the vinyl gold side down, then let the machine do its job.

Gold side down


Silver side was the back

You'll have to pull away or weed the unwanted vinyl.  Weed slowly, especially if you choose a text or design with lots of curves or small pieces.  You'll probably want a weeding tool (looks like a dental pick) to get at the small bits inside letters.  It took me about 30 minutes to weed the design.

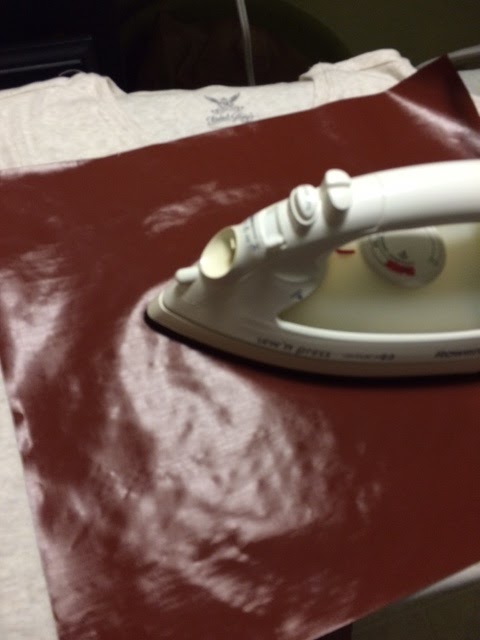
I don't have a big heat press, just my regular Rowenta iron.  The Wool setting is supposed to be around 300 degrees.  The vinyl manufacturer recommends 305-320 for proper adhesion.  I used a laser thermometer to check the temperature of the iron surface (about 315 when I pushed the dial a smidge past "wool").  I pressed down hard for 15 seconds on each section.  My ironing board does not have a padded cover, so I just used the board--but video tutorials I watched suggested using a hard table or board under the iron.  Spend plenty of time with a ruler planning the placement of your decal.  Iron out your shirt before you adhere the vinyl--also make sure there are no fuzzies, specks, hairs etc... on the shirt. 


 I used a teflon sheet between my vinyl and the iron, but I hear parchment paper works too.

Friday, January 1, 2016

Personalized Bath Towels

Pin It
Do you have a pile of fabric that you can't part with, but it doesn't seem like enough for a project?  How about this quick one?  My sister-in-law decorated tables with fabric from her favorite fandoms at her wedding reception, and this Dr. Who fabric had a bit left over.  I thought I might be able to do something with it for a Christmas gift, but time was getting tight and I didn't really have it in me to do a big project.  Light-bulb moment--just fancy up an already made item--in this case, bath towels.  But it would work great on flour sack towels for the kitchen too.

Supplies needed

1/3 yard of fabric (maybe less depending on the pattern of the fabric)
2 bath towels
matching thread

Since the towels and the fabric were both 100% cotton, I washed and dried them first so that uneven shrinking wouldn't cause pulled seams.   I ironed the Dr. Who fabric and started measuring. Measure the width of the towel.  Take that measurement and add an inch to the length of your decoration fabric so you'll have room to fold under the ends. 

Decide how tall you want the finished strip to be and add 1 inch (you'll fold over both edges 1/2 inch and iron--it gives you plenty of room to sew your seams). The Tardis pattern was about 3 inches tall, so I cut my fabric 4 inches.


Pin the decoration fabric to the front of your towel (make sure you pin it straight)--fold the short ends under and pin them too.  Next, just sew around all 4 edges.


Now you're done.  Total measuring/cutting/sewing time...15 minutes (for both towels).  My sister-in-law said she thought they were great.

Monday, November 4, 2013

Rustic wood nightstand

Pin It


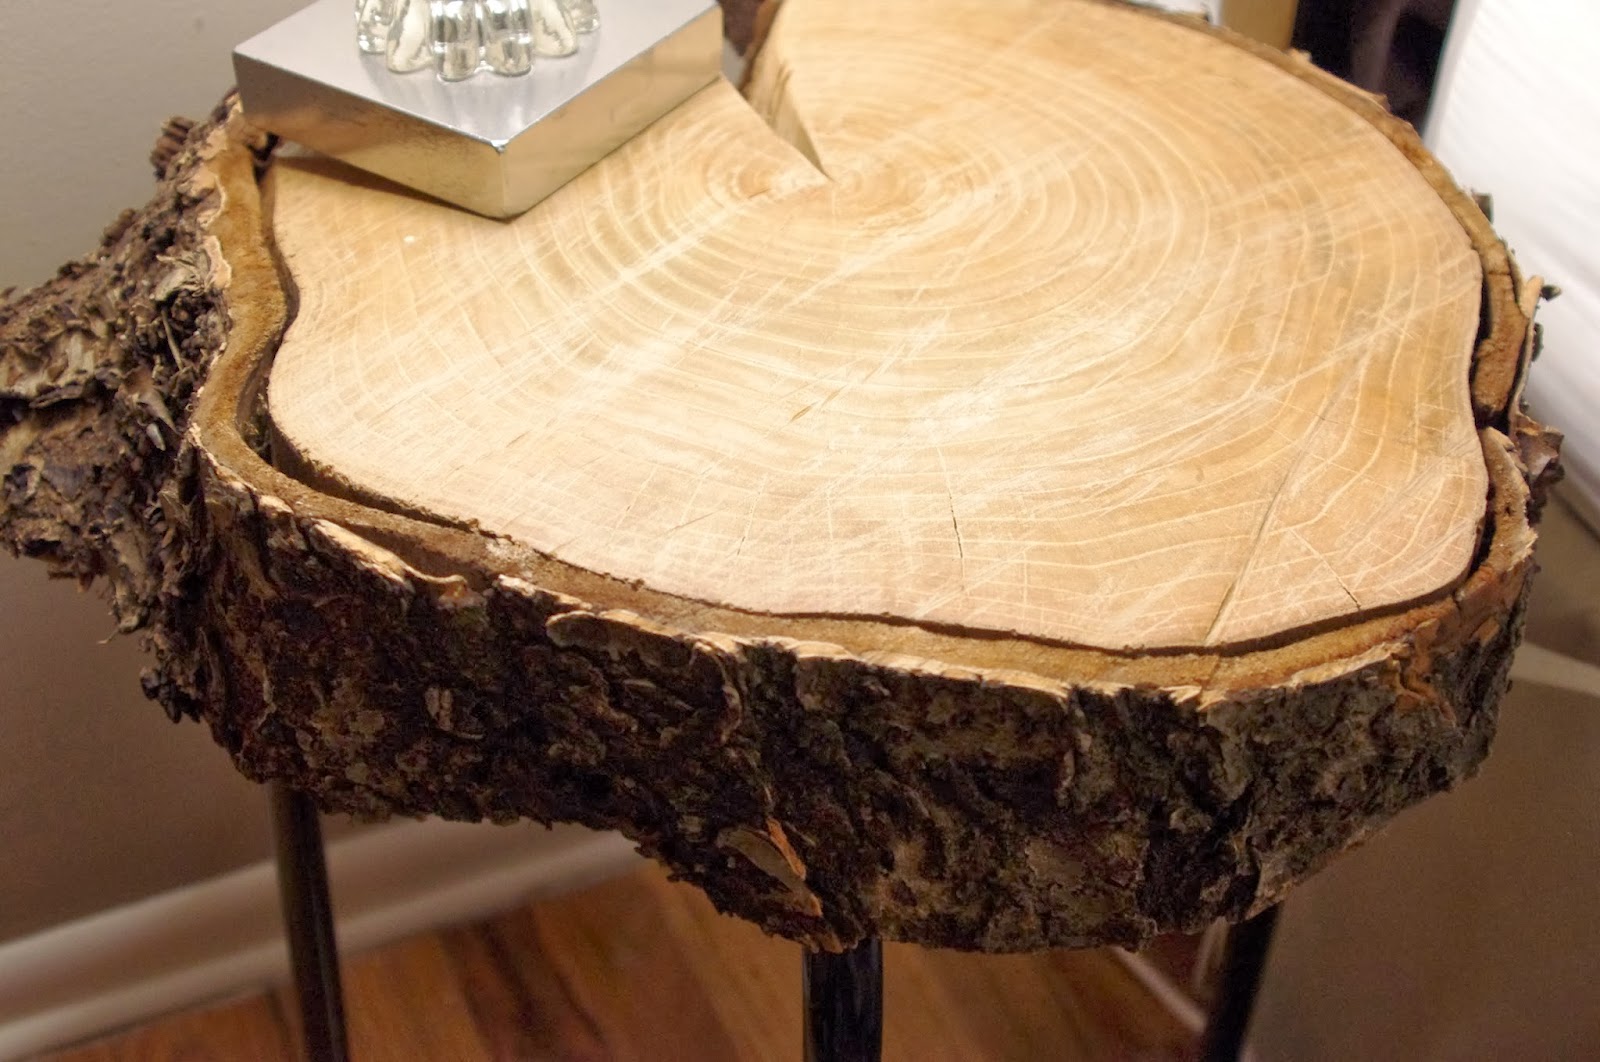
I've been a fan of a blog called Liz Marie...and she has a great way of blending traditional, modern and rustic styles all together, and it all looks great mixed up!  Taking some inspiration from her designs and another blog  I decided to give this project a try.  A co-worker was kind enough to bring me some slices of a tree that he was taking out.  They were beautiful rounds of wood back in June...and when I came home from a trip, both slices had split as they dried (I think a possible solution would be to use older wood...a log that had dried for a year before being sliced into rounds).

My tree slice is cherry, and may I say cherry is HARD wood.  I started by using my nail gun to make sure the bark was firmly attached (not that it seemed like it was coming off, but just to be safe).  I also used a stiff brush to clean up any stuff on the bark--I wasn't gentle with the bark at all--I figured if it was going to come off, now would be the time to address that.  Next, I started the sanding with 36 grit sandpaper and my palm sander.  You know its super hard wood when hardly any sawdust is created.  I eventually got to 80 grit, but I didn't think it was going to get any smoother (took about 1 1/2 hours of sanding).  I had hoped to sand out the lines from the chain saw, but seriously, cherry is hard.  I guess that bodes well as a table top though.  It is very smooth to the touch and has no slivers.


Using the IKEA marius stool ($5.99) as my base, I flipped the legs of the stool upside down and attached the wood to the legs.  I replaced the screws that came with the stool with 3" wood screws.  I did pre-drill the holes since the wood was SO hard there was no way I was going to be able to muscle in the screws without the pre-drilling.  Did I mention cherry is hard?  Maybe next time I'd use pine :) As my one mistake in the project, I was using a 5" bit and drilled all the way through the log in one of the holes, so I had to fill that in.  Darn it.

I coated the top of the log with Minwax paste wax and buffed it the next day.  I decided that the split just adds rustic character (which I could also cover with a lamp).  This table is super stable and could be used as a stool if you wanted, but its pretty heavy. 

Really, it wasn't a difficult project, just lots of sanding.  I like it-how about you?

Wednesday, July 31, 2013

Coffee Table Re-do

Pin It  
The industrial rustic decorating style has been holding some appeal for me lately.  I had been looking for the right project to tackle and finally found it!

This was one of the easiest and fastest furniture makeovers ever.  Really. It started with this clearance Target table (11.00).  The faux wicker and glass had to go, it was the metal base that I was interested in.
 

Next, the new top.  I headed to Home Depot and the "cull" bin at the back of the store.  I scored two pieces of lumber for only 1.01 each.  I measured the length of the old top and cut the boards to be about the same, 41 inches.  The old top was 20 inches wide, but with my lumber it was 22...close enough.


Some sanding and then I clamped the two boards together.  I cut 3 wood pieces (scraps from my shed) to connect the two pieces together.  I used the nail gun to tack them in place, then used screws to make the connection more secure.
 

More sanding with the palm sander.  I applied the stain (a mix of golden oak and kona black-it was what I had in the garage) and let it dry.  I finished it with some Minwax Finishing Paste, let it dry overnight and buffed it out.

I attached the table top to the base frame using some screws from underneath.

Total investment: $13 and 1 day of working time and a day of drying time.


Friday, August 24, 2012

Shabby Nightstand with Blue Interior

Pin It


I've had the twin nightstand to the one I painted earlier this summer just waiting for me to decide what to do. I finally found a great inspiration picture on Pinterest and set about making mine just as fun.


This stand needed more repairs than the other one. The pins at the base of the front door were missing and a chunk of wood in the front right corner needed to be repaired. I used some wood filler resin (2 part putty) to fill in the missing wood and hit my local Ace Hardware for the small pins (my Ace has a wall of bits and bobs that you can buy just one at a time, including hardware for furniture). I lightly sanded all the surfaces before priming it with one coat of Kilz.


I painted the interior of the drawer and cabinet Aqua Smoke from Home Depot, still from the sample can from the previous project. The outside is crisp white-also a Behr Ultra Premium sample, just no color added. I distressed it a bit with my palm sander and finished it with a coat of wax. Glass knobs from Hobby Lobby fancy it up. (I'm still thinking about what to do with the super fun fabric I found at HobLob while picking up the knobs).