Showing posts with label pie. Show all posts

Monday, September 19, 2016

Fresh Peach Pie

Pin It


Peach season has been abundant around here.  I have some very awesome neighbors who shared their bounty with me.  One neighbor invited me to pick peaches with her, another left a bag of peaches on the front porch and yet another sets a box out at the end of the driveway for anyone who needs a few.  I've made topping for waffles, I froze peach pie filling, I made fruit leather, I froze some for smoothies--but I also made a fresh peach pie.  Oh, this is a treat for sure!


Makes a 10" pie
7 C. sliced fresh peaches, divided (probably about 10 big peaches)
1 C. sugar
5 T. cornstarch (I might use 6 T next time)
1 T. lemon juice
1 T. butter
1 10" baked pie crust


When you make fresh peach pie you mix the raw peaches with a glaze.  I don't care for the pre-made peach sauce that you buy in plastic tubs in the produce section.  I thought I liked the box of powdered peach pie filling mix--until I made my own.  Yeah, you have to ditch the box. It won't take much extra time.

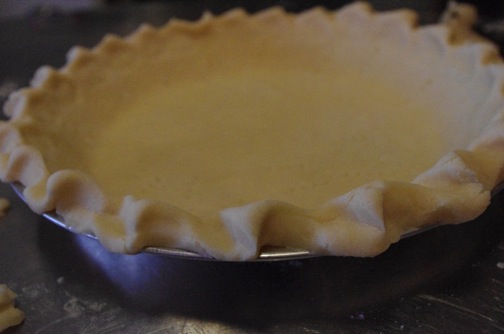
First, bake a pie crust and let it cool on the counter. You can do it any way you like, buy a frozen one, refrigerated dough or make your own.  Next, peel your peaches (I use the quick blanching method to get the skins to slip off rather than try to do it with a paring knife) and get them sliced up and in a big bowl.


You will need to put the juice that has accumulated at the bottom of your bowl as well as 1 cup of the peaches into a blender.  You should have about 1 1/2 cups of puree (add water if needed, or wait a few minutes and get a bit more juice from the peaches still in the bowl).  Add the sugar and  cornstarch and blend til smooth.


Pour the mixture into a saucepan and heat on medium until it comes to a boil. Boil for 1 minute, remove from heat and add butter and lemon juice.  Pour the hot mixture over your sliced peaches.  Gently mix with a spatula then pour into the crust.

Put the pie in the fridge for at least 4 hours and serve with whipped cream. 

Sunday, May 15, 2016

Blueberry Sour Cream Custard Pie with Olive Oil Crust

Pin It


 For my birthday this year, I had a delicious dinner at a fun restaurant called The DoDo.  They have very tasty food options, but they are well known for their great dessert menu.  I chose to be particularly indulgent that night (hey, it was my birthday!) and got the Sour Cream Blueberry pie. I was expecting something like a lemon meringue with a blueberry topping, but it was completely different...and really, really good!  Instead, it was somewhere between a blueberry pie and a cheesecake, all mixed together with a nut topping.

Some searching around the internet showed something that resembled it called a blueberry custard pie--so I thought I'd give it a shot to see if it was like the dessert in my memory.  I'm happy to say that this version is a pretty good facsimile!  Its not hard to make--not fussy or temperamental, and the ingredients are not exotic either.  You do want to give yourself about 20 minutes of hands on time, 40 minutes for baking and at least 2 hours to refrigerate before serving (try making it before bed and it will be ready for the next day).

I love pie--but I'm really lousy at pie crust.  I usually buy it ready made.  At a large Sunday dinner at my friend's home a few weeks ago, pie was served with a flaky, delicious crust.  I asked the baker what the secret was and she said the crust was "no fail" and the secret ingredient was olive oil.  Yup, olive oil.  I had never heard of such a thing.  She also didn't roll out the dough, instead, she pressed it straight into the pie pan.  Hmmm, intriguing.  Well, I have to say, success!  I tried it today and it was very tender and delicious (and the olive oil flavor was extremely mild and not noticeable when combined with the filling).  I altered Sherry's crust recipe (partly because I didn't write it down completely when I talked with her, and because I thought adding sugar sounded like it would make more of a cookie style crust).

Pre-heat the oven to 400 degrees.

Pie Crust
1 1/2 C. all purpose flour
1/4 tsp. salt
1 T. sugar
1/2 C. olive oil (frozen for about 30 minutes)
2 T. cold water (can sub milk if desired)

In a food processor add the dry ingredients and pulse to mix.  Now scoop in the cold olive oil (it becomes a thick liquid when partially frozen) and water.  Pulse until you have combined the ingredients and it looks like a wet sand.  Pour the mixture into the pie pan and press up the sides and the base (I used a 9" pie pan, so I had more dough than I needed).  Pop the crust into the freezer for about 15 minutes while you make the filling.


Filling
3/4 C. sugar
1 egg
1/2 tsp. salt
2 T. all purpose flour
1 C. sour cream
1 1/2 tsp. vanilla
2 1/2 C. blueberries (fresh or frozen)


In the KitchenAid, mix the egg, sugar and salt.  Add the flour and then the sour cream and vanilla.  Mix for about 2-3 minutes until its all incorporated.  Add the blueberries and stir by hand.  Pour the mixture into the pie pan.  Bake for 25 minutes, then add the topping, then bake an additional 10-15 minutes.


Topping
4 T. pecans
3 T. flour
3 T. sugar
2 T. cold butter

Put all the ingredients in the food processor and pulse until the nuts are chopped and the flour/sugar/butter are combined (looks like sand with pebbles of pecans).


This dessert lasted about 5 minutes at dinner--and got great reviews.  Its particularly good chilled and served with whipped cream.


Saturday, November 21, 2015

Make and Freeze Thanksgiving

Pin It Thanksgiving is a great holiday.  I have great memories of helping prepare food with my mom and my grandmother.  In the last couple years, my mom and I have noticed that even doing dishes as you go all day long, there is still a mountain of dishes at the end of the meal.  I love to cook--but I hate dishes.  Even though I'm not hosting Turkey Day at my house, I love the once-a-year foods for this meal, so I'm cooking my favorites and I'm doing some tricks to make things easier.

Make and Freeze Dressing
Serves 4-5
1 pkg  herbed bread cubes
1/2 c. butter
1 c. onion, chopped (1 medium)
1 c. celery, chopped (2-3 stalks)
1 can low sodium chicken broth (14 oz)
1 tsp. sage (or poultry seasoning)

Chop up the onion and celery finely and saute in the butter in a skillet over medium heat for about 10-12 minutes, until translucent and soft.  In a large mixing bowl, pour the cooked onion mixture over the breadcrumbs and stir.  Slowly pour about half of the chicken broth over bread and mix.  Add more broth until the cubes have absorbed and they are soft but not soggy.  Add the sage and stir.

Here's the time saver--at this point, you have two choices.  1.  Let the mixture come to room temperature, put it in a zipper bag and freeze it.  On Thanksgiving, you can put the mix in the nice baking dish and cover with foil and bake at 350 for about an hour or in a crock pot on low for 2-3 hours (you may need to add a bit more chicken stock as you bake).  2.  You  bake the dressing immediately then freeze and just use the microwave to reheat on meal day.

P.S.  I was watching America's Test Kitchen this morning, and they put their dressing in the bottom of the roasting pan and placed a "deconstructed" turkey (the breast and the thigh/legs) on top and baked it that way for extra turkey flavor.  Looked good to me, I might have to try that. 


Make ahead fruit pie
I'm afraid that pumpkin pie is not my thing--although I can make one (and you can do it the day before).  If you want to do pie the easy way, like me.  Make the fruit pie filling in advance and freeze it in a zipper bag.  When you are ready to make the pie, just put it in the crust and bake.  No, I don't make my own crust--Pillsbury works for me.  You CAN make and freeze an entire pie, before you bake--it just takes about 2 hours to bake from frozen (and you have to shield the edges of the crust so they don't burn).  Here's how I do pie filling for the whole year all at once.  http://theprojectspot.blogspot.com/2011/11/apple-pie-filling-for-now-or-freezer.html

Cranberry Sauce

If you haven't ever made your own cranberry sauce, try it this year.  It takes about 15 minutes and its so delicious.  I did some instructions a few years ago, so give it a go and throw it in the fridge or freezer until Thursday.
http://theprojectspot.blogspot.com/2010/11/homemade-cranberry-sauce.html


Friday, December 19, 2014

Triple Chocolate Mousse Cake

Pin It
 
If you have a holiday party that you want to "WOW" everyone at, I suggest this tasty dessert from America's Test Kitchen (I've never been disappointed with one of their recipes).  Warning, while the dessert is not super challenging, it does take all morning to get it prepped and then it will need to refrigerate the rest of the day (or overnight).

Ingredients


Bottom Layer
  • 6 tablespoons (3/4 stick) unsalted butter , cut into 6 pieces, plus extra for greasing pan
  • 7 ounces bittersweet chocolate , chopped fine
  • 3/4 teaspoon instant espresso powder (I didn't use this)
  • 1 1/2 teaspoons vanilla extract
  • 4 large eggs , separated
  • Pinch table salt
  • 1/3 cup packed (about 2 1/2 ounces) light brown sugar , crumbled with fingers to remove lumps 


  • Middle Layer


  • 2 tablespoons cocoa powder , preferably Dutch-processed
  • 5 tablespoons hot water
  • 7 ounces bittersweet chocolate , chopped fine
  • 1 1/2 cups cold heavy cream
  • 1 tablespoon granulated sugar
  • 1/8 teaspoon table salt


  • Top Layer


  • 3/4 teaspoon powdered gelatin
  • 1 tablespoon water
  • 6 ounces white chocolate chips
  • 1 1/2 cups cold heavy cream
  • Shaved chocolate or cocoa powder for serving, optional

  • Directions

    1. FOR THE BOTTOM LAYER: Adjust oven rack to middle position and heat oven to 325 degrees. Butter bottom and sides of 9 1/2-inch springform pan. Melt butter, chocolate, and espresso powder in large heatproof bowl set over saucepan filled with 1 inch of barely simmering water, stirring occasionally until smooth. Remove from heat and cool mixture slightly, about 5 minutes. Whisk in vanilla and egg yolks; set aside.


    2. In stand mixer fitted with whisk attachment, beat egg whites and salt at medium speed until frothy, about 30 seconds. Add half of brown sugar and beat until combined, about 15 seconds. Add remaining brown sugar and beat at high speed until soft peaks form when whisk is lifted, about 1 minute longer, scraping down sides halfway through. Using whisk, fold one-third of beaten egg whites into chocolate mixture to lighten. Using rubber spatula, fold in remaining egg whites until no white streaks remain. Carefully transfer batter to prepared springform pan, gently smoothing top with offset spatula


    3. Bake until cake has risen, is firm around edges, and center has just set but is still soft (center of cake will spring back after pressing gently with finger), 13 to 18 minutes. Transfer cake to wire rack to cool completely, about 1 hour. (Cake will collapse as it cools.) Do not remove cake from pan.


    4. FOR THE MIDDLE LAYER: Combine cocoa powder and hot water in small bowl; set aside. Melt chocolate in large heatproof bowl set over saucepan filled with 1 inch of barely simmering water, stirring occasionally until smooth. Remove from heat and cool slightly, 2 to 5 minutes.


    5. In clean bowl of stand mixer fitted with whisk attachment, whip cream, granulated sugar, and salt at medium speed until mixture begins to thicken, about 30 seconds. Increase speed to high and whip until soft peaks form when whisk is lifted, 15 to 60 seconds.
    6. Whisk cocoa powder mixture into melted chocolate until smooth. Using whisk, fold one-third of whipped cream into chocolate mixture to lighten. Using rubber spatula, fold in remaining whipped cream until no white streaks remain. Spoon mousse into springform pan over cooled cake and gently tap pan on counter 3 times to remove any large air bubbles; gently smooth top with offset spatula. Wipe inside edge of pan with damp cloth to remove any drips. Refrigerate cake at least 15 minutes while preparing top layer.
    7. FOR THE TOP LAYER: In small bowl, sprinkle gelatin over water; let stand at least 5 minutes. Place white chocolate in medium bowl. Bring 1/2 cup cream to simmer in small saucepan over medium-high heat. Remove from heat; add gelatin mixture and stir until fully dissolved. Pour cream mixture over white chocolate and whisk until chocolate is melted and mixture is smooth, about 30 seconds. Cool to room temperature, stirring occasionally, 5 to 8 minutes (mixture will thicken slightly).
    8. In clean bowl of stand mixer fitted with whisk attachment, whip remaining cup cream at medium speed until it begins to thicken, about 30 seconds. Increase speed to high and whip until soft peaks form when whisk is lifted, 15 to 60 seconds. Using whisk, fold one-third of whipped cream into white chocolate mixture to lighten. Using rubber spatula, fold remaining whipped cream into white chocolate mixture until no white streaks remain. Spoon white chocolate mousse into pan over middle layer. Smooth top with offset spatula. Return cake to refrigerator and chill until set, at least 2 1/2 hours.


    9. TO SERVE: If using, garnish top of cake with chocolate curls or dust with cocoa. Run thin knife between cake and side of springform pan; remove side of pan. Run cleaned knife along outside of cake to smooth sides. Cut into slices and serve.


    Wednesday, November 21, 2012

    Pumpkin Pie

    Pin It

    Picture from McCormick.com

    I've been a bit busy lately, so the projects have fallen behind, but with Thanksgiving tomorrow, I know I needed to get my assignments done for the family dinner.  I'm in charge of pies and yams...both things I really love.  I did the apple pie using some of my freezer pie filling, so that was a snap.  The pumpkin pie is SUPER easy--why buy it (even from Costco) when it takes about 5 minutes to mix up and about an hour to bake.


    I used the recipe from McCormick's Pumpkin Pie Spice mix, found here.  You'll need
    1 15-oz can pumpkin puree
    1 14-oz can sweetened condensed milk (NOT evaporated milk)
    2 eggs
    1 Tablespoon of pumpkin pie spice mix
    1 unbaked pie shell.

    I par-baked my pie shell for 5 minutes before I started mixing up the filling.  Mix the pumpkin, sweetened condensed milk, eggs and spices with a mixer until nice and smooth.  Pour into the shell.  Wrap foil around the edges of the shell so it doesn't get too brown during baking.

    Bake for 15 minutes at 425, then turn the oven down to 350 and keep on baking for another 40 minutes.  My foil was wrapped a bit too close to the filling, so when the filling puffed up during baking, some of it got stuck on the foil.  Oh well.  I'll be covering it with whip cream anyway.


    Monday, May 28, 2012

    Rhubarb Abundance!

    Pin It
    I grew up in Idaho, and apparently that may have something to do with my enjoying foods that many of my friends have either never heard of or can't imagine anyone liking--rhubarb is one of those foods.  I love the tartness that this "fruit" gives to pies and cobblers.  I planted my own last year, but it was too small to harvest anything from this year.  Lucky for me, my friend had an abundance and was willing to share with me!

    I already made (and ate) the rhubarb cobbler--with no pictures.  Oops.  I use Paula Deen's cobbler recipe because it always works and I've tried it with lots of different kinds of fruits.

    4 C. rhubarb (or any other fruit that you love)
    2 C. sugar, divided
    1/2 C. water
    1/2 C. butter, melted
    1 1/2 C. flour
    3/4 tsp. salt
    2 tsp. baking powder (scant)
    1 1/2 C. milk

    Preheat the oven to 350.  On the stove in a medium saucepan mix the fruit, 1 C. sugar and the water.  Bring to a boil and boil for 10 minutes.  While fruit is coming to a boil:  In a 3 qt baking dish, put the butter in the bottom of the dish.  In a separate mixing bowl, mix 1 C. sugar, the flour, salt, baking powder and milk together to make a batter.  Pour the batter on top of the melted butter; don't stir it.   When fruit mixture is done, spoon or carefully pour it all over the top of the batter.  Bake for about 40 minutes.  During the baking time, the butter mixes in the batter, the fruit ends up on the bottom and the batter is all golden and moist on the top.  Yum.


    OK, since I had so much rhubarb I also made up some pie filling to use later.  I've done this technique before with apple and cherry pies.  Check it out here.  For this recipe, I used:

    4 C. chopped fresh rhubarb
    1 1/2 C. sugar
    3 T. instant tapicoa

    Put all ingredients in a gallon size freezer bag.  Zip it up and mix it up.  Let it sit on the counter for about 10 minutes, then place the whole bag into a pie pan.  Freeze it in the pan.  Once frozen, you have a pan-shaped disc of filling mix that you can use to make a quick pie.  I usually use refrigerator pie dough, so my prep time is about 2 minutes, then let it bake for 45-60 minutes (its a long time because the filling is frozen), so you'll need to use foil to shield the edges of the crust during the long baking time.

    Still MORE rhubarb?


    I still had more rhubarb, but I was out of tapioca for more pie filling.  No worries, you can just chop up rhubarb and put it in freezer bags to use later in a cobbler, pie or some other treat.  I bagged it up in 4 c. packages.  Easy!


    Friday, November 18, 2011

    Apple Pie Filling for Now or the Freezer

    Pin It

    I had the good fortune of having some friends with an apple tree with so many apples, that they gave me a large bag! I love eating apples, but this was more than I could really eat in a timely fashion. So, I decided to get some apple pie filling made and frozen. I'm planning on using it for the Thanksgiving pies that I'm responsible for at the family dinner.


    Recipe:

    6 C. sliced apples
    1 T. lemon juice
    3/4 C. sugar
    1/4 t. salt
    2 T. instant tapioca
    1/2 t. cinnamon
    butter
    pie crust

    I used an apple/peeler/corer to get all my apples done (I ended up with enough apples for five 9" pies). I mixed up each batch of dry ingredients and apples separately, mostly because I don't have a bowl big enough for 30 cups of apples! In a bowl mix the apples and lemon juice. In a smaller container mix the sugar, salt, tapioca and cinnamon. Mix the dry ingredients into the apples. Let the mixture rest on the counter for at least 15 minutes.


    Option 1:
    Make the pie right now! Put the bottom crust in your pan and pour the apple filling in, dot with butter; top with crust and pinch the seams together. Cut vent slits in the top. Bake for 50-60 minutes at 400 degrees.


    Option 2:

    Freeze just the raw filling so you can use in future pies. To freeze the pie filling, dump the 6 cups of apple mix into a large zipper freezer bag and squeeze out the air and close it. Put the zipper bag of apples into the pie pan that you will eventually be using to bake the pie. Smoosh the apples around until you have a pan-shaped pile of apples. Leave the bag in the pan and put both in the freezer. After the apples are frozen, you can take the bag out of the pan and just keep the bag in the freezer. You may want to double bag to help avoid freezer burn.


    When you are ready to make the pie, get the bottom crust into the pan and put the frozen apples in it. Dot with a couple tablespoons of butter and put on the top crust. Cut some slits in the top and bake for 50-60 minutes on 400 degrees (you'll need to wrap the edges of the pie in foil so that the crust doesn't get too brown). Don't let the apples defrost before using them; they'll get too juicy and make for a soggy pie.

    Option 3: Freeze a whole raw pie to bake later.

    Make up the pie, as if you were going to bake it right away (crust and all) and freeze the whole thing, just don't cut the vent holes yet. Wrap it in plastic wrap and then foil (or if you have those giant freezer bags, you could try them too). When you are ready to use, take it out of the freezer, cut the vent holes and bake, do not defrost first--it will take nearly 2 hours at 400 degrees, so be sure to use foil around the edges for at least the first hour. (I did this method as a test run for Thanksgiving and it turned out PERFECT!!)


    Now I'm stocked up on apple pie makings!

    Update: I tried it with cherries and it also turned out super yummy. The recipe is slightly different. 4 C. sour cherries, 3 T. tapioca, 1 t. almond extract, 1 C. sugar

    Monday, July 11, 2011

    Fresh Strawberry Pie

    Pin It
    Need a fast dessert that won't heat up your kitchen on a hot summer day? Try making a fresh strawberry pie! You can make your own regular pie crust (which I have given up trying), you could use a box pie crust mix (like Krustez or Betty Crocker) or you can use a pre-made graham cracker crust. I took these ingredients with me up to the cabin for the 4th of July for a yummy summertime dessert.

    Ingredients

    1 9-inch pie crust
    1 pkg Danish Dessert, Strawberry (Junket brand...found on the Jello aisle, usually on top shelf)
    1 3/4 C. cold water
    4 C. sliced fresh strawberries


    If you are lucky like me and have a strawberry patch that is doing amazing things, go get some berries, wash, hull and slice them (or at least cut them in half so that they are nice bite size slices).

    In a small saucepan combine the cold water and Danish Dessert mix and cook over medium heat, stirring constantly. Bring to a boil and boil for 1 minute.


    Pour the sauce over the berries and gently mix. Pour into the prepared pie crust. Refrigerate for at least 2 hours (I prefer to not leave overnight because the berries start to get soft).


    Top with whip cream if you like! Super tasty and inexpensive (strawberries...free, Danish Dessert $1.34 and crust, $1.19 at Walmart).


    Tuesday, May 3, 2011

    Lemon Meringue Pie

    Pin It


    I hosted Easter dinner this year, and for dessert, I made my dad's favorite, Lemon Meringue Pie. Of course, I made it because I love him (not because this is one dessert that never fails me!) My good old Betty Crocker cookbook recipe works every time.

    OK, first thing I admit is that I cannot make pie crust. Despite my grandmother's best efforts, I can't do it, so I cheat. I use a box mix...you do have to use a bowl and a rolling pin, so it almost homemade and I think it tastes great (and you can make those yummy cinnamon and sugar pie crust cookies with the leftover bits).


    Meringue
    3 egg whites
    1/4 tsp cream of tartar
    6 Tb sugar
    1/2 tsp vanilla

    In a 2 1/2 qt mixing bowl beat egg whites and cream of tartar until foamy. Add sugar 1 T at a time. Continue beating until stiff and glossy. Add vanilla.

    Pie
    9" baked pie shell
    1 1/2 C. sugar
    1/3 C. plus 1 T cornstarch
    1 1/2 C. water
    3 egg yolks, slightly beaten
    3 T. butter
    2 tsp lemon zest
    1/2 C. lemon juice

    Bake the pie shell. Make the meringue. Preheat oven to 400. Now make the lemon filling. Mix sugar and cornstarch in a saucepan ( 1 1/2 qt). Gradually add the water. Cook over medium heat, stirring constantly until mixture thickens and boils. Boil and stir for 1 minute. Slowly pour at least half of the hot mixture into the eggs (you need to be pouring a thin stream of hot mixture while quickly stirring it into the eggs). Now pour it all back into the saucepan and return to heat. Bring back to boil and boil & stir for 1 minute. Remove from heat. Add the butter, lemon juice and zest. Pour into the pie shell.

    Spread the meringue over the hot filling, sealing it to the edge of the crust. Bake about 8 minutes until the meringue is golden brown. Let cool completely on the counter and then refrigerate.