Showing posts with label skirts. Show all posts

Sunday, May 31, 2015

Ruffled Maxi Skirt

Pin It
I'd been looking for a mustard colored skirt in the fall-and kept looking all winter and finally figured I'd have to make my own (never found one, or at least not one I liked). I decided I really wanted it to be ruffled like a gray skirt I bought at Macys. I then started looking for fabric, which turned out to be just as challenging as finding the skirt in the first place. You'd think as popular as ruffles are mainstream stores like Joann's or Hobby Lobby would have lots of cute knit fabric-but not the stores in my town. So I turned to Etsy and finally found some 2" knit ruffle fabric.


The making of the skirt is actually pretty simple, but the ruffles on the fabric do add a level of concentration. I had to pay really close attention when I cut out the front and back so that the ruffles lined up. I also did a basting stitch along the raw edges to make sure the ruffles didn't get bunched up when I sewed the pieces together. 

If you already have a long skirt, just use it as a pattern and cut your pieces about the same size (its stretchy knit, so you don't need much seam allowance).   If not, measure your waist and cut that measurement in half (so if your waist is 32", the top of your pattern will be 16".  Again, it's stretchy knit, so I didn't leave a seam allowance).  For the bottom of the skirt you decide how wide you want it to be (I went about 6" wider). 

Baste (or use straight pins) all the ruffles along the long edge of the pieces. You'll be glad you did when you go to sew the front and back together.

Put the front and back pieces together (right sides together) and sew up the long sides.
Now is the time to try it on-if it's too big you can adjust it now. Once you're sure it's the right size, measure around and add an inch (so if your measurement is 32", you'll need to add 1". 

To make the waistband I bought some regular jersey knit that matched as closely as I could find.  I like my waistbands to be about 6" tall when finished, so that means I cut a rectangle of fabric that was 12" tall and 33" wide (remember your width will match your skirt).  You can also use 2 pieces, each 12x16.5. I like to have my waistband taper, but you can just sew it as a rectangle. If you want to taper, you lay it out and trim the sides-then sew up the raw edges.


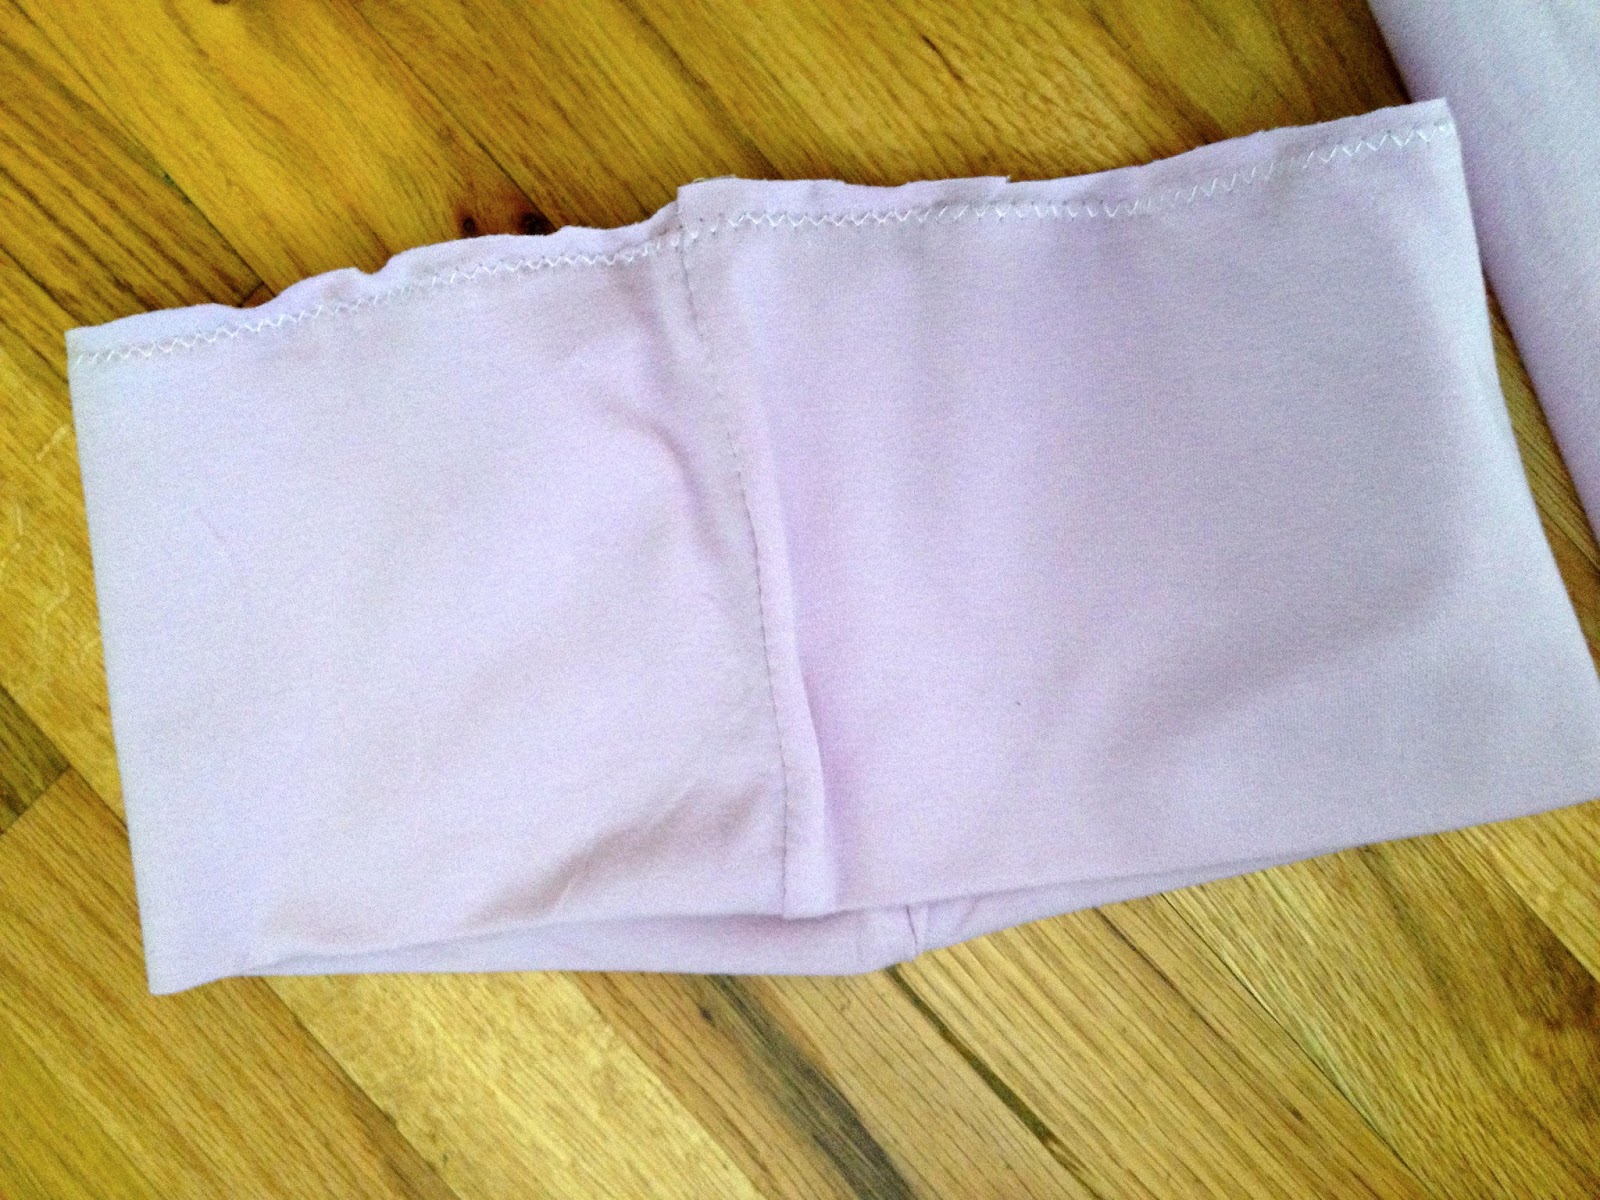
You'll have to fold the waistband over (wrong sides on the inside). 

Flip the waistband so that all the raw edges line up. Sew around (use a serger or if you don't have one, use the zig zag stitch so that it will stretch).  I had some custom labels made, so now is the time to sew that in too.

Ta-da, you have a new skirt have that is flouncy, bouncy, full of fun, fun, fun!

Wednesday, June 5, 2013

Knit Skirt, Yoga Waistband

Pin It


I wear skirts a lot..for work, for church, for travel...they're comfy, especially when they are knit and have a fold-over waistband. I have a few in my closet that I've purchased, but who doesn't need more?  I have made about 5 of these so far, using mostly fabric I got online at Girl Charlee.  Love 'em.


Get your fabric laid out (right sides together...and if the front and the back look a lot alike, put some tape on the wrong side so you don't get mixed up later when you are working in a dim basement :) For the pattern, either use a skirt you already have as a guide, or just do some math.


For the math version:
Skirt front and back
Measure the spot around your hip/waist where you want the skirt's waistband to sit.  Let's use the number 40" since its a nice round number. 
Now divide that measurement by 4.  40/4 =10 inches
On the fold of the fabric, measure a line 10" arcross at the top of the skirt
Note:  Its stretchy fabric, so I don't leave much of a seam allowance, but you can if you want.

Now find out how many inches long you want the skirt to be, then add an inch for some hemming allowance.  (Lets say about 36 inches).
Next, you need to make the measurement for the bottom of the skirt.  You can make this as wide as you want.  I'd suggest that you make the bottom  at least 4" more than the top (our top was 10", so the bottom would need to be at least 14")--but it doesn't matter.  If you want a fuller skirt, make it 6 or 8 inches more than the top. 
For the back skirt piece.  If you have enough fabric length, just do an identical piece to the front along the fold (it depends on how long you need your skirt to be--if you are taller than my 5'7", you might need more than 2 yards of fabric--OR--don't cut it on the fold.  Instead, cut it on the leftover space from the front skirt piece.  You'll end up with two pieces that need a back seam sewed, but it works.

Now that you have a front piece and a back piece (note, if you had to cut the back in two pieces, please sew the center seam, right sides together)--you need to sew the side seams.  If you have a patterned fabric, you can try lining up the pattern, or not.  It is a pretty casual skirt.


Once you have the skirt body done, try it on--if its too big, you can always re-sew the side seams a bit closer. 

Waistband
Its time to make the fold-over (yoga style) waistband.  Let's take that waist measurement again, 40"-we'll need a rectangle of fabric that is 40"x 15" (the 15 is a flexible number.  I like my fold over waistband pretty wide, but you can make it narrower if you like).  The 40" need to be the stretchy direction (so theoretically you could stretch that 40" to more than that...if it doesn't stretch, then you're going the wrong direction on the fabric).  Note.  I like to actually measure the distance between the side seams on the skirt body and use that as my official waistband measurement.  It means that for sure the waistband will fit the skirt body precisely.

Fold the rectangle in half (right sides together) so that you end up with a 20x15 piece and sew the side seam, making a tube (You'll note that I didn't have a single piece big enough, so I did 2 20x15 pieces and sewed both edges).


Now fold the tube down so that you have a tube that is 7.5 inches tall and 20 inches (or so) across.  The right side of the fabric should be all you see on the tube. (Hmmm, I also used a quick basting stitch on the raw edges on this example, but I quit doing that because it took more time and didn't really  make a difference...I'm lazy apparently).


Last, you have to attached the waistband to the skirt.  Leave the skirt inside out.  Lay the skirt flat on the ground/table with the waist opening pointing away from you.  Leave the tube right side out. The folded edge of the tube should be pointing toward you.  

Slide the tube over the skirt so that the folded edge of the tube is pointing toward you and all the raw edges of the tube and the skirt body line up.   (sorry, no pic).  I like to line up my tube's side seam with the left seam of the skirt body.  You'll need to pin the waistband all around.  Now use a serger, or a zig-zag stitch on a regular machine to sew the waistband onto the skirt.

You may think you did the waistband backwards, except remember you will be folding the waistband down, hiding that seam :) 

Hemming.  Knit doesn't fray or ravel...so you could just leave it with no hem. Or just serge it.  Or fold it over a couple times and sew a straight stitch around.  Up to you.


Saturday, July 2, 2011

T-shirt recycling, Summer Skirts

Pin It


So, I've come up with a new use for old t-shirts...summer skirts! I tend to wear skirts all summer since they are cool and breezy. You all know by now that I like cutting up old shirts and putting them back together, so here is a great way to recycle some of those big, boxy t-shirts in your closet.

I did two different versions, the first one, which I didn't take good pictures of, is the 15 minute version. The second, probably took me about 45 minutes (although part of that time was me trying to decide how I wanted to go about things, so the next time I do it, I'm guessing it would only be about 30 minutes). You will need a Large or XL shirt (I usually wear a size medium skirt or medium t-shirt, but a men's Large shirt had the length I needed to make a modest skirt).


Version 1: Drawstring skirt.
1. Lay shirt flat on your quilting cutting board. Line up your cutting ruler along the side of the shirt and cut off whatever part of the sleeve sits outside the "perfect rectangle". Next, use the ruler to cut off the neck hole (as high up as you can so that you have plenty of fabric at the top to turn into the waistband). So you should have a perfect rectangle shape left.

2. Flip shirt inside out and sew up the sides where you cut off the sleeve. So now you have a perfect rectangle tube.


3. Fold down about 1 inch of fabric from the top of the shirt and sew a casing to hold a drawstring.

4. I used leftover knit from the sleeves and collar (sewed together) to make the drawstring.


Version 2: Shaped waistband.


Lay the t-shirt out and use your ruler and rotary cutter to cut off the top of the shirt. I left about 1 inch above the graphic for some seam allowance. You want as much fabric on the collar piece left as possible since you will use that to cut out the waistband.

I used a pair of yoga pants with the type of waistband I wanted as my pattern. I laid the yoga pants on the leftover collar fabric and traced the shape. I then cut out the waistband and sewed the ends together (right sides together) to make the circle for the waistband.
With the wrong side out, fold down the top of the waistband to make a finished edge (if you have enough space, you could possibly add a drawstring, but I didn't). Sew around the top of the waistband.

Next, you will need to lay your waistband piece on top of the skirt and trim the body of the skirt so that it is more A-line rather than rectangle. The waistband is your guide on how much to trim off the top of the t-shirt. Once you trimmed the shirt, sew up the sides of the skirt (right sides together).

Last, you need to attach the waistband to the body of the skirt. Make sure that right sides are together (before you start sewing, pin it on and flip it to make sure it isn't backwards). Sew around and then trim off excess fabric from the seams.

If your t-shirt isn't long enough, you could use a second shirt, in a contrasting color and cut off the hem and sew it on to the bottom of the skirt to add some length. I got my shirts at Thriftown for $1 each, but it is yard sale season and you can probably get them for even less (or raid your guy's closet :)

Close up of the waistband:


Back of the skirt had a player's number, which I think just adds to the character:


Great with a pair of flip flops and shades!