Showing posts with label Christmas. Show all posts

Tuesday, November 26, 2019

Fabric Christmas Trees

Pin It
I saw some really cute fabric Christmas tree decor at Walmart this year--I like them, and they are only about $5 each--BUT--they are all the same size.  I like having some variety/depth if I'm grouping things together.  This post is not sponsored at all by Walmart, but wow, they've had some pretty great decorations and craft supplies this year.


Walmart version


When I wandered past the crafting section at the same Walmart, I saw some fat quarter fabric for only $1.47 each and thought they'd make awesome craft projects. Fat quarters are pieces of fabric that are 18x22 inches.  You could use any fabric (or cut up an old piece of clothing).  The nice thing about fat quarters is you don't have to wait in line to get fabric cut.


Also down the craft aisle at Walmart are some pre-cut dowels, only $1.27 for a package of 16.


Once I had my supplies at home, I poked around in the garage for something to work as the base--a tree "cookie" would be great, but I didn't have any of those, but I did have a leftover bit of 1x2 lumber, so I cut it into about 1.5" lengths.  I used my drill to make a 3/16" hole to receive the dowel.

I used a simple tree outline (you could also just make a plain triangle with no branches) and enlarged and reduced it so that I had multiple sizes.  I printed them on cardstock and cut them out as patterns.  My biggest tree is 7 inches tall and 6 inches at the base.  I also did a 6 inch tall and 5 inch tall.  I have a pattern for a 4 inch, but it seemed too small for what I wanted.


With some careful planning, I was able to cut 4 Large, 4 Medium and 4 Small trees from each of my 3 fabrics.  That meant 36 pieces which equals 18 trees.  I had to really layout the pattern carefully to get this many.  I laid the fabric out flat and traced and cut each piece.  It would be way faster to fold the fabric and cut more than one at a time, but you won't get as many pieces.


I chose to sew mine.  I also chose a "rustic" look, so I sewed them with wrong sides together and left the edges a bit ragged (instead of sewing with the right sides together and then turning it out to hide the stitching).  I started my seam about 1/8 of the way in on the bottom edge of the tree and then went around every branch until I was back at the bottom of the tree--and went in about 1/8 inch.  That left me a wide opening to insert a bit of stuffing.  I used the dowels to poke the stuffing into all the branches (I went with a slightly stuffed look, but you could really pack it in there).  You could probably do this as a no-sew craft if you used fabric glue and let it dry for several hours before stuffing.  I just liked the look of the stitching around the edges.  The sewing was the longest part of the project.

Once the trees were stuffed, I closed up the bottom seam with my machine (skipping over about 1/4 inch in the center so I'd have space to insert the dowel).  Run the dowel all the way to the tip of the tree.  Place the dowel in the base and you are set.

Materials
fat quarters of different fabrics (or if you like them all the same, just the one kind)
3/16" wooden dowels
wood block or tree cookie for base
polyfill stuffing (or an old pillow you can cannibalize)
matching thread/sewing machine or glue


My total investment was under $6 for all 3 fat quarters and the package of dowels.  I already had the other supplies.  I was able to get 5 sets (actually 6, but the dowel package leaves you short two dowels, so I went into the yard and cut a couple sticks off a shrub...it will do--if you have some small, straight tree branches, you could skip the dowels altogether).

You could do the same tree pattern for ornaments, or decorations on a wreath instead of on dowels.  I thought I'd gift each set along with the story of the Three Trees. 

Saturday, December 30, 2017

Placemat Pillows

Pin It


Do you like to hit the after Christmas clearance sales? I do! I don't mind storing things for a year if it means I got it for 90% off.  I grabbed these place mats at Target last year-and it was no problem that there were only one of a kind since I wasn't thinking of using them for the table.  Instead, I saw that these place mats were made with a front and back fabric-so they were basically pillowcases that had been sewn shut. Also in the Christmas clearance section, I saw lots of bags of "snow batting"--the kind you unroll and put under villages or trees-but it's the same polyfill material used for stuffing pillows. It was super cheap, so I bought a couple packages for each pillow.


Materials
1 fabric place mat (make sure that it has a front and back fabric)
Stuffing material
Thread to match

Use a sharp pair of scissors or a seam ripper to open up the seam along the bottom of the place mat. Start and end about 1 inch from the edges.


If using flat snow batting, unroll it and then accordion fold it into a rectangle that will fit inside the pillow.


To make it easier to insert into the pillow, roll up the batting and stick one end into the pillow and then the other. Use your hands to smooth it flat.

Sew up the seam either on your sewing machine or by hand (or for a no-sew version, add stick-on Velcro or fabric glue).

This project took about 5 minutes per pillow. I chose to just make a quick pillow, but you could do pillow covers if you wanted to take the time to add buttons or snaps or sew-in Velcro.

Tuesday, December 13, 2016

Mickey Mouse Rice Crispy Treats

Pin It

You may have noticed my Disney theme lately...a recent trip is still in my memory and I'm trying to relive my vacation.  Tis the season for gifts for friends, neighbors and co-workers.  In my office, it can be comical how quickly a small gift shows up on your office chair when you've been around the corner only a moment (I have really great co-workers).  I decided to do some tasty treats for everyone (I have nearly 35 people in my department)--one treat is healthy clementines and the other is less healthy but very tasty: rice crispy treats. 

In the cafeteria in my building, they make the most delicious crispy treats.  Soft and chewy and buttery--oh so good (if you really want one, you have to wander down by 10am or risk them being all sold out by the time you get down to lunch).  I asked the Queen Crispy Treat Maker (Jamie) what the secret was--more marshmallow?  or butter?  or secret sauce?  Nope, she says.  Just don't melt all the marshmallows.  Instead reserve some of the marshmallows and stir them in with the cereal and the melted marshmallows.  Genius.


Ingredients
5 C. rice crispy cereal
16 oz pkg mini marshmallows (about 10 cups)
5 Tbs. butter
1/8 tsp salt


Before you start, line an 8x8 pan with parchment paper that you've sprayed with non-stick spray. (I used my 9x13 pan but didn't fill it on one end).

In a large pot melt the butter over medium heat then add 8 cups of the marshmallows and the salt.  Stir constantly until all melted and smooth.  Pour the cereal into the pot and stir a couple times, then dump in the rest of the marshmallows and stir everything up.


Dump the sticky mix onto the parchment lined pan and use a measuring cup or back of a big spoon to press into the pan (spray the cup/spoon with non-stick spray first).  Don't press too hard, just enough to have it stick together.  Cool completely.  Flip the cooled treats out of the pan and then use a Mickey Mouse sandwich or cookie cutter to make your cute treats.  I had to spray my hands and the cutter to keep them from sticking.


Sunday, November 20, 2016

Vintage Truck Christmas Printable

Pin It

I've been loving the vintage truck design for Christmas for a few years--so I finally got around to making a print for my mantle.  Its sized to print 8x10.  It would also work as a card or a gift tag.  Hope you enjoy it.


Click the link to download


Vintage Red Christmas Truck


Monday, December 7, 2015

Christmas Handel Messiah Printable

Pin It I was singing at the Christmas devotional for church and we did For Unto Us a Child is Born from Handel's Messiah--which is an awesome piece of music.  (You can check it out here)  I thought it would be a great piece to use for my Christmas art in my seasonal frame on the mantel.  Although truth be told, its been less seasonal this year and more...oh, its probably time to change up the frame, its not Easter any more.  So, if you are looking for a quick way to add some of the real meaning of Christmas to your decorations, give this one a go.  I printed it 8x10, but the file size is big enough that it should be able to print 11x14 without pixelating.  Once you click the link, find the print called Handel Chalkboard.  Merry Christmas!

Link to file, click here.

Tuesday, November 25, 2014

Christmas Water Bottle Labels

Pin It

I enjoy singing, especially with a choir and especially at Christmastime.  I like to give a little something to the ladies I sing with, but none of us really NEED anything, and even small items can get expensive when you buy 50 of them.  So, this year I thought why not a bottle of water?  We're singers, so we are always needing a swig of water during rehearsal.  I made some cute labels, bought a flat of water from Costco and included a note that I made and printed on the computer to go along with the water.  I've seen the labels go around other containers too (salsa, candy etc...) might make for a nice neighbor or teacher gift.  They are sized to print on a regular 8.5 x 11 piece of paper.  Just print, cut the strips and tape them around the bottle.

You can download the labels on my site, just look for the files called "bottle" in the list.


Sunday, December 22, 2013

Nostalgic Cookies Part 2: Rosettes

Pin It  
My last post was about cookies that my dad's mom made.  This post is about my other grandma-a great cook--who was always certain that she hadn't made enough cookies (maybe its because we  filched cookies while she wasn't looking).  I thought I'd give Rosette cookies a try--its been many, many years since I've had them, and for a first try, these seem pretty good (not Grandma perfect, but a worthy effort).

Batter
1 egg
1/8 tsp salt
1/2 Tbs sugar
1/2 cup flour
1/2 cup milk
1/2 tsp vanilla


Beat the egg, salt and sugar then add the remaining ingredients and mix until smooth (I used my hand mixer for about 1 minute).  Refrigerate batter for about 30 minutes.

Heat the oil to about 350 degrees.  Place your rosette iron in the hot oil for about 30 seconds.  Since I had 2 irons I kept one in the oil while I used the other one. 

To make the rosettes:
Take the iron out of the hot oil and tap off excess oil on nearby paper towel.
Dip the iron into the batter, leaving at least the top 1/4 of the iron out of the batter. Hold the iron in the batter for about 3 seconds.
Dip the battered iron into the hot oil for about 12-18 seconds.
Tap off the excess oil and use tongs to gently pull the rosette off the mold.
Flip the cookie so that the oil drips out of the indentations.
When ready to serve, sprinkle with powdered sugar (or a mix of granulated sugar/cinnamon)

I struggled to keep the oil the right temperature, but for the most part, the rosettes worked out fine.  They taste good, and that is the important part!  Merry Christmas.


Friday, December 20, 2013

Nostalgic Cookies Part 1-Raisin Filled Cookies

Pin It  
This Christmas season I have been trying to stay very focused on the true meaning of Christmas--which has meant less shopping, less decorating and more reflections on the birth of the Savior. I also have been reflecting on what a great family I have. As a kid, I have fond memories of celebrations with my grandparents. Today's post is in honor of my Grandma--an Idaho farm wife who was great at making jams, jellies...and raisin filled cookies. I am sad to say that I couldn't find my grandmother's recipe (although I'm still working on it), so I did some searching online and found this one from Brown Eyed Baker, which I tweaked a bit.


The recipe turned out great.  I can imagine sitting in Grandma's kitchen eating cookies, so I think that is a success.  Stay tuned for Nostalgic Cookies Part 2-Rosettes

Dough
1 cup sugar
1/2 cup margarine (don't substitute, look for Gold n Soft)
1 tsp salt
1 egg
3 cups flour
1/2 cup milk
1 Tbs sour cream
2 tsp baking powder
1 tsp baking soda
1 tsp vanilla

In a stand mixer, cream the sugar and butter.  Add the salt, egg, milk, sour cream, baking powder, baking soda and vanilla-mix until combined. Turn off the mixer and add all 3 cups of flour.  Turn mixer on low to avoid a cloud of flour, and mix until a soft, sticky dough ball is formed.  The dough reminds me of a very soft sugar cookie dough.  Wrap the dough in plastic wrap and refrigerate for at least 30 minutes while you make the raisin filling.
 
Filling
1/2 cup sugar
1 1/2 Tbs cornstarch
3/4 cup water
1/2 Tbs lemon juice
8 oz of raisins (that is about 1 1/2 cups, but I use a kitchen scale)

In a small saucepan, mix the sugar, cornstarch and water and whisk until smooth.  Add the lemon juice and raisins and bring to a boil on medium heat.  Simmer while stirring for about 5 minutes (the raisins need to get super soft and plump).
 
Dust your counter top with flour and roll out about 1/3 of the dough to 1/8 inch thick.  Use a round cookie cutter (mine was about 2" circle) to cut the cookies.  I used a well floured spatula to get them off the counter and placed them on a parchment lined baking sheet.  Use a couple of spoons to get the filling out of the pan and smoothed onto the cookie (as the filling cools, its a bit sticky and hard to get off the spoon and I didn't want to use my finger).  Top the cookie and filling with another cookie.  I lightly pressed the edges of the cookies together, but I wasn't careful about it--the dough is soft and it just bakes together.


I baked mine at 375 for about 12 minutes (I rotated the sheet about half way through the process)--its important to only let the bottoms get a bit golden because you want the cookie to be soft, not crunchy.
This recipe made about 2 1/2 dozen cookies.  I've already eaten 3.  I had to put them in the freezer so there will be some left for the family Christmas celebration. 


Saturday, December 1, 2012

Joy to the World Chalkboard Prints

Pin It
Chalkboard art seems to be very popular these days. I'm getting ready to deck the halls around my house and decided I wanted to go with this look for my mantle art. I thought about painting up a board in chalkboard paint and actually writing on it, and I toyed with doing vinyl, but nope, I decided to do some Photoshop instead-not sure it was any faster- but it is easier to share :)


So, the first thing I needed was a chalkboard background, which it turns out I had to make because if you want to print something in large format, no such background exists out on the internet.  I found some great instructions here--but I've uploaded my version so  you can just use mine if you want.  It is HUGE, 20x30 and at 300 dpi, so you can print it (I think it's a 12 MB file).  

I did the Joy print in both 20x30 and 8x10.  I suppose you could try it at other sizes too--should have plenty of pixels to print whatever you want.  I'm doing the giant size from Costco for $8.99 and will put it up in the mirror frame already on the mantle.


Downloads

Blank Chalkboard background 20x30
8x10 Joy to the World
20x30 Joy to the World

Tuesday, November 27, 2012

Christmas Bucket List

Pin It


Pinterest is full of Christmas Bucket Lists or Advent Activities--so here is my version.  I've created a check list style, which is great if you just want to pick something and do it as you feel like it.  I also created some labels, which would be great to stick on cardstock or scrapbook paper and put in a jar to randomly pull out (or slip into an advent calendar).  Since I live in Salt Lake, I added a few local things to my list, but for my friends and family in Idaho I tweaked one for them too.  I've actually already checked several of these off already (including a picture with Santa at Disneyland :)

I decided to keep mine pretty simple, just black and white- so feel free to print it off on colored paper to make it more festive.  I've uploaded the Word version, just in case you want to use it as a template for your own list. 

I thought it might be a nice gift for neighbors; the activities are family-centered and pretty inexpensive.

Click on one of the links to get the PDF of the item. 

SLC Label style (print on Avery 5160 size labels)
SLC List style
Idaho Falls Label style (print on Avery 5160 size labels)
Idaho Falls List style

Microsoft Word version (if you don't have the same fonts as me, you'll have to make some changes).

Example:  Salt Lake lists include the "ZCMI Candy windows" which are now City Creek Candy Windows and Gardner Village.

Idaho Falls lists-includes Winder Dairy and Candy Cane Lane!


Tuesday, January 3, 2012

More Subway Art

Pin It


I'll be adding to this post later this weekend, but I'm uploading all my calendar subway art... (sometimes I use my own in my decorating, sometimes I use the ones from Eighteen25, or from other places). More are coming-these are done in PhotoShop Elements.

Here is the Google Doc with the large files where you can download them. They will print as big as 8x10. If you need a larger file, just let me know.

Saturday, December 10, 2011

Licorice Caramels

Pin It

One of my favorite memories of my grandpa is that he always had licorice in his front shirt pocket (he wore those Western style shirts with snaps on the pockets). My brothers and I all love black licorice--so it was no surprise that licorice caramels are a big hit around our house. I first had these tasty treats in college when my roommate made them for me. I'm pretty sure the recipe is from The Lion House Dessert cookbook, but I got it from Melissa and haven't been able to come to a family Christmas without it since. Even if you don't think you like licorice, you very well may love these (you can make the recipe without the anise and just use vanilla...or if you are busy like me, you make one batch of caramel and divide it in half and do both in one fell swoop). On years that I get my act together early, I wrap the caramels individually, other years I cut it into squares and stack in wax paper layers. I usually cut up my wax paper squares while the caramel is cooling in the pan.

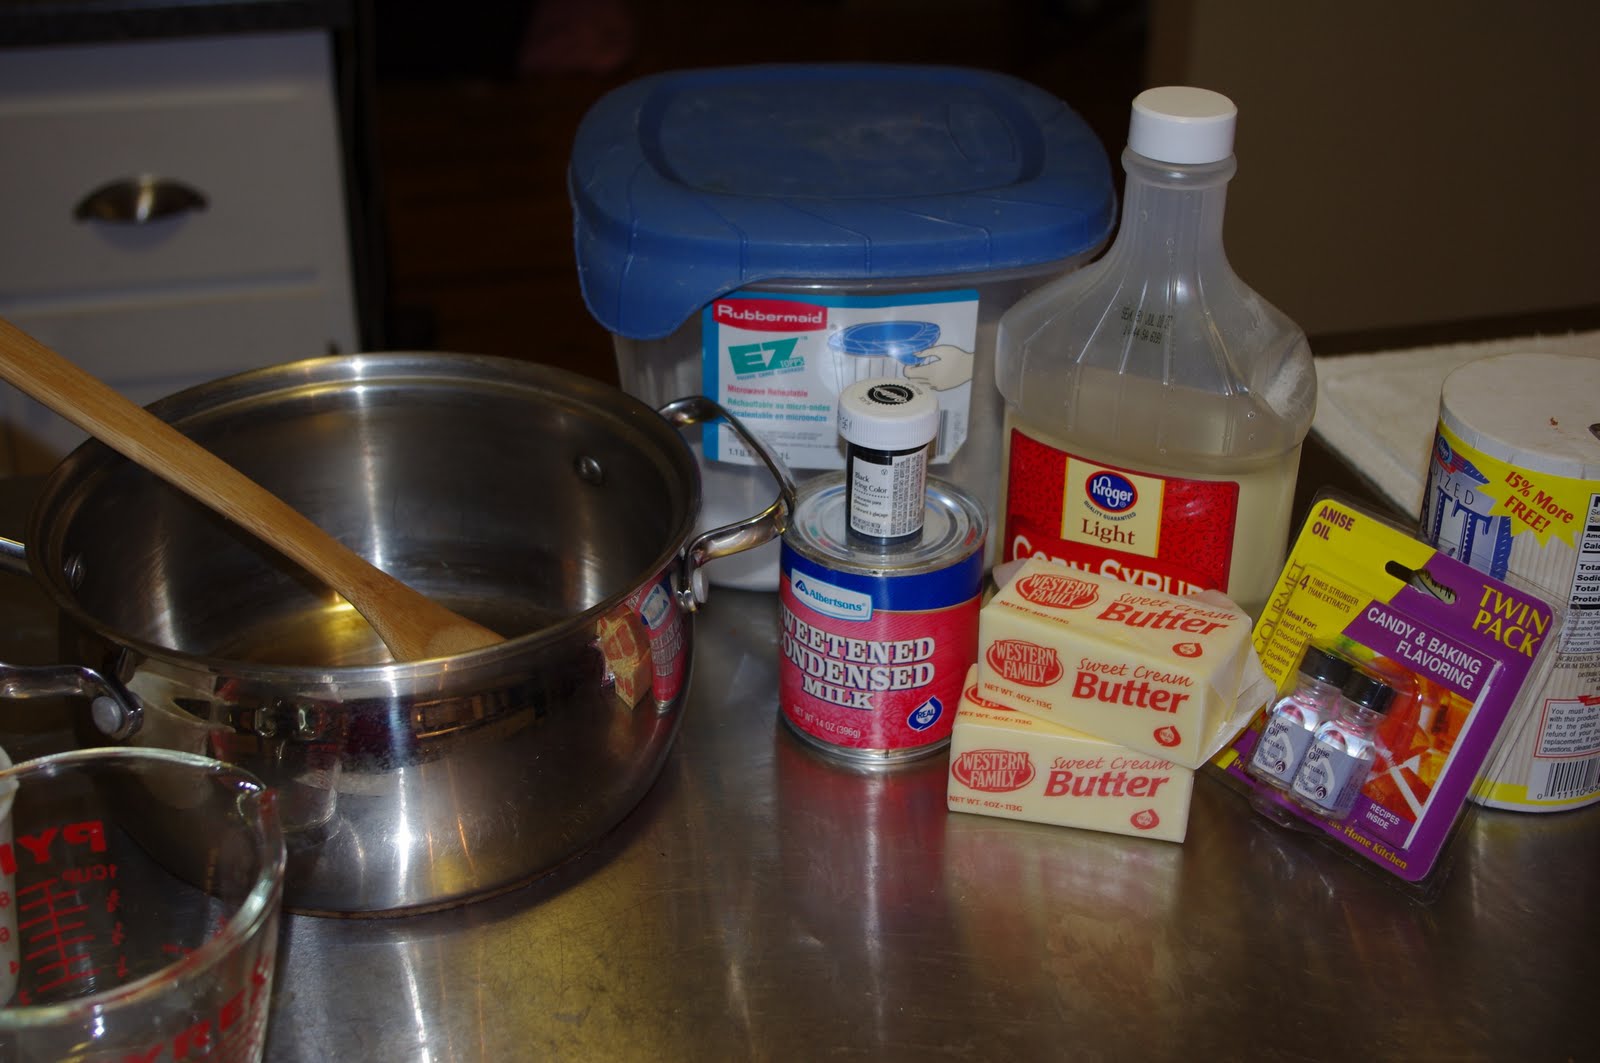
Ingredients

1 C. butter
1 1/2 C. light corn syrup
2 C. white sugar
1 can sweetend condensed milk
1/4 tsp salt
1 tsp black food paste
1/2 tsp anise oil (NOT extract)

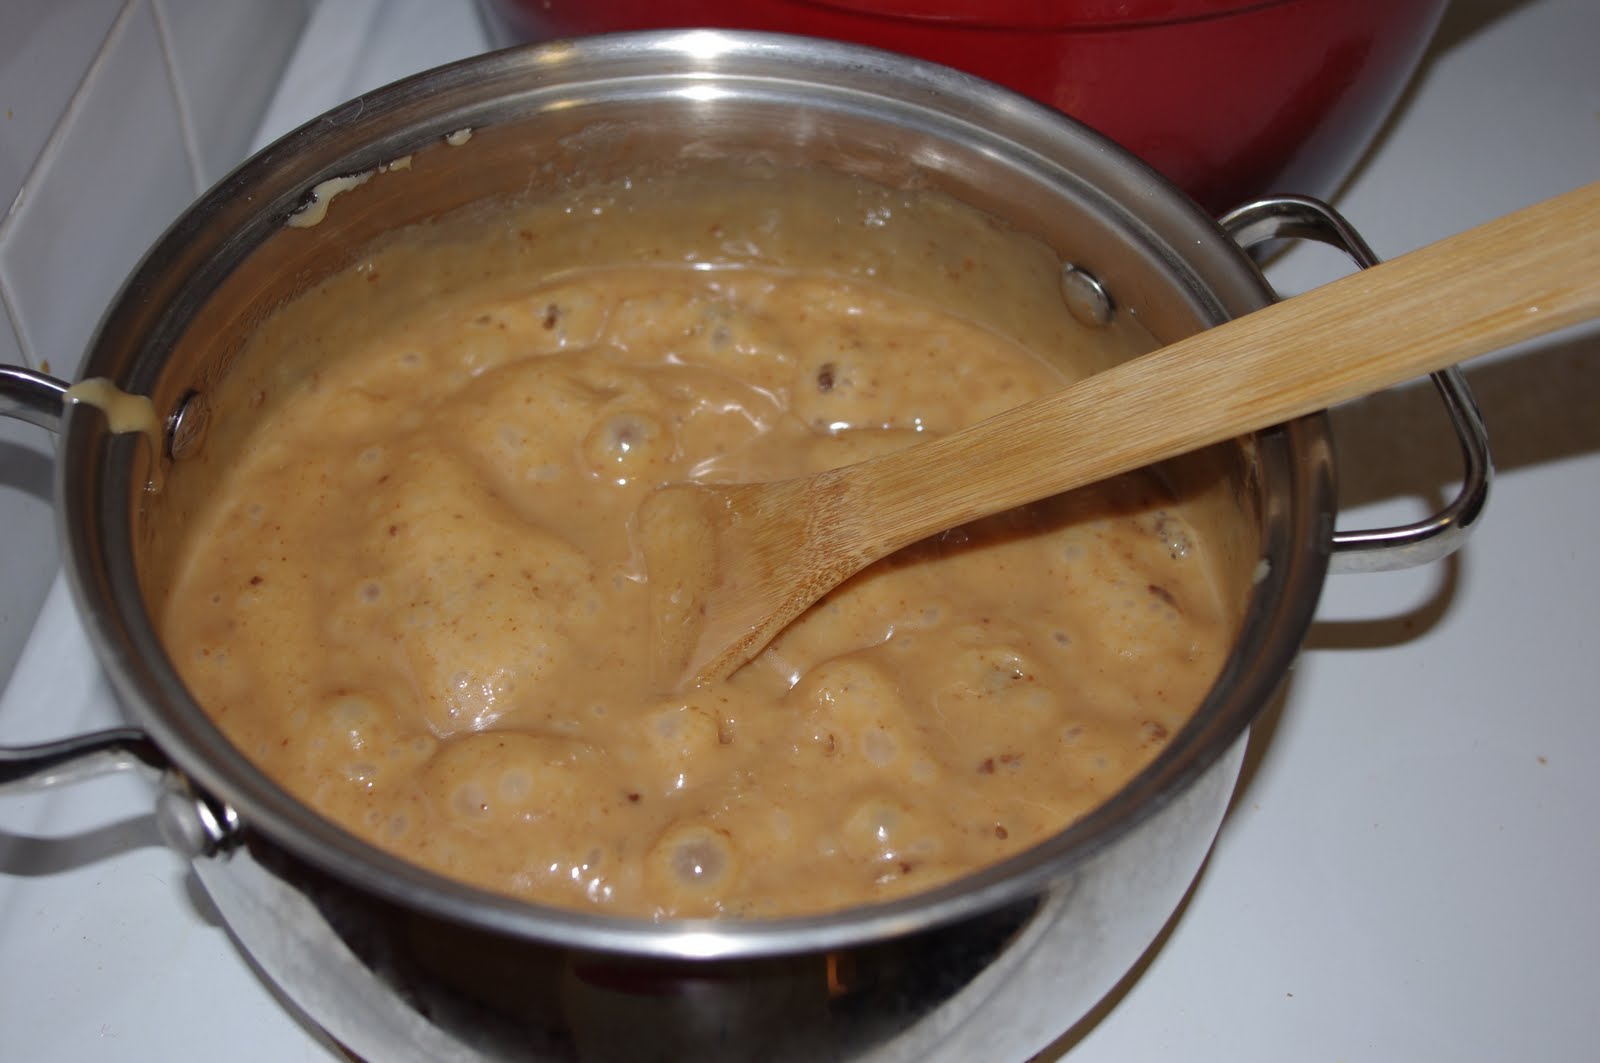
In a heavy 6 qt saucepan mix the butter, syrup, sugar, sweetened condensed milk and salt. Cook on medium-low heat, stirring constantly until mixture reaches "soft ball" stage and a medium caramel color (around 225-235 on a thermometer...I never use one, I use a bowl of ice water and test it). Don't try and make the process faster by turning up the heat, it will burn.


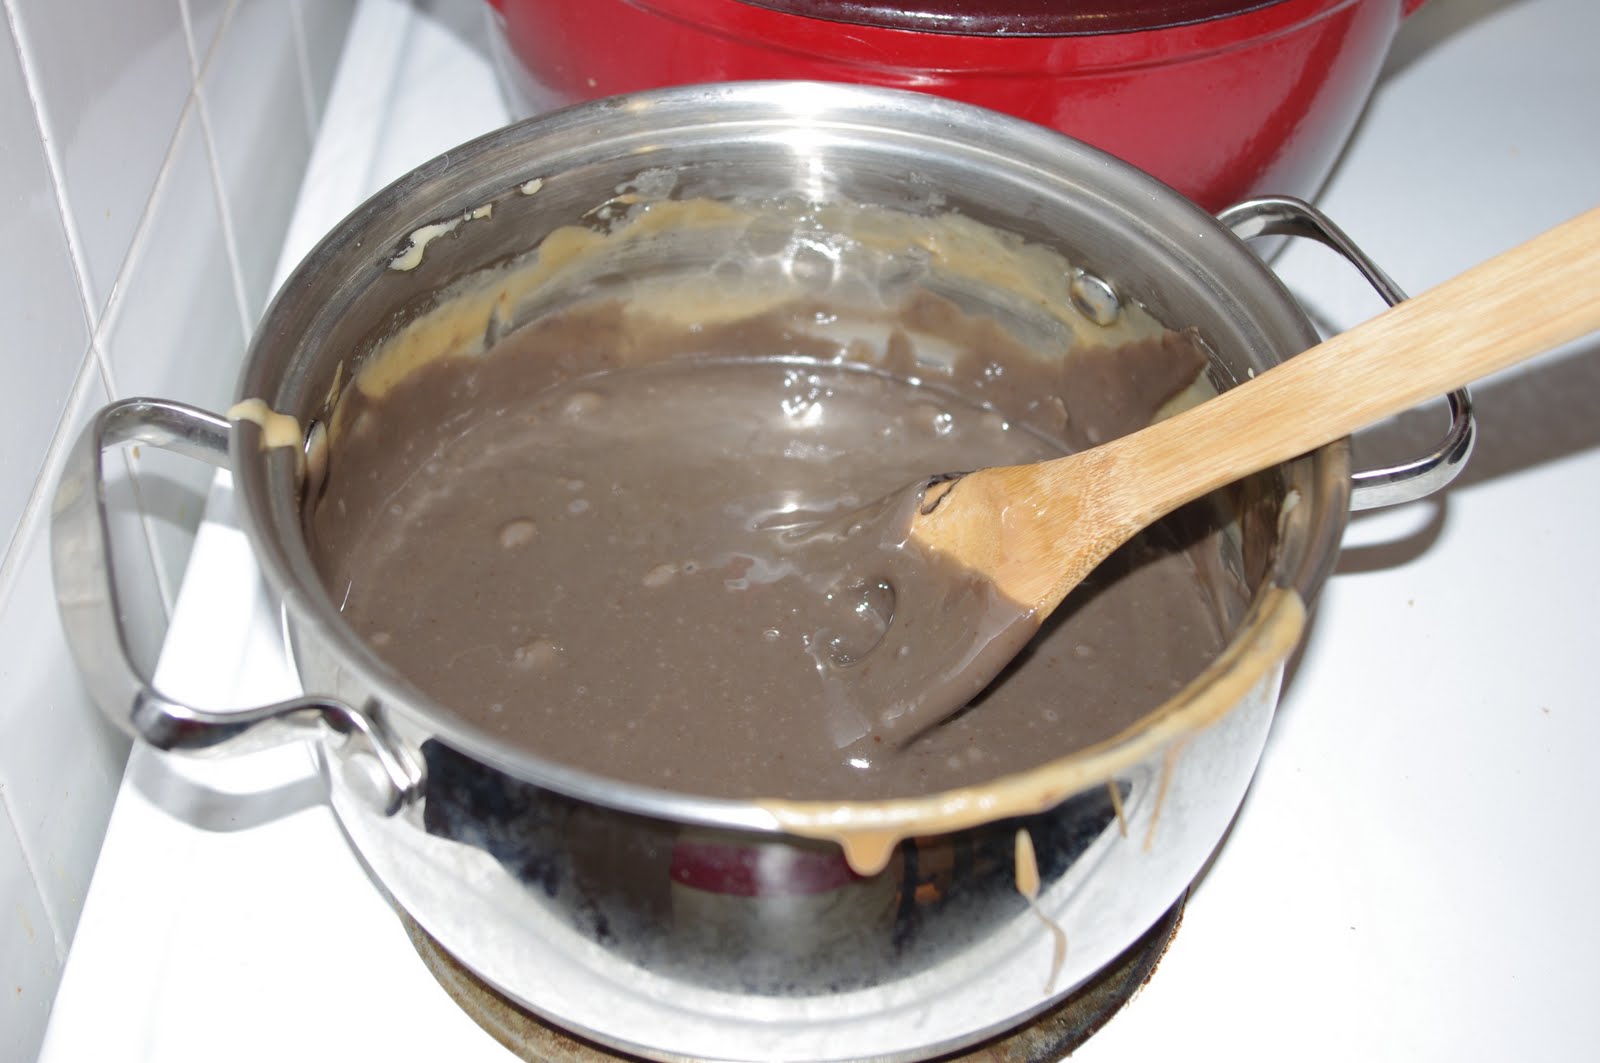
Remove the caramel from the heat and add the anise oil and food paste. Let the caramel cool a 20-30 minutes in the saucepan before pouring it into a well-buttered cookie sheet/cake pan (if you pour super hot caramel, it will melt the butter and stick to the pan). Do NOT try and pour the mixture directly on wax paper, it will melt the wax and stick to the paper (learned the hard way). I usually use my kitchen shears (sprayed with Pam) to cut them into squares.