Showing posts with label bedroom. Show all posts

Saturday, February 27, 2016

Cheater Faux Pallet Wall

Pin It
I have way too many "inspiration rooms" pinned to my boards for my bedroom.  I really like the idea of a dark accent wall behind my bed--but I've been really enamored of the rustic/modern look of weathered barn wood (I've been re-working my living room and I've built an industrial shelf with lumber and plumbing fittings, post coming eventually).  I also know I'm a commitment-phobe when it comes to decorating. Maybe its more like a short attention span for trends. My last bedroom update resulted in cute wall vinyl decoration.
 

At any rate, I was leaning toward paint since I know I can change it out really easily, as opposed to nailed-on boards.  And then I saw this bulletin board paper at JoAnn Fabric (in the "kids craft" section).

http://www.joann.com/busy-kids-learning-fadeless-designs-weathered-wood/10795243.html#q=wood+paper&start=33
JoAnn

The ideas started flowing.  The paper comes in a roll 12 feet x 4 feet and was only 7.99--if you use your 40% off coupon, it was only $5 a roll including tax.  Bargain!  I might have preferred a darker color wood, but on the plus side, this weathered color blends nicely with the rest of the paint in my room.

I measured my wall 10.5 feet across and its vaulted, so 89.5 inches on one end and 100 inches on the other.  Math was required for this project.  I calculated the rise/run of the slope of my ceiling and found that I needed to slope 4.25 inches for every 4 feet.  I needed 2 rolls of paper, so I opened them both and lined up the "boards" and used a long straight-edge to draw the angle and cut the top of the paper.


I used painters tape and clear thumbtacks to hold up the top while I used a level to make sure things weren't all skiwampus.  Once I got the first sheet up, I tacked up the 2nd sheet and carefully matched all the seams of the boards and smoothed it up on the wall.  I used more painters tape behind the paper.

I cheated behind the headboard--the paper only goes down about 8 inches behind the bed.  That left me with enough of the roll of paper to do the last bit of wall (since the wall is 10 feet and the paper combined to make 8 feet).  I overlapped the paper and once again lined up the boards and tacked it up.

So, for a couple hours total (that includes measuring, math calculations, furniture moving and pinning/taping) I've got a pretty good facsimile of a pallet wall.  I bought two rolls of paper (check that both are in the same dye lot), so I only spent $10 and I still have paper left over-enough for a "headboard" for a twin size bed maybe. 


Monday, November 4, 2013

Rustic wood nightstand

Pin It


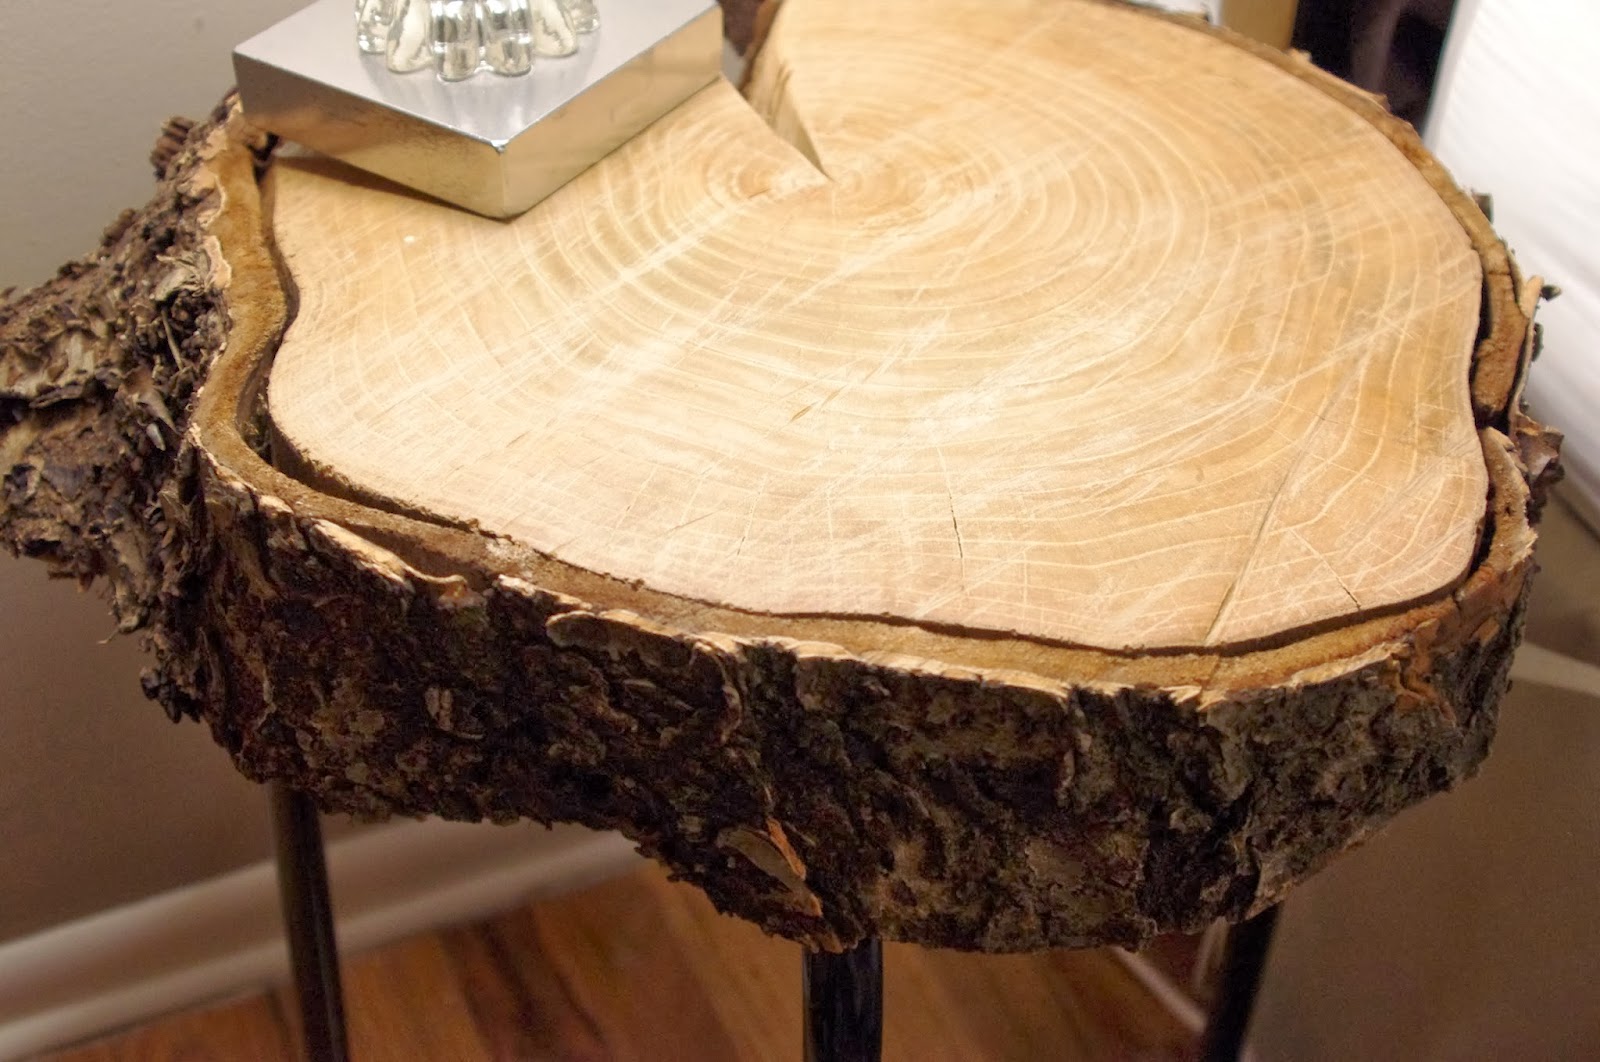
I've been a fan of a blog called Liz Marie...and she has a great way of blending traditional, modern and rustic styles all together, and it all looks great mixed up!  Taking some inspiration from her designs and another blog  I decided to give this project a try.  A co-worker was kind enough to bring me some slices of a tree that he was taking out.  They were beautiful rounds of wood back in June...and when I came home from a trip, both slices had split as they dried (I think a possible solution would be to use older wood...a log that had dried for a year before being sliced into rounds).

My tree slice is cherry, and may I say cherry is HARD wood.  I started by using my nail gun to make sure the bark was firmly attached (not that it seemed like it was coming off, but just to be safe).  I also used a stiff brush to clean up any stuff on the bark--I wasn't gentle with the bark at all--I figured if it was going to come off, now would be the time to address that.  Next, I started the sanding with 36 grit sandpaper and my palm sander.  You know its super hard wood when hardly any sawdust is created.  I eventually got to 80 grit, but I didn't think it was going to get any smoother (took about 1 1/2 hours of sanding).  I had hoped to sand out the lines from the chain saw, but seriously, cherry is hard.  I guess that bodes well as a table top though.  It is very smooth to the touch and has no slivers.


Using the IKEA marius stool ($5.99) as my base, I flipped the legs of the stool upside down and attached the wood to the legs.  I replaced the screws that came with the stool with 3" wood screws.  I did pre-drill the holes since the wood was SO hard there was no way I was going to be able to muscle in the screws without the pre-drilling.  Did I mention cherry is hard?  Maybe next time I'd use pine :) As my one mistake in the project, I was using a 5" bit and drilled all the way through the log in one of the holes, so I had to fill that in.  Darn it.

I coated the top of the log with Minwax paste wax and buffed it the next day.  I decided that the split just adds rustic character (which I could also cover with a lamp).  This table is super stable and could be used as a stool if you wanted, but its pretty heavy. 

Really, it wasn't a difficult project, just lots of sanding.  I like it-how about you?

Sunday, April 28, 2013

Easy Rustic Headboard

Pin It

I was in the mood for building something, and my brother had recently move into a new place and needed some grown up furniture--so I decided on a headboard.  I was really inspired by the planked walls I have seen around on Pinterest made out of pallets-but no way am I going to nail and glue boards up on the wall...especially for my brother since he's in a rental.

I found the plan on Ana White's website, where all the plans are free!  I didn't take any pictures of the process, but the plans on the website are pretty useful.  I used a nail gun to make this task go super fast.  Really.  Once the boards were cut, it was about 15 minutes. 

Tip #1-Don't use fencing unless you want to spend a lot of hours sanding (sure its super cheap, but dang, I spent a couple hours with the palm sander).  I spent about $12 in materials, but I think I should have splurged to the $20 it would have cost to buy slightly nicer lumber.

Tip #2-Don't cut the trim pieces that go around the front until AFTER you've got the horizontal boards all assembled.  Ditto on the extra support piece for the leg.  I cut all my wood in advance, and perhaps its my novice skill, but things didn't line up the way I would have liked.  I ended up cutting a couple new pieces because the pre-cut ones were too short.

Finish-I tried what I had hoped would be a cool method for making a grey/weathered stain, but it didn't work.  I put a piece of steel wool in a mason jar with white vinegar for 2 days.  It ended up a nice rust color, but not grey.  Maybe if I had used it sooner.  Oh well.