Showing posts with label dessert. Show all posts

Sunday, July 5, 2020

Key Lime Pie Frozen Custard

Pin It
Key lime pie is one of my favorites.  I love the tart/sweet combo.  This summer, since we're still all social distancing and spending way more time in our own kitchens, I started experimenting with homemade ice creams.  I have a Cuisinart ice cream maker (from Costco) and had been keeping the canister in the freezer thinking I'd like to make ice cream now that it was hot outside.  Fourth of July weekend was a perfect excuse. 

This custard-based ice cream is easy, but you need to plan ahead.  You CAN make it the day you want to eat it, but if you can mix it up the night before you'll have more flexibility in having it ready when you want to eat it. You need to plan for about 30 minutes making the custard, 2-4 hours to cool it (I start with an ice bath and then the fridge to speed things along), 30 minutes to churn and then 3-4 hours to freeze before serving (ok, you can serve it right after churning as a very soft serve).


This recipe uses a little bit of corn syrup, which helps reduce ice crystal formation, so that you don't get grainy ice cream.

Ingredients
1 1/2 C. half and half
1 C. heavy cream
3/4 C. sugar
2 Tbs. corn syrup
1/8 tsp. salt
5 egg yolks
2 Tbs. lime zest (around 3-4 limes)
1/2 C. fresh lime juice

Crust cookie "add in"
5 whole graham crackers
3 Tbs. sugar
1/4 C. melted butter

Equipment needed
Medium saucepan
Medium bowl
Fine mesh strainer
Citrus zester
Ice cream maker
8x8 baking dish or a large loaf pan
Thermometer (opt)

Get things set up before you start so that you can work efficiently.   Does your ice cream maker need the canister to be frozen in advance?  Make sure you've got that taken care of!

1. Crack the egg yolks into a medium bowl and whisk, set aside.

2. Zest the limes, set aside.

3. Juice the limes, set aside.

4. Make the custard.  In a saucepan add the half & half, cream sugar,  lime zest, corn syrup and salt.  Heat on medium stirring constantly until sugar is dissolved and you start to see bubbles around the edge-do NOT boil.  Slowly pour a thin stream of the hot cream mixture into the egg yolks, whisking constantly.  This will bring the eggs up to a higher temperature without scrambling them.  Pour the hot mixture back into the saucepan and keep cooking on medium and stirring with a wooden spoon until the custard coats the back of the spoon (its about 175-180 degrees)--about 3-5 minutes of cooking.  Do NOT let it boil.  You'll notice it become thicker and bubble around the edges.   While it cooks, wash out the bowl that held the eggs so it is ready for the finished custard.

5. Pour the hot custard through a fine mesh strainer back into the clean bowl--this will strain out the zest and any eggy bits.  Also pour the lime juice into the custard through the strainer (catches any seeds or pulp). Stir it up.  Resist licking the spoon.   Cover with a piece of plastic wrap placed right on the surface of the custard to avoid a film forming.

6. You need to cool the custard down to 40 degrees.  You can just refrigerate it overnight or you can speed things along by putting the bowl into a bowl of ice water. 

7. Make the crust cookies.  I like to add the cookie bits to the ice cream, although you could leave them out or just sprinkle them on a bowl when serving.  In a gallon zipper bag add the graham crackers and crush with a rolling pin.  Add the sugar and butter and mix right in the bag.  Pour onto a parchment lined baking sheet, press into a giant cookie that is about 1/4 inch thick and bake for 5-7 minutes  at 350 until golden.  Let cool.  Crumble.   I added about 1 T of shredded coconut to my mix before baking because I love it, but I know lots of folks don't.

8. Churn the custard!  You are getting closer.  First, get the 8x8 baking dish and line it with plastic wrap.  Get your ice cream machine going (mine requires that I freeze the canister at least 24 hours, so I just store it in the freezer).  Follow the directions on your machine and add the cooled custard.  It will take around 30 minutes to become a very thick soft-serve. 


9. Scoop the custard into the prepared 8x8 dish, smooth it out, sprinkle it with the crust cookies and press them in.  Cover with more plastic wrap and pop into the freezer for 3-4 hours.  This will let it firm up enough to scoop and put on cones.   You will definitely want to lick the dasher from the ice cream machine at this point. 
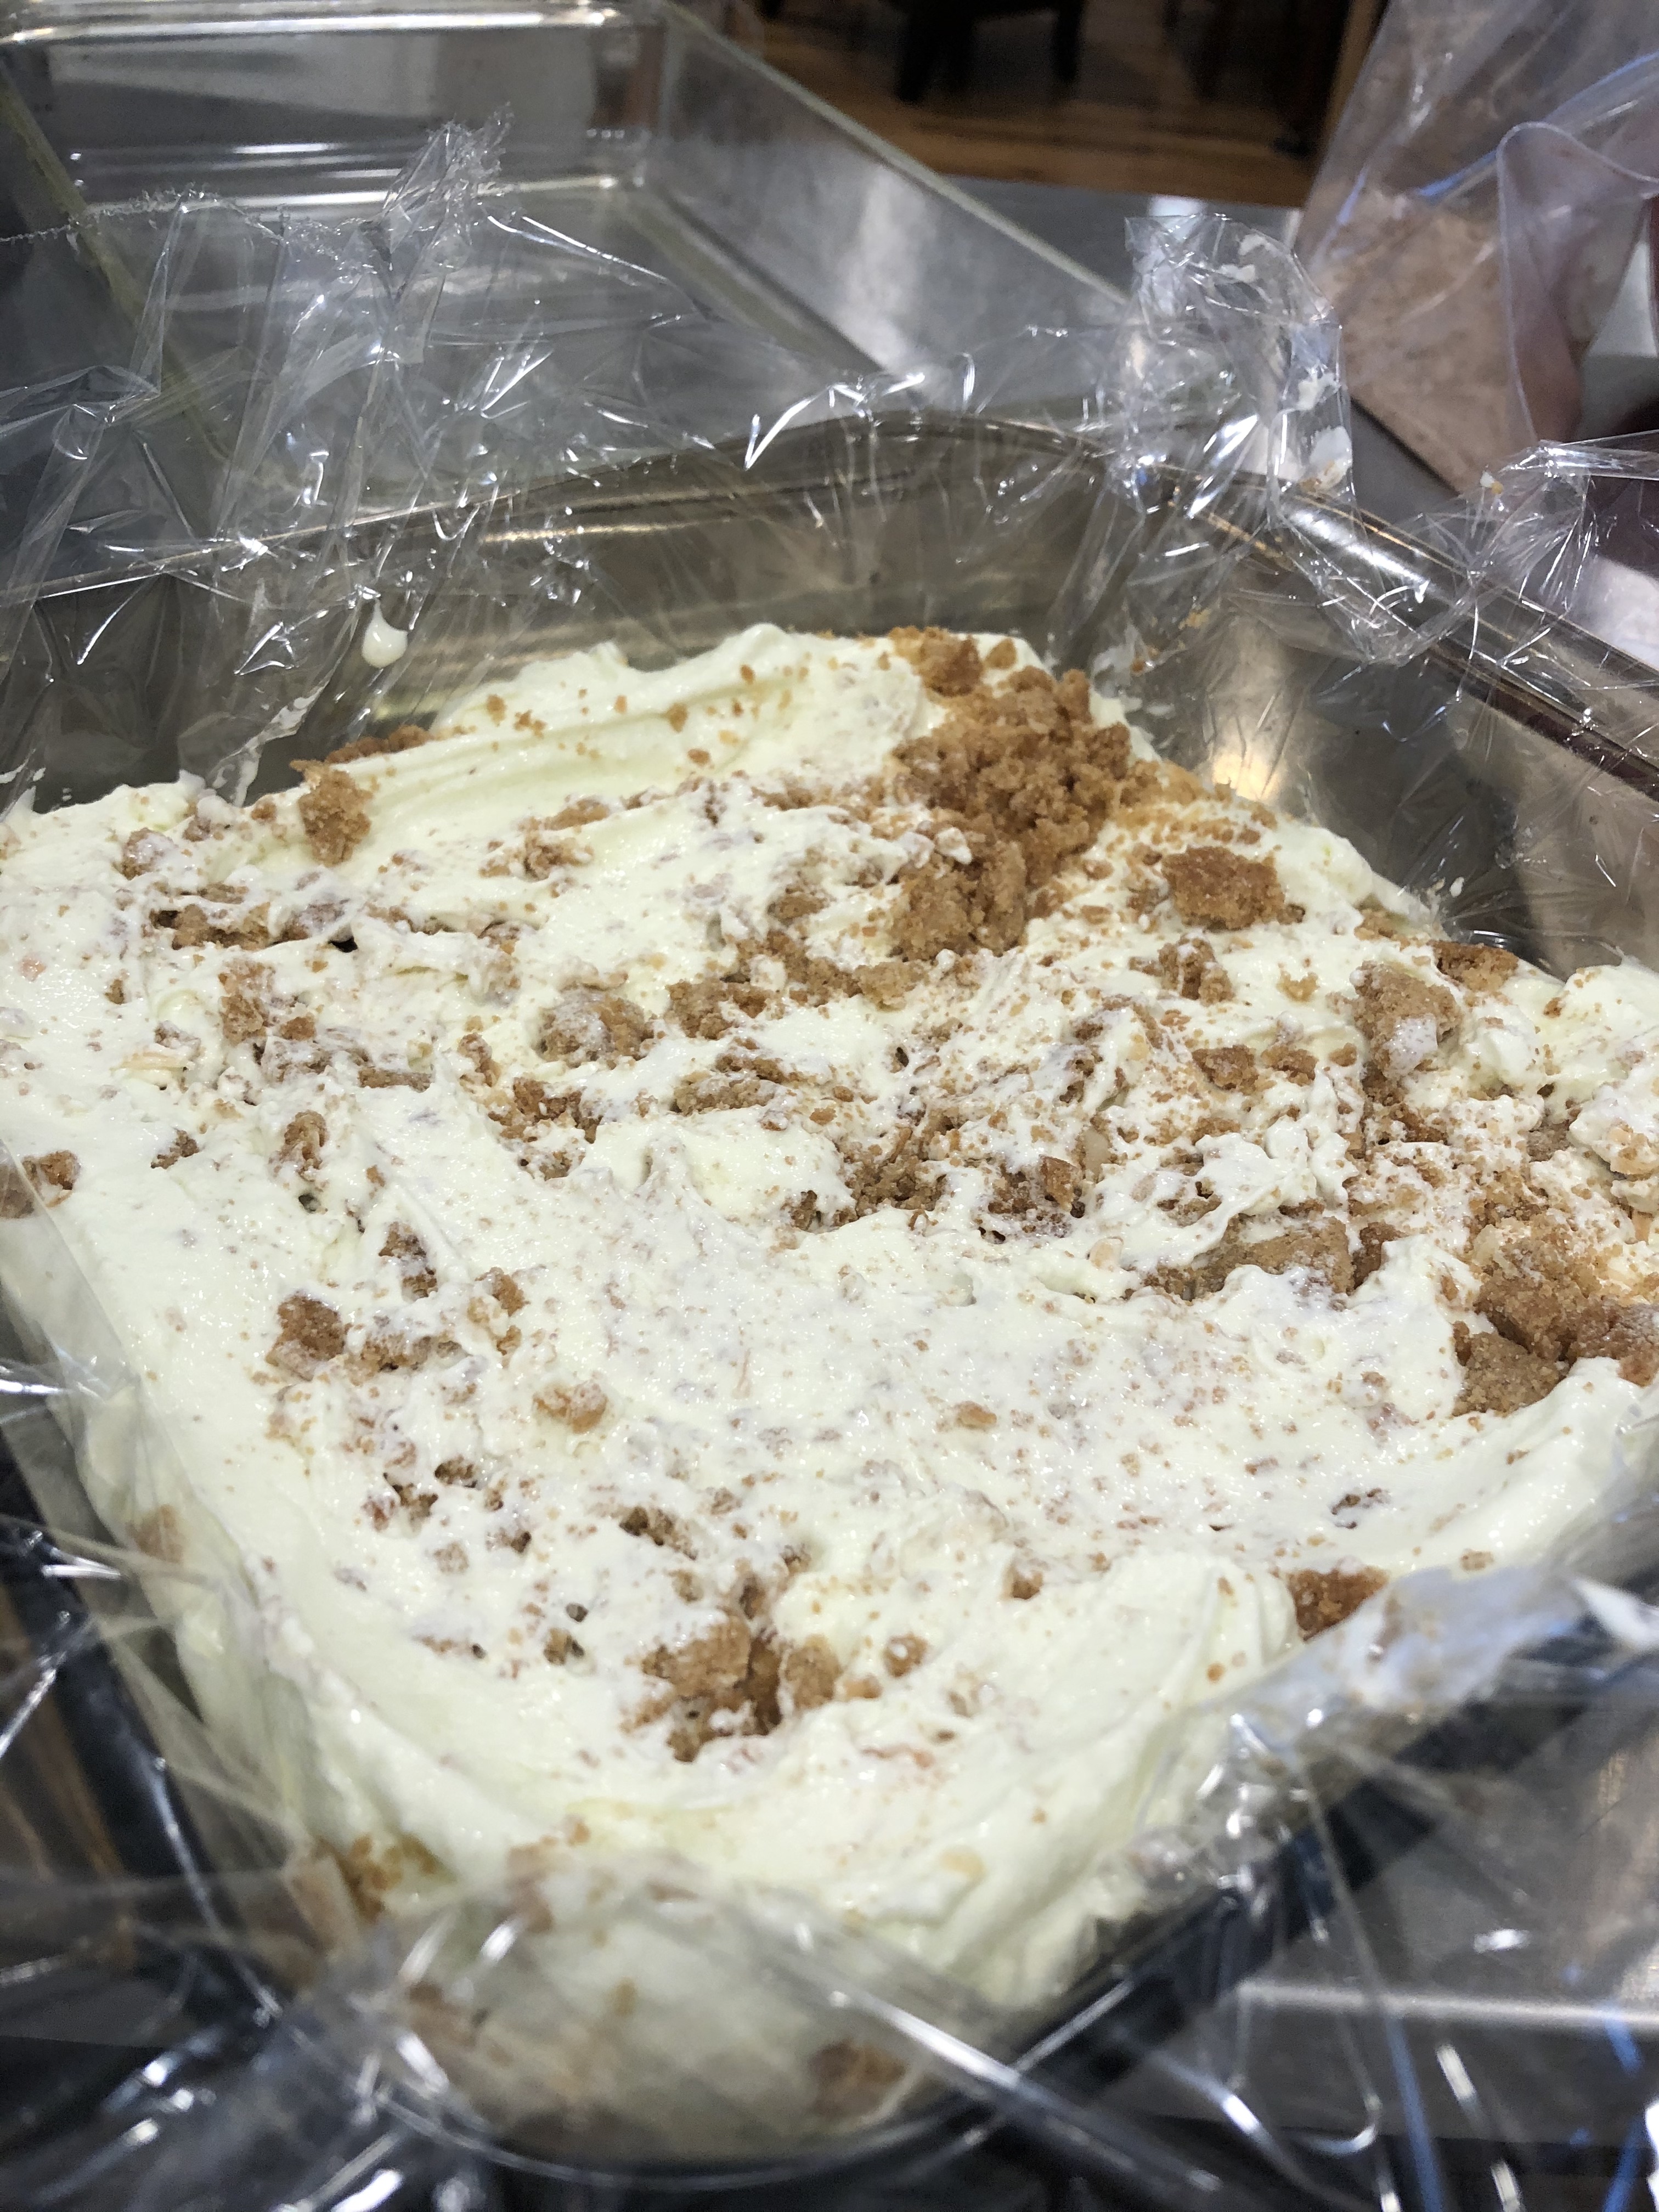
This ice cream is so delicious.  Serve it on your favorite cone or just dig in with a spoon. 


Lemon variation
If you also like lemon meringue pie, you could do this with lemons instead.  Increase the lemon juice to 2/3 C. Everything else is the same.  I made this version too and left out the crust cookies--reminded me of Aggie Ice cream from USU.  Only better.  And closer to home.


Tuesday, December 13, 2016

Mickey Mouse Rice Crispy Treats

Pin It

You may have noticed my Disney theme lately...a recent trip is still in my memory and I'm trying to relive my vacation.  Tis the season for gifts for friends, neighbors and co-workers.  In my office, it can be comical how quickly a small gift shows up on your office chair when you've been around the corner only a moment (I have really great co-workers).  I decided to do some tasty treats for everyone (I have nearly 35 people in my department)--one treat is healthy clementines and the other is less healthy but very tasty: rice crispy treats. 

In the cafeteria in my building, they make the most delicious crispy treats.  Soft and chewy and buttery--oh so good (if you really want one, you have to wander down by 10am or risk them being all sold out by the time you get down to lunch).  I asked the Queen Crispy Treat Maker (Jamie) what the secret was--more marshmallow?  or butter?  or secret sauce?  Nope, she says.  Just don't melt all the marshmallows.  Instead reserve some of the marshmallows and stir them in with the cereal and the melted marshmallows.  Genius.


Ingredients
5 C. rice crispy cereal
16 oz pkg mini marshmallows (about 10 cups)
5 Tbs. butter
1/8 tsp salt


Before you start, line an 8x8 pan with parchment paper that you've sprayed with non-stick spray. (I used my 9x13 pan but didn't fill it on one end).

In a large pot melt the butter over medium heat then add 8 cups of the marshmallows and the salt.  Stir constantly until all melted and smooth.  Pour the cereal into the pot and stir a couple times, then dump in the rest of the marshmallows and stir everything up.


Dump the sticky mix onto the parchment lined pan and use a measuring cup or back of a big spoon to press into the pan (spray the cup/spoon with non-stick spray first).  Don't press too hard, just enough to have it stick together.  Cool completely.  Flip the cooled treats out of the pan and then use a Mickey Mouse sandwich or cookie cutter to make your cute treats.  I had to spray my hands and the cutter to keep them from sticking.


Thursday, July 21, 2016

Coconut Chia Pudding

Pin It
I've been wanting to try the chia pudding trend--the images on Pinterest all look so tasty, but I was worried that looks would be deceiving and I'd be sad to waste good ingredients.  As luck would have it, I was waiting for a flight and the cafe near my gate was a place called Naked Food with all kinds of whole food choices, including a chia pudding with mangoes. It was a worthy purchase--it was so tasty!  So I headed home to replicate it at home with great success.

This stuff is super simple, and while I've only tried it with the coconut milk, other recipes around the internet use all kinds of milks.


2 C. coconut milk (I used canned full fat Thai coconut milk, not the box kind)
1/2 C. chia seed
1 tsp. vanilla
1 packet of stevia

Whisk it all together and refrigerate for at least 3 hours.  The seeds swell and gel the liquid, but mine stayed a bit crunchy.  Top with fruit and enjoy.  I divided it into 6 servings. I hear that if you have a super blender, you can puree the mix before refrigerating and you'll end up with a smooth pudding.  Maybe I'll try that (and maybe I'll try the box coconut milk and some chocolate).


Sunday, May 15, 2016

Blueberry Sour Cream Custard Pie with Olive Oil Crust

Pin It


 For my birthday this year, I had a delicious dinner at a fun restaurant called The DoDo.  They have very tasty food options, but they are well known for their great dessert menu.  I chose to be particularly indulgent that night (hey, it was my birthday!) and got the Sour Cream Blueberry pie. I was expecting something like a lemon meringue with a blueberry topping, but it was completely different...and really, really good!  Instead, it was somewhere between a blueberry pie and a cheesecake, all mixed together with a nut topping.

Some searching around the internet showed something that resembled it called a blueberry custard pie--so I thought I'd give it a shot to see if it was like the dessert in my memory.  I'm happy to say that this version is a pretty good facsimile!  Its not hard to make--not fussy or temperamental, and the ingredients are not exotic either.  You do want to give yourself about 20 minutes of hands on time, 40 minutes for baking and at least 2 hours to refrigerate before serving (try making it before bed and it will be ready for the next day).

I love pie--but I'm really lousy at pie crust.  I usually buy it ready made.  At a large Sunday dinner at my friend's home a few weeks ago, pie was served with a flaky, delicious crust.  I asked the baker what the secret was and she said the crust was "no fail" and the secret ingredient was olive oil.  Yup, olive oil.  I had never heard of such a thing.  She also didn't roll out the dough, instead, she pressed it straight into the pie pan.  Hmmm, intriguing.  Well, I have to say, success!  I tried it today and it was very tender and delicious (and the olive oil flavor was extremely mild and not noticeable when combined with the filling).  I altered Sherry's crust recipe (partly because I didn't write it down completely when I talked with her, and because I thought adding sugar sounded like it would make more of a cookie style crust).

Pre-heat the oven to 400 degrees.

Pie Crust
1 1/2 C. all purpose flour
1/4 tsp. salt
1 T. sugar
1/2 C. olive oil (frozen for about 30 minutes)
2 T. cold water (can sub milk if desired)

In a food processor add the dry ingredients and pulse to mix.  Now scoop in the cold olive oil (it becomes a thick liquid when partially frozen) and water.  Pulse until you have combined the ingredients and it looks like a wet sand.  Pour the mixture into the pie pan and press up the sides and the base (I used a 9" pie pan, so I had more dough than I needed).  Pop the crust into the freezer for about 15 minutes while you make the filling.


Filling
3/4 C. sugar
1 egg
1/2 tsp. salt
2 T. all purpose flour
1 C. sour cream
1 1/2 tsp. vanilla
2 1/2 C. blueberries (fresh or frozen)


In the KitchenAid, mix the egg, sugar and salt.  Add the flour and then the sour cream and vanilla.  Mix for about 2-3 minutes until its all incorporated.  Add the blueberries and stir by hand.  Pour the mixture into the pie pan.  Bake for 25 minutes, then add the topping, then bake an additional 10-15 minutes.


Topping
4 T. pecans
3 T. flour
3 T. sugar
2 T. cold butter

Put all the ingredients in the food processor and pulse until the nuts are chopped and the flour/sugar/butter are combined (looks like sand with pebbles of pecans).


This dessert lasted about 5 minutes at dinner--and got great reviews.  Its particularly good chilled and served with whipped cream.


Sunday, April 24, 2016

Thai Mango Sticky Rice

Pin It


If you like Thai food as I do, then for sure you've ordered the sweet mango sticky rice as a tasty dessert. Never tried mango sticky rice?  Do you like rice pudding? Then you will like this. It isn't terribly difficult, but it does take some time to prep. If you have an Asian grocery, head there to pick up the rice and the coconut milk (it will cost less and be more authentic).


To serve 2-4 people

1 c. Thai sweet sticky rice (glutinous rice)
1 c. water to cook rice
2/3 c. Coconut milk (full fat variety)
1/2 c. Sugar
1/2 tsp. salt
2-3 ripe mangoes


1. Start by rinsing the dry rice. Place the rice in a bowl and cover with water, swish with your hand til water is cloudy with starch, then drain and repeat 4-5 times until water stays pretty clear. This rice just smells so delicious--a nutty, sweet smell.  I bought mine at the Asian market because my grocery store didn't have it.  Its really different than regular long grain rice (or minute rice)--so look for the real deal. 

2. Soak the rice in water for at least 4 hours, but overnight is better. 

3. Drain the soaked rice and cook it. You can do it on the stovetop like regular rice, use a rice cooker, or go authentic by steaming the rice. I used my pressure cooker and put the rice in a flour dish towel on top of the steam tray. I steamed it for 17 minutes, but wish I had gone a bit longer since my rice was still a bit al dente. I saw some online suggestions on using your frying spatter screen as the steam tray and put the rice directly on it (and then cover with an inverted bowl). I don't have a splatter screen, but it looked like a less messy option than the dishtowel method.

4. Make the sweet coconut sauce. While the rice is steaming, mix the coconut milk, sugar and salt in a saucepan and bring to a low simmer. You just want it to dissolve all the sugar--you don't want to reduce or thicken the sauce.  Turn off heat and wait for rice to finish.

5. As soon as the rice is cooked, quickly transfer the hot rice to a bowl and pour the warm coconut sauce over it and stir. It will look really runny, but the hot rice will absorb the sauce.

6. After about 35 minutes, the rice will be thick and ready to be topped with fresh, sliced mangoes.  You can take a bit of extra coconut milk and sweeten it and drizzle it over the top.


I prefer the ataulfo (honey) mango, but the red mango tastes great too!


Friday, December 19, 2014

Triple Chocolate Mousse Cake

Pin It
 
If you have a holiday party that you want to "WOW" everyone at, I suggest this tasty dessert from America's Test Kitchen (I've never been disappointed with one of their recipes).  Warning, while the dessert is not super challenging, it does take all morning to get it prepped and then it will need to refrigerate the rest of the day (or overnight).

Ingredients


Bottom Layer
  • 6 tablespoons (3/4 stick) unsalted butter , cut into 6 pieces, plus extra for greasing pan
  • 7 ounces bittersweet chocolate , chopped fine
  • 3/4 teaspoon instant espresso powder (I didn't use this)
  • 1 1/2 teaspoons vanilla extract
  • 4 large eggs , separated
  • Pinch table salt
  • 1/3 cup packed (about 2 1/2 ounces) light brown sugar , crumbled with fingers to remove lumps 


  • Middle Layer


  • 2 tablespoons cocoa powder , preferably Dutch-processed
  • 5 tablespoons hot water
  • 7 ounces bittersweet chocolate , chopped fine
  • 1 1/2 cups cold heavy cream
  • 1 tablespoon granulated sugar
  • 1/8 teaspoon table salt


  • Top Layer


  • 3/4 teaspoon powdered gelatin
  • 1 tablespoon water
  • 6 ounces white chocolate chips
  • 1 1/2 cups cold heavy cream
  • Shaved chocolate or cocoa powder for serving, optional

  • Directions

    1. FOR THE BOTTOM LAYER: Adjust oven rack to middle position and heat oven to 325 degrees. Butter bottom and sides of 9 1/2-inch springform pan. Melt butter, chocolate, and espresso powder in large heatproof bowl set over saucepan filled with 1 inch of barely simmering water, stirring occasionally until smooth. Remove from heat and cool mixture slightly, about 5 minutes. Whisk in vanilla and egg yolks; set aside.


    2. In stand mixer fitted with whisk attachment, beat egg whites and salt at medium speed until frothy, about 30 seconds. Add half of brown sugar and beat until combined, about 15 seconds. Add remaining brown sugar and beat at high speed until soft peaks form when whisk is lifted, about 1 minute longer, scraping down sides halfway through. Using whisk, fold one-third of beaten egg whites into chocolate mixture to lighten. Using rubber spatula, fold in remaining egg whites until no white streaks remain. Carefully transfer batter to prepared springform pan, gently smoothing top with offset spatula


    3. Bake until cake has risen, is firm around edges, and center has just set but is still soft (center of cake will spring back after pressing gently with finger), 13 to 18 minutes. Transfer cake to wire rack to cool completely, about 1 hour. (Cake will collapse as it cools.) Do not remove cake from pan.


    4. FOR THE MIDDLE LAYER: Combine cocoa powder and hot water in small bowl; set aside. Melt chocolate in large heatproof bowl set over saucepan filled with 1 inch of barely simmering water, stirring occasionally until smooth. Remove from heat and cool slightly, 2 to 5 minutes.


    5. In clean bowl of stand mixer fitted with whisk attachment, whip cream, granulated sugar, and salt at medium speed until mixture begins to thicken, about 30 seconds. Increase speed to high and whip until soft peaks form when whisk is lifted, 15 to 60 seconds.
    6. Whisk cocoa powder mixture into melted chocolate until smooth. Using whisk, fold one-third of whipped cream into chocolate mixture to lighten. Using rubber spatula, fold in remaining whipped cream until no white streaks remain. Spoon mousse into springform pan over cooled cake and gently tap pan on counter 3 times to remove any large air bubbles; gently smooth top with offset spatula. Wipe inside edge of pan with damp cloth to remove any drips. Refrigerate cake at least 15 minutes while preparing top layer.
    7. FOR THE TOP LAYER: In small bowl, sprinkle gelatin over water; let stand at least 5 minutes. Place white chocolate in medium bowl. Bring 1/2 cup cream to simmer in small saucepan over medium-high heat. Remove from heat; add gelatin mixture and stir until fully dissolved. Pour cream mixture over white chocolate and whisk until chocolate is melted and mixture is smooth, about 30 seconds. Cool to room temperature, stirring occasionally, 5 to 8 minutes (mixture will thicken slightly).
    8. In clean bowl of stand mixer fitted with whisk attachment, whip remaining cup cream at medium speed until it begins to thicken, about 30 seconds. Increase speed to high and whip until soft peaks form when whisk is lifted, 15 to 60 seconds. Using whisk, fold one-third of whipped cream into white chocolate mixture to lighten. Using rubber spatula, fold remaining whipped cream into white chocolate mixture until no white streaks remain. Spoon white chocolate mousse into pan over middle layer. Smooth top with offset spatula. Return cake to refrigerator and chill until set, at least 2 1/2 hours.


    9. TO SERVE: If using, garnish top of cake with chocolate curls or dust with cocoa. Run thin knife between cake and side of springform pan; remove side of pan. Run cleaned knife along outside of cake to smooth sides. Cut into slices and serve.


    Monday, October 14, 2013

    Pumpkin Cinnamon Rolls with Ah-Mazing Cream Cheese Frosting

    Pin It
     

    Scrolling through blogs one night, I ran across a very pretty post about pumpkin cinnamon rolls.  To be perfectly honest, I don't usually gush over pumpkin recipes this time of year (now apple recipes, that is a whole 'nother ball game for me)--but this one looked pretty darn tasty.


    I tweaked the recipe a bit, hoping to use the 1-hour bread recipe that my sister-in-law gave me.  It did take me more than an hour, but  the finished rolls were coming out of the oven in under 2 hours.  The rolls are very good, but its the frosting that turned out surprisingly wonderful.  The original recipe called for maple extract, but I didn't have any, so I substituted Vanilla Butter and Nut (from my Smith's grocery)--and WOW, best frosting ever.  Even if you don't make the rolls, try the frosting!


    In the KitchenAid bowl:
    1/3 c. melted butter
    1/2 c. warm water
    1/2 c. scalded milk (heat milk on medium until bubbles start to form around the edges, but not boiled)
    1 c. pumpkin puree
    1 egg
    1 tsp. salt
    1 tsp. pumpkin pie spice
    2 1/2 tsp. instant yeast (the instant type is important, because you do NOT proof this type of yeast in water and you only have to rise the dough once)
    1 T. dough enhancer or lecithin (I buy powdered dough enhancer at my WalMart)
    4-5 cups of flour (I used 4).

    Filling:
    1/4 c. brown sugar
    1-2 tsp. cinnamon
    4 Tbs. butter, softened


    Mix all the wet ingredients in the bowl.  In a separate bowl mix all the dry ingredients.  Add the dry ingredients 1 cup at a time until you get a ball of dough that pulls away from the sides of the bowl cleanly.  Let it mix for 5 minutes.


    Spray your counter with non-stick cooking spray and dump out your dough.  Because I used instant yeast, you only have to do one rise, instead of the usual two.  So you can immediately roll dough out to a 9x15 rectangle.  Spread the dough with butter, sprinkle with brown sugar and cinnamon.


    Roll the dough up along the long edge.  I use dental floss to cut the dough, but a serrated knife would work too.  Place the rolls into a greased baking dish (I wish I'd cut mine 1" instead of 1 1/2" and gotten 15 instead of 12 rolls). Let rise for 30-45 minutes or until double in size.


    Bake for about 30 minutes at 350.  Frost with the Ah-Mazing cream cheese frosting.


    Ah-MAZING Frosting
    4 oz cream cheese
    1/4 C. butter
    1 1/2 C. Powdered sugar
    1 T. milk
    1 1/2 tsp. Vanilla butter nut extract-this is the secret ingredient
    1/4 tsp. salt


    Whip it all together in the KitchenAid for about 3 minutes on high.


    Monday, July 1, 2013

    Mango Coconut Vanilla Artisan Popsicles

    Pin It


    I recently returned from a trip that included a stop in Indianapolis, IN.  As luck would have it, I was there on a Statehouse Market day and I discovered that artisan popsicles are apparently all the rage.

    Where have I been to have not known about this?  Obviously I haven't been searching Pinterest nearly enough.  Well, I am happy to step up to the plate on this one (especially since it will be over 100 degrees pretty much every day this week).

    The hardest part for me was deciding what flavor to make. Like many of you, I started thinking I wanted to do this project late at night...on a Sunday...so I had to use what was in the house.  Luckily, I had a few options (ruled out, but saved for a future day are Key Lime Coconut, Strawberry, Chocolate Pudding and Pineapple/Greek yogurt).  I reviewed several recipes online for inspiration, but I really just went with what sounded good.  If you wanted to make these completely dairy free, skip the condensed milk and use sugar or honey as your sweetener instead. Don't have coconut milk?  Use half and half instead.

    Here's what you need:
    Popsicle molds
    2 ripe mangoes
    1 can coconut milk (13 oz)
    1/4 tsp. vanilla bean paste (or 1 vanilla bean, seeds scraped out)
    1/2 can of sweetened condensed milk


    Peel and dice up the mangoes and then puree them in the blender--you may need to add a splash of water to make it easier on the blender.


    Pour the mango puree through a strainer into a bowl with a pour spout (you'll strain out a bunch of stringy fibers that would otherwise make your popsicle less enjoyable to eat).  Add the coconut milk, vanilla and sweetened condensed milk.  Stir it up.

    Pour into your molds and put in the freezer.  I set the timer for 1 hour and then I put the sticks in.  In my mold, if I put the sticks in right away, they sink and leave me with no handle.  If the mixture was a bit thicker to begin with, you could probably put sticks in from the get-go. 


    I indulged in a popsicle and some time in the inflatable pool in the backyard with one of these babies today!