Sunday, July 5, 2020

Key Lime Pie Frozen Custard

Pin It
Key lime pie is one of my favorites.  I love the tart/sweet combo.  This summer, since we're still all social distancing and spending way more time in our own kitchens, I started experimenting with homemade ice creams.  I have a Cuisinart ice cream maker (from Costco) and had been keeping the canister in the freezer thinking I'd like to make ice cream now that it was hot outside.  Fourth of July weekend was a perfect excuse. 

This custard-based ice cream is easy, but you need to plan ahead.  You CAN make it the day you want to eat it, but if you can mix it up the night before you'll have more flexibility in having it ready when you want to eat it. You need to plan for about 30 minutes making the custard, 2-4 hours to cool it (I start with an ice bath and then the fridge to speed things along), 30 minutes to churn and then 3-4 hours to freeze before serving (ok, you can serve it right after churning as a very soft serve).


This recipe uses a little bit of corn syrup, which helps reduce ice crystal formation, so that you don't get grainy ice cream.

Ingredients
1 1/2 C. half and half
1 C. heavy cream
3/4 C. sugar
2 Tbs. corn syrup
1/8 tsp. salt
5 egg yolks
2 Tbs. lime zest (around 3-4 limes)
1/2 C. fresh lime juice

Crust cookie "add in"
5 whole graham crackers
3 Tbs. sugar
1/4 C. melted butter

Equipment needed
Medium saucepan
Medium bowl
Fine mesh strainer
Citrus zester
Ice cream maker
8x8 baking dish or a large loaf pan
Thermometer (opt)

Get things set up before you start so that you can work efficiently.   Does your ice cream maker need the canister to be frozen in advance?  Make sure you've got that taken care of!

1. Crack the egg yolks into a medium bowl and whisk, set aside.

2. Zest the limes, set aside.

3. Juice the limes, set aside.

4. Make the custard.  In a saucepan add the half & half, cream sugar,  lime zest, corn syrup and salt.  Heat on medium stirring constantly until sugar is dissolved and you start to see bubbles around the edge-do NOT boil.  Slowly pour a thin stream of the hot cream mixture into the egg yolks, whisking constantly.  This will bring the eggs up to a higher temperature without scrambling them.  Pour the hot mixture back into the saucepan and keep cooking on medium and stirring with a wooden spoon until the custard coats the back of the spoon (its about 175-180 degrees)--about 3-5 minutes of cooking.  Do NOT let it boil.  You'll notice it become thicker and bubble around the edges.   While it cooks, wash out the bowl that held the eggs so it is ready for the finished custard.

5. Pour the hot custard through a fine mesh strainer back into the clean bowl--this will strain out the zest and any eggy bits.  Also pour the lime juice into the custard through the strainer (catches any seeds or pulp). Stir it up.  Resist licking the spoon.   Cover with a piece of plastic wrap placed right on the surface of the custard to avoid a film forming.

6. You need to cool the custard down to 40 degrees.  You can just refrigerate it overnight or you can speed things along by putting the bowl into a bowl of ice water. 

7. Make the crust cookies.  I like to add the cookie bits to the ice cream, although you could leave them out or just sprinkle them on a bowl when serving.  In a gallon zipper bag add the graham crackers and crush with a rolling pin.  Add the sugar and butter and mix right in the bag.  Pour onto a parchment lined baking sheet, press into a giant cookie that is about 1/4 inch thick and bake for 5-7 minutes  at 350 until golden.  Let cool.  Crumble.   I added about 1 T of shredded coconut to my mix before baking because I love it, but I know lots of folks don't.

8. Churn the custard!  You are getting closer.  First, get the 8x8 baking dish and line it with plastic wrap.  Get your ice cream machine going (mine requires that I freeze the canister at least 24 hours, so I just store it in the freezer).  Follow the directions on your machine and add the cooled custard.  It will take around 30 minutes to become a very thick soft-serve. 


9. Scoop the custard into the prepared 8x8 dish, smooth it out, sprinkle it with the crust cookies and press them in.  Cover with more plastic wrap and pop into the freezer for 3-4 hours.  This will let it firm up enough to scoop and put on cones.   You will definitely want to lick the dasher from the ice cream machine at this point. 
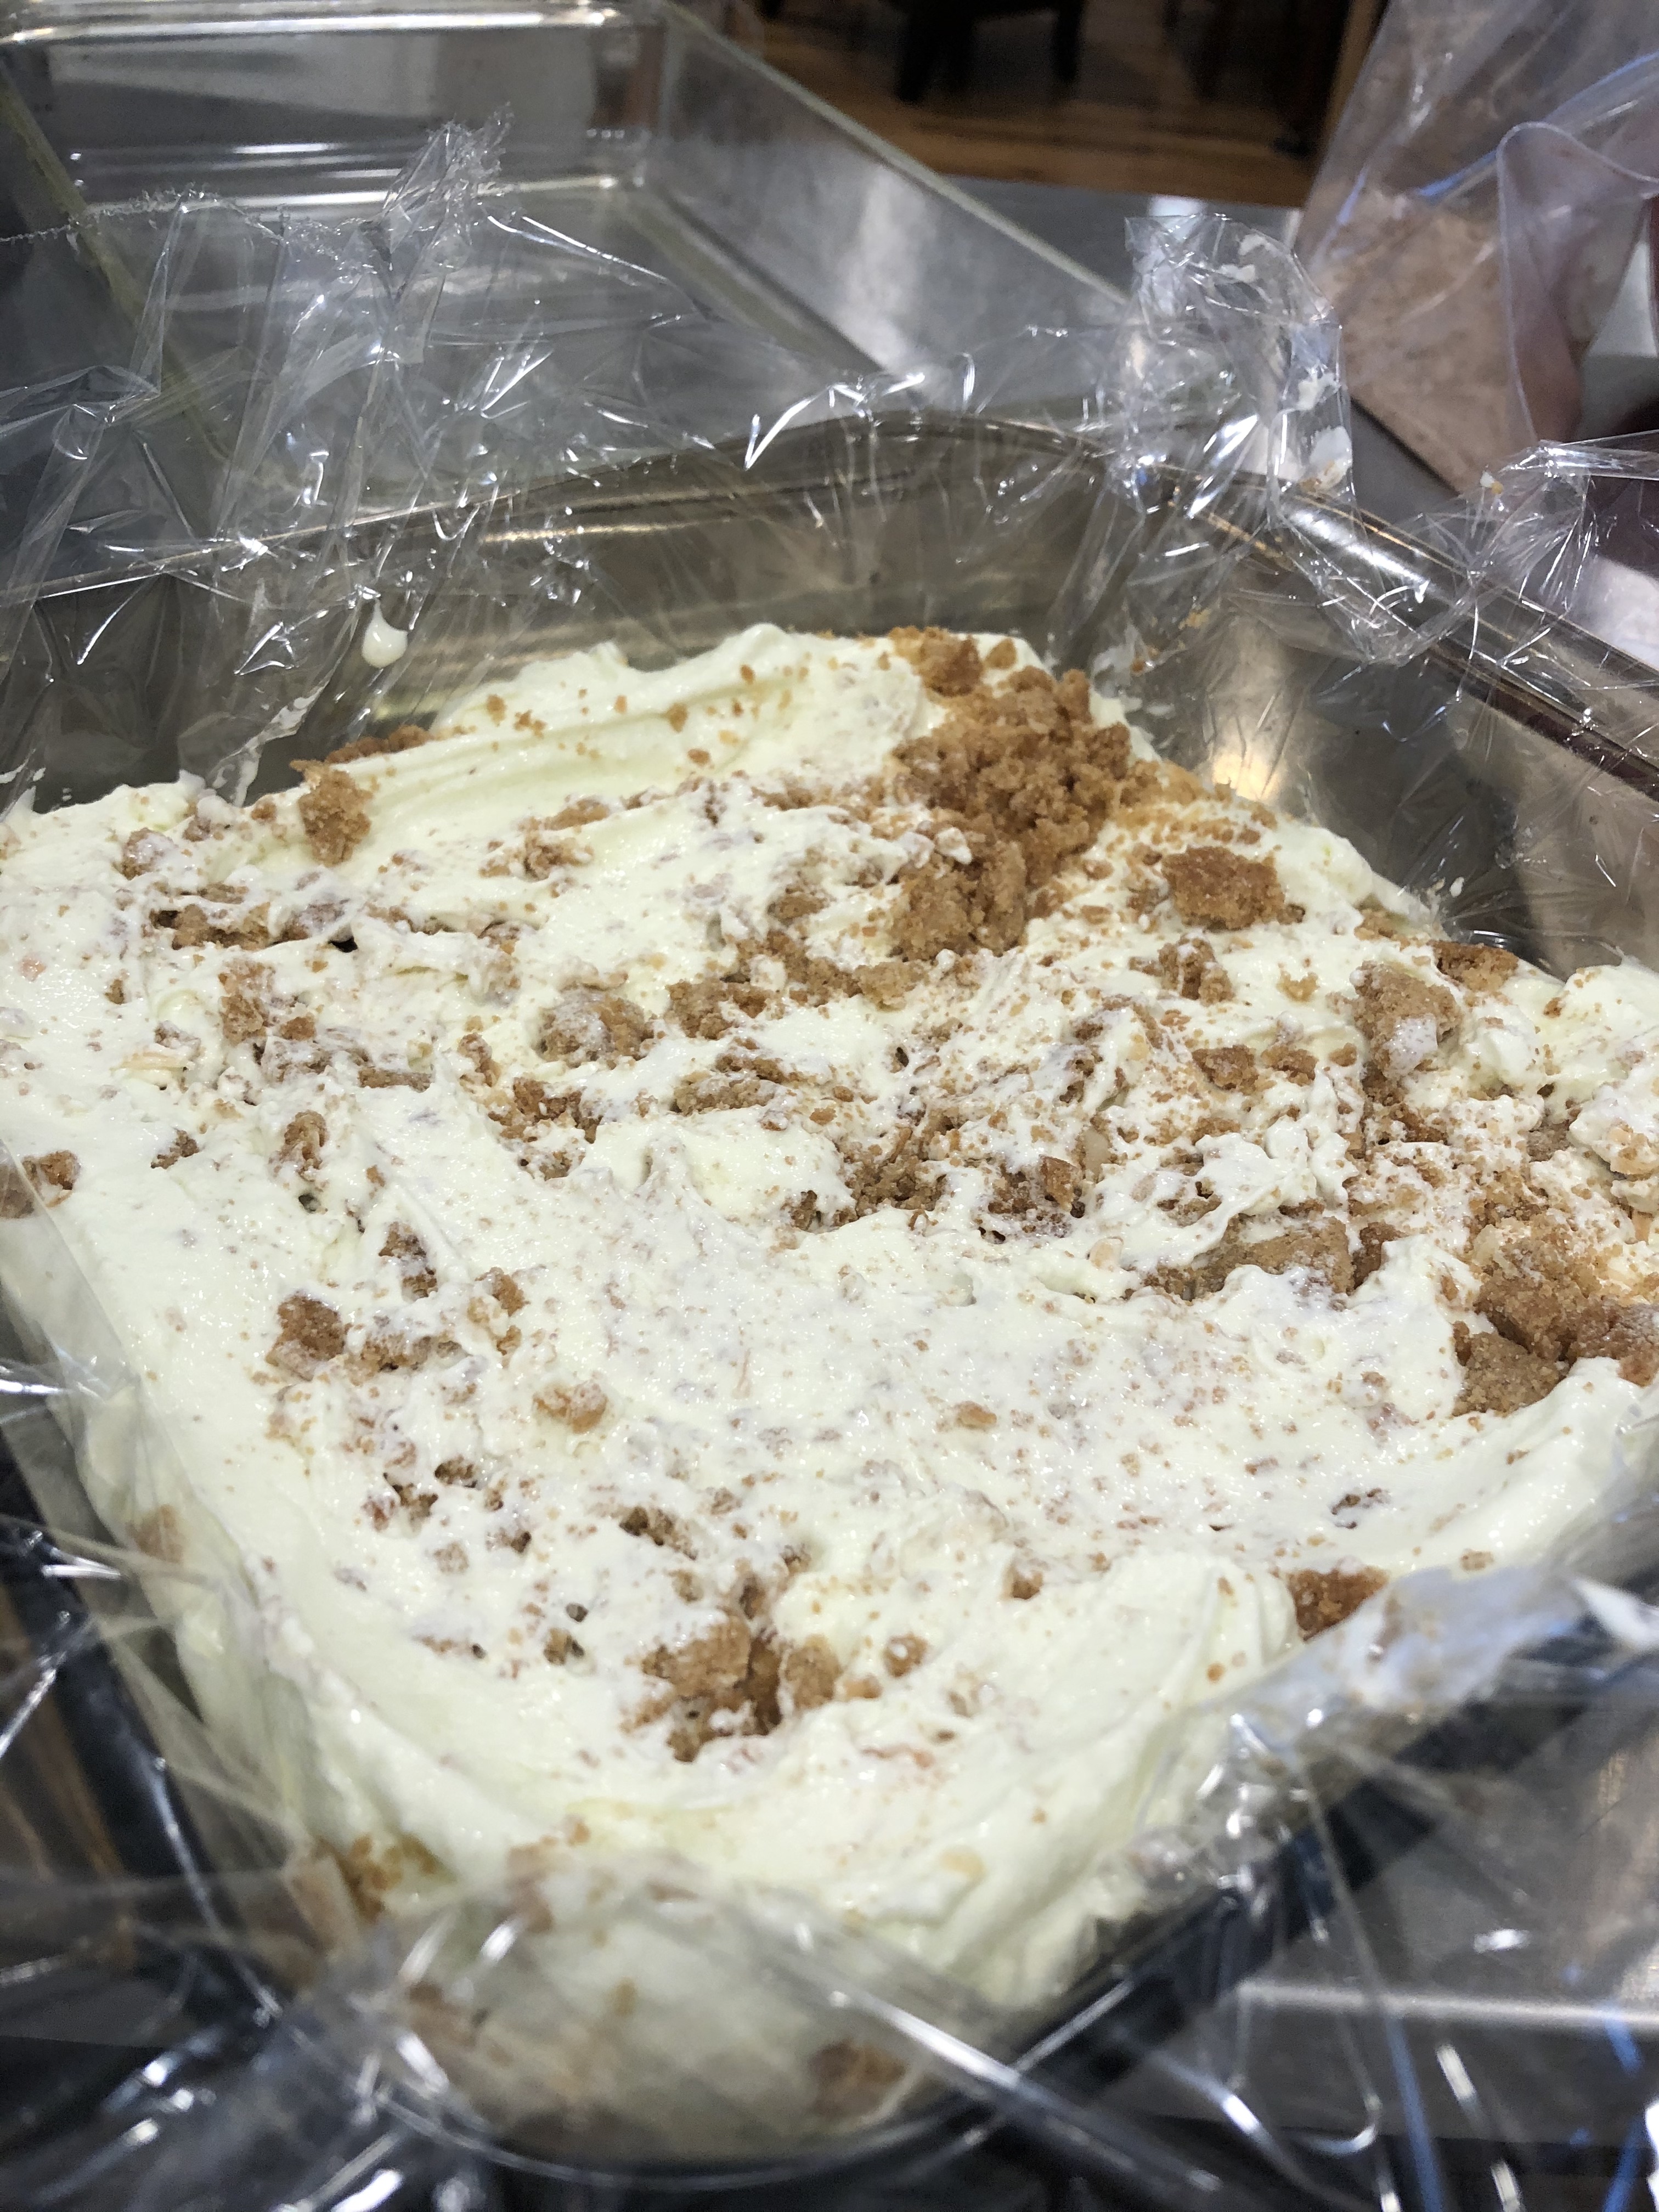
This ice cream is so delicious.  Serve it on your favorite cone or just dig in with a spoon. 


Lemon variation
If you also like lemon meringue pie, you could do this with lemons instead.  Increase the lemon juice to 2/3 C. Everything else is the same.  I made this version too and left out the crust cookies--reminded me of Aggie Ice cream from USU.  Only better.  And closer to home.


Friday, April 10, 2020

Strawberry Strawberry Cupcakes

Pin It


Raise your hand if you've ever planned a trip around a cupcake shop visit?  Silos Bakery? Check.  Georgetown Cupcake? Check.  Magnolia? Sprinkles?  Check, Check.  I like cupcakes.  I've searched for lots of copy-cat recipes to all those famous shops and none have met my expectations (too lightweight, too dry, too heavy...just not right).  So I went with a default trick of doctoring up a cake mix for my cupcakes.  The real star of this show is the strawberry flavor--and it comes from freeze-dried strawberries.  Since I'm home like everyone else in the world trying to avoid the coronavirus, I went wandering through my food storage and brought up the can of freeze dried berries.   They are PERFECT for cupcakes.  You get tons of strawberry flavor and you don't need any artificial flavoring!  You can buy them in smaller packages at Trader Joes--maybe even regular grocery stores.

Cupcakes
1 Duncan Hines white cake mix
1 C. milk
3 large egg whites
1/3 C. vegetable oil
1/4 C. crushed/powdered freeze dried strawberries (not fresh berries)
1/2 C sour cream

Preheat the oven to 350 degrees and get 24 cupcake liners ready.  Pulverize  about 1 cup of the freeze dried strawberries in a zipper bag  with a rolling pin (you'll get enough for cake and frosting).  Mix up the batter by following the directions on the box, but sub out the water with whole milk.  Add the sour cream and the strawberry powder.  Mix just enough to get it all mixed together with no streaks of white remaining.  Divide the batter into 24 cupcakes (I think I got 22).  The box said to bake for 18-22 minutes BUT I went with 16 and it was just right.

Strawberry Cream Cheese Frosting

1/2 C butter, room temp
1/2 C cream cheese, room temp (4 oz, which is half a brick)
1 tsp vanilla
1/8 tsp coconut extract
1/8 tsp almond extract
1 1/2 Tbs freeze dried strawberry powder
3 C. Powdered sugar
1-2 Tbs milk

Use paddle attachment on the stand mixer and cream the butter and cream cheese together.  Add the extracts and strawberry powder.  Alternate adding the powdered sugar and milk (on low) and mix on low until all combined.  Switch to the whisk attachment and whip on medium-high for 3-4 minutes to get all fluffy and light pink.

When cupcakes are completely cool, pipe frosting onto your cupcakes (I found that I actually preferred the ratio of frosting when I used the smaller tip than my jumbo star tip).  You can freeze these completely frosted if you want (I tested that out for you...an entire cupcake, with its pretty frosting will defrost in about 15 minutes and taste delicious). 


Freeze dried strawberries are the trick.  You can't use fresh strawberries because everything will be too wet and diluted.  The freeze drying concentrates the flavor.  Game changer!  

Sunday, March 22, 2020

Amigurumi Patterns

Pin It  

I learned to do some basic crochet from my mom and grandma when I was in junior high.  I did the usual scarf and dishrag.  I even got fancy enough to do some bookmarks and baby blankets--and then I put it away for a very long time.  When the Disney+ series The Mandalorian came out and there were no baby Yodas to be bought anywhere, I started thinking I could make one--and lo and behold, several other folks thought so too.  There are many patterns out there for making "The Child"--some were so good and so popular the big corporate Disney sent cease and desist notices.  I ended up making about 5 Baby Yoda crochet dolls (aka Amigurumi crochet), and I am finding it very satisfying to make them.  I picked up a kit at Sam's Club for Harry Potter and was debating the Disney Princess kit when I came across a pattern online.  


These are the only 2 dolls I've made so far, but they sure are fun.  If you want to try your hand at Baby Yoda, check out Hooked On Fandom's excellent pattern (free!).  I've tried it with a hook a size up as well as a size down and liked both results.  I tinkered with the pattern to make a 2/3 size "pocket" Yoda, and it was fun...but I have not developed good pattern making skills yet...too many errors in mine (which I've hidden with clothes).  For Baby Yoda, I decided I liked his robe being made out of fleece rather than crochet--which is probably not allowed in amigurumi, but I don't care.  It's my craft right?   


With Cinderella (which could also be Belle or Tinkerbelle pretty easily), the pattern of stitches is really good, however, the order of the instructions for construction/sewing was not good.  It looks like the original pattern was in Russian, and someone translated.  Even with some experience with the Yoda dolls, I found Cinderella and some of her construction pretty challenging (the hair band and the white dress flounce were the very hardest part).  

For both dolls, you will need to know how to do the Magic Circle--which is how you start any sphere shape.  I found the tutorial at Winding Road Crochet to be super easy to follow.   As a general tip for any project, make your first row, the chain-on row fairly loose.  Not sloppy, just not as tight as you would for any other row.  Otherwise its tough to get your hook back into those loops again. 


Here is my reorganization of the Cinderella pattern (check out her website for some great pics):
Materials:
  • Yarn:  dress (blue), trim (white), black, flesh, hair (yellow)
  • Safety eyes 6 mm
  • Fiberfill
  • Beads for a hair band (optional)
  • Embroidery needle (long with large eye)
Abbreviations:
R = row
mc = magic circle
ch = chain
st = stitch
sc = single crochet
sk=skip stitch
DC = double crochet
TR = treble crochet
hdc =  half double crochet
htr = half treble crochet
sl st = slip stitch
inc = 2 sc in the next stitch
dec = single crochet 2 stitches together
BLO = back loop only
FLO = front loop only
( ) = number of stitches you should have at the end of the round/row
( )x6 = repeat whatever is between the brackets the number of times stated
 
Body + legs
With white yarn:
First leg
R 1. 6 sc in mc (6)
R 2-6. 6 sc (6)
Second leg
R 1. 6 sc in mc(6)
R 2-6. 6 sc (6)
Don’t cut the yarn! Just leave it hanging so you can pick it up again later in the body.
R 7. Crochet 3 ch from the second leg and join it with the first leg, 6 sc on first leg, sc in next 3ch, 6 sc on second leg, sc in next 3ch (opposite side) (18)
R 8-10. 18 sc (18)
With DRESS yarn color:
R 11-12. 18 sc (18)
R 13. BLO 18 sc (18)
R 14. 18 sc (18)
With BODY color:
R 15. 18 sc (18)
R 16. (dec, 1 sc) х 6 (12)
With BLACK yarn make the necklace (if no necklace, continue with body color):
R 17. 12 sc (12)
Stuff the leg and body and set aside. 
Head
R 1. 6 sc in mc (6)
R 2. inc x 6 (12)
R 3. (inc, 1 sc) х 6 (18)
R 4.  (inc, 2 sc) х 6 (24)
R 5. (inc, 3 sc) х 6 (30)
R 6-13. 30 sc (30)
Find eye placement at the level of Rnd 10-11, at the distance of 5 stitches from each other. Don't attach eyes yet, first you should Embroider eyelashes, then put the backing on the eyes.  Stuff the head.
R 14. (dec, 3 sc) х 6 (24)
R 15. (dec, 2 sc) х 6 (18)
R 16. (dec, 1 sc) х 6 (12)
Finish stuffing the head. Leave a long tail of yarn for sewing head on much later. 
Dress
Go to the center back of the body – R13:
R1. FLO: 3 ch, (4 DC in next st, 2 DC in next st) x repeat to the end of row, sl st (54).
R2-5. 1 DC in every st to the end of row, sl st (54). 1 hdc, 1 sc to make hem look even. Finish off by slip-stitching around the entire dress.
Arms (make 2)
With WHITE yarn:
R 1. 6 sc in mc (6)
R 2-4. 6 sc (6)
With body colour:
R 5-7. 6 sc (6)
Leave a long tail. Don’t stuff arms! Sew onto body.(if your doll doesn't have white gloves, use another color OR just body color)
Sleeve (make 2)
With WHITE yarn:
Make 9 ch.
From the 2nd ch from hook: 2 sl st, 4 sc in next 4 st, 2 sl st.
F.o., leaving a long tail. Sew sleeves to the body.
Dress band
With WHITE yarn:
Make 26 ch
From the 2nd ch from hook: sl st, (2 sc, 1 hdc and 1 DC in next st, 1 DC, 2 htr in next st, 3 TR in next st, 2 htr in next st, 1 DC, 1 DC and 1 hdc in next st, 1 sc), 3 sl st, (2 sc, 1 hdc and 1 DC in next st, 1 DC, 2 htr in next st, 3 TR in next st, 2 htr in next st, 1 DC, 1 DC and hdc in next st, 1 sc), sl st.
F.o., leaving a long tail. Sew to the dress.
Hair
R 1. 6 sc in mc (6)
R 2. inc x 6 (12)
R 3. (inc, 1 sc) х 6 (18)
R 4. (inc, 2 sc) х 6 (24)
R 5. (inc, 3 sc) х 6 (30)
R 6. (inc, 4 sc) х 6 (36)
R 7-10. 36 sc
As you continue to the next round, you will start the flap that will become the bangs:
R 11. (sk st, 5 DC in next st, sk st, 1 sc) x 5, 16 sc, turn.
R 12. 1 ch, 15 sc, turn. (repeat this row 6 times).
Make a roll and sew roll up.

Bun
R1. 6 sc in mc (6)
R2. inc x 6 (12)
R3. (inc, 1 sc) х 6 (18)
R4. (inc, 2 sc) х 6 (24)
R5-9. 24 sc (24)
Stuff. F.o., leaving a long tail.
Hair band
With blue yarn:
Make 25 ch
From the 2nd ch from hook: sl st, 3 DC, 2 sc, hdc, 10 DC, hdc, 2 sc, 4 sl st.
F.o., leaving a long tail. Sew to the hair.
Decorate with 2 beads.
Assemble Hair 
Place bun on the top-center of the hair and sew the bun to the hair cap. Now place hair on the head and find the position of the headband.  Once you are sure of the headband, remove the entire hair and sew the headband to the hair.  Once entire hairpiece is complete, sew to the head. 
Attach head to body
This is the most challenging part.  Center the head on the body and start sewing it in place.  You may need to use stitches that go from the head all the way through the body and then back up.  Just keep stitching until the head feels stable. 

Tuesday, November 26, 2019

Instant Pot Cafe Rio style chicken

Pin It
I love Cafe Rio.  There is one just about 1 mile from my house, which is awesome.  But I also like cooking at home and having leftovers.  And I love my Instant Pot.  There are lots of recipes out and about for Cafe Rio.  I make no claims to this being exactly like theirs-but its close enough for me for a substitute for when I don't want to stand in line or circle the parking lot looking for a space.


Chicken
2 lbs boneless, skinless chicken (I use thighs because they cook up better than white meat in the instant pot)
1 C. chicken broth
1 Tbsp vegetable oil
1/4 C. red wine vinegar
1 Tbsp cumin
1 Tbsp Cajun seasoning
1 Tbsp Italian seasoning
1 tsp dried onion pieces
1 tsp powdered garlic
1 tsp dried chili flakes/red pepper flakes

Put all ingredients in the Instant Pot.  Set for 6 minutes then let it natural release for 7 minutes. Shred the chicken (I take the steaming hot chicken and a couple tablespoons of the liquid and put it in my KitchenAid mixer with the paddle attachment on low--watch it carefully and it will shred.  Don't walk away, you'll end up with mush). 

My dressing recipe is still on target for Cafe Rio--but everytime it seems to get better. 

In the Magic Bullet blender
1/4 C. milk
2 Tbsp sour cream
2 Tbsp mayonaise (NOT Miracle Whip)
2 tsp ranch dressing powder (Winco sells in in the bulk section, so I keep a jar handy)
small chunk of onion (like 1 tsp or so)
small chunk of jalepeno (like 1/2" slice off the end)
handful of cilantro, stems and leaves--about 1/4 c
juice from 1/2 a lime

Make up your salad or burrito with lettuce, guac, sour cream, tortilla chip strips, rice, beans, cheese.  I buy the foil pans at the Dollar Tree when I'm feeling fancy...but most of the time I just make it up on a plate (or pie pan).

Fabric Christmas Trees

Pin It
I saw some really cute fabric Christmas tree decor at Walmart this year--I like them, and they are only about $5 each--BUT--they are all the same size.  I like having some variety/depth if I'm grouping things together.  This post is not sponsored at all by Walmart, but wow, they've had some pretty great decorations and craft supplies this year.


Walmart version


When I wandered past the crafting section at the same Walmart, I saw some fat quarter fabric for only $1.47 each and thought they'd make awesome craft projects. Fat quarters are pieces of fabric that are 18x22 inches.  You could use any fabric (or cut up an old piece of clothing).  The nice thing about fat quarters is you don't have to wait in line to get fabric cut.


Also down the craft aisle at Walmart are some pre-cut dowels, only $1.27 for a package of 16.


Once I had my supplies at home, I poked around in the garage for something to work as the base--a tree "cookie" would be great, but I didn't have any of those, but I did have a leftover bit of 1x2 lumber, so I cut it into about 1.5" lengths.  I used my drill to make a 3/16" hole to receive the dowel.

I used a simple tree outline (you could also just make a plain triangle with no branches) and enlarged and reduced it so that I had multiple sizes.  I printed them on cardstock and cut them out as patterns.  My biggest tree is 7 inches tall and 6 inches at the base.  I also did a 6 inch tall and 5 inch tall.  I have a pattern for a 4 inch, but it seemed too small for what I wanted.


With some careful planning, I was able to cut 4 Large, 4 Medium and 4 Small trees from each of my 3 fabrics.  That meant 36 pieces which equals 18 trees.  I had to really layout the pattern carefully to get this many.  I laid the fabric out flat and traced and cut each piece.  It would be way faster to fold the fabric and cut more than one at a time, but you won't get as many pieces.


I chose to sew mine.  I also chose a "rustic" look, so I sewed them with wrong sides together and left the edges a bit ragged (instead of sewing with the right sides together and then turning it out to hide the stitching).  I started my seam about 1/8 of the way in on the bottom edge of the tree and then went around every branch until I was back at the bottom of the tree--and went in about 1/8 inch.  That left me a wide opening to insert a bit of stuffing.  I used the dowels to poke the stuffing into all the branches (I went with a slightly stuffed look, but you could really pack it in there).  You could probably do this as a no-sew craft if you used fabric glue and let it dry for several hours before stuffing.  I just liked the look of the stitching around the edges.  The sewing was the longest part of the project.

Once the trees were stuffed, I closed up the bottom seam with my machine (skipping over about 1/4 inch in the center so I'd have space to insert the dowel).  Run the dowel all the way to the tip of the tree.  Place the dowel in the base and you are set.

Materials
fat quarters of different fabrics (or if you like them all the same, just the one kind)
3/16" wooden dowels
wood block or tree cookie for base
polyfill stuffing (or an old pillow you can cannibalize)
matching thread/sewing machine or glue


My total investment was under $6 for all 3 fat quarters and the package of dowels.  I already had the other supplies.  I was able to get 5 sets (actually 6, but the dowel package leaves you short two dowels, so I went into the yard and cut a couple sticks off a shrub...it will do--if you have some small, straight tree branches, you could skip the dowels altogether).

You could do the same tree pattern for ornaments, or decorations on a wreath instead of on dowels.  I thought I'd gift each set along with the story of the Three Trees. 

Friday, November 8, 2019

Moo Goo Gai Pan

Pin It
This is my usual order at my favorite Chinese take-out place.  I had never tried the technique of "velveting chicken"-but it was a win, so I'll keep that one in my pocket to use again on other stir fry recipes.

This recipe is from a fun family food blog called Dinner at the Zoo-check it out, lots of good stuff there. Like most things I see online, I tweak the recipe to fit my style or the ingredients I have at home.

I use boneless, skinless chicken thighs since I often use the instant pot (but not this time) and dark meat cooks better under pressure.  You must have thin sliced meat for the velveting technique to work, so partially thawed meat is easiest to slice.

Velvet the Chicken
1 lb boneless skinless chicken, thinly sliced
1 large egg white, whisked until foamy
1 Tbsp cornstarch
 Mix the egg white and cornstarch in a bowl and add the sliced chicken.  Refrigerate for 30 minutes, then strain off liquid before cooking.

Make the Sauce
1 1/2 C. chicken broth
1 Tbsp corn starch
1 Tbsp sugar
1.5 Tbsp soy sauce
1 tsp sesame oil
Mix sauce ingredients in a bowl and set aside.

Veggies to chop
2 tsp minced garlic (I use the bottled kind, about 2 cloves)
1 tsp ginger, chopped (also from the bottle)
16 oz pkg of sliced mushrooms
1 C. snow pea pods
1/2 C. sliced carrots (I buy them presliced)
1 head, baby bok choy chopped across the stalk
1 can sliced water chestnuts
1 can bamboo shoots

Heat 1 Tbsp of vegetable oil in a large fry pan over medium heat and add the carrots and about 1 T of water.  Stir and cook for a couple minutes, then add the mushrooms.  Keep cooking (and add a bit of water if you need it) until the mushrooms are soft.  Toss in the pea pods and cook for about a minute. Scoop all the cooked veggies out of the pan and into a bowl, wipe out the pan and put in a bit more oil and cook the chicken for about 4 minutes or until done.  Add in the garlic and ginger and stir for about a minute.  Add back the cooked veggies, the bok choy, water chestnuts and bamboo shoots.  Pour the sauce liquid over everything and cook until bubbling.

Tasty.  Serve it over rice and pick up a box of fortune cookies! 


Thursday, November 7, 2019

Tacos Al Pastor

Pin It
Do you love tacos?  The kind from a cart outside on a sidewalk?  Me too.  I live in a community with lots of opportunities to hit a taco cart or local Beto's (or his cousin's, brother's, uncle's version...)--but cooking awesome tacos at home is not hard.  I love me some ground beef "American" tacos with crunchy shells, but when you are craving a taco cart style--try these.

Tacos Al Pastor use pork with a bit of pineapple.  If you are lucky enough to have a Hispanic  market nearby, go to the meat counter and just buy the pre-seasoned al pastor meat.  Done.  If you don't, you can make the marinade.

1 Tbsp ancho chile powder
1 Tbsp oregano
1 Tbsp thyme
1 Tbsp black pepper
1 Tbsp cumin
1 tsp paprika
1 tsp salt
3 cloves garlic
1/2 medium onion, rough chop
1/2 C. orange juice
1 small can of pineapple, drain and keep the juice for marinade and use pineapple with the meat.
2 pounds pork, sliced thin (I use pork loin or boneless chops)


Make the marinade by putting all the ingredients in a blender and pour over meat for at least an hour or overnight.  Remove the meat and cook in a medium hot skillet.  Add the pineapple tidbits while cooking.

Serve in your favorite tortillas and top with things like:
Salsa (link is my dad's quick homemade salsa) I also like to look for salsa verde molcajete from the store
cilantro
shredded Nappa or red cabbage
pickled red onions
sliced fresh jalapenos
fresh lime
chopped white onion
guacamole
mango salsa if you've got it!