Friday, October 14, 2016

Halloween Playlist

Pin It
I'll admit that I don't go too big for Halloween. I have a framed subway art on the mantle--that's the extent of my decorations.  I will usually don a costume and hand out candy to the neighborhood kids--but something I do like, no matter the holiday, is fun music.  Here's a collection that I thought you might enjoy (heavy on the 80's and 90's of my youth).

Thriller-Michael Jackson
It's a Dead Man's Party-Oingo Boingo
Twilight Zone Tower of Terror Remix
Ghostbusters Theme-Ray Parker Jr (Run DMC version fun too--and Bobby Brown's On Our Own)
Highway to Hell-AC/DC
Crazy Train-Ozzy Osbourne
I Put a Spell on You (Bette Middler cover) or Screamin' Jay Hawkins
Somebody's Watching Me-Rockwell
Bad Moon Rising-CCC

If you'd like to add movie songs, then these are some that seem Halloween flavored

Harry Potter-Double Double Toil and Trouble
Jaws-Theme Song
Nightmare Before Christmas-Jack's Lament

Friday, October 7, 2016

Overnight Waffles

Pin It
 
Its pretty rare for me to make waffles. I'm just not home in the mornings, but I had a day off from work and I just enjoyed being home and really wanted waffles.  I have tried lots of waffle mixes, which promise delicious waffles with zero effort, and I haven't ever been in love (they taste like pancakes in waffle shape).  I know I love the Leige waffles you can get at Belgian places (or our local food truck)--but the sugar in the Leige waffles is hard to clean and you need a nicer waffle iron than I have to get the right heat going (plus it requires a trip to IKEA for the sugar or an order from Amazon).  So more research.  King Arthur flour always has interesting recipes, and they had one for overnight yeast waffles.  This sounds like my kind of time-saver; let the waffles get ready while I sleep.  

Mixing up the waffles took about 5 minutes in my KitchenAid--then I let the batter sit on the counter while I puttered around my bedtime routine.  Then put it in the fridge until morning. 
After 1 hour on the counter
After resting overnight in the fridge

I made only one change to the recipe, I used white sugar instead of maple sugar in the batter.  I found that my waffle iron on level 7.5 (out of 10) was the right temp.  I preheated the iron for about 10 minutes.  Added 1 cup of batter and let it cook for about 6 minutes.  I made 3 waffles in the batch.  The batter is pretty thick.  Maybe I'd mix it up in a gallon zipper bag next time and then cut off the tip to just squeeze out the batter. 
Serve it with fresh picked peaches and whipped cream.  I froze the leftover and they toast up nicely the next day.  The yeast gives the waffle a really nice light texture and more interesting flavor.  I think this is my go-to recipe.  I think I could even make a mix with powdered milk and then I'd just have to add eggs, butter and water.  Hmmmm.

3/4 C. lukewarm milk
3 T. melted butter
1 1/2  T sugar
1/2 tsp. Salt
1 tsp. vanilla
1 egg
1 C. all purpose flour
3/4 tsp. instant yeast

Mix everything up and sit on counter for about an hour. You can cook them after the 1st hour if you want...or refrigerate the batter overnight and make waffles in the morning.


Friday, September 30, 2016

Quick Door Decor Upcycle

Pin It
Super easy project!  I love pineapples--I've been on quite a kick lately (on my last trip to Hawaii I tried to find a cute skirt with a pineapple print with no luck--I went to all the fabric stores and found hardly ANY pineapple fabric, and none of it cute--but I did find a fun t shirt at Ann Taylor Loft).  Anyway...I'm always on the lookout for cute pineapple stuff.  I saw this plaster door medallion at the High School Yard Sale for $1.  Nice.  

30 minutes later and it fits my door decor much better.  I used acrylic craft paint and then a bit of silver Rub N' Buff to give it a nice sheen.  


Friday, September 23, 2016

DIY Barn Door

Pin It
 

I have been in my house for about 13 years and I've always wished I had a door to the laundry room in the basement.  I have a TV downstairs and my sewing area, so it was noisy when the washer was running and I wanted to use the family room. The door to the laundry was framed out without a door--and a traditional swinging door would take up precious space in the narrow room (or make it really hard to move the washer out should I ever need to replace it).  

I decided to give the barn door trend a go.  I went to Habitat for Humanity's ReStore and picked up a hollow core sliding closet door and painted it with chalkboard paint (with white trim).  It was a steal since the door was only $5 and I had the paint left over from other projects. I had to build my own track because my ceiling is only 7 feet and all the hardware I could find needed a bit more headroom than I had. 

Next, I added a wooden header across the whole opening and screwed it into the studs (which are not 16" on center...darn old houses).  Then I undid my work because I realized that the trim around the door stood out further than my bracket.  I put in spacers and hung the wood back up. 


My friend made me some J track with holes for screws, which I screwed into the wood header.  
To hang the door, I used closet door hardware as well as a couple of casters on the bottom of the door.  The hanging closet hardware keeps the door on the track; the casters hold all the door's weight. It rolls across the carpet fairly easily--if I were doing it again, I'd probably use larger casters. 


Monday, September 19, 2016

Fresh Peach Pie

Pin It


Peach season has been abundant around here.  I have some very awesome neighbors who shared their bounty with me.  One neighbor invited me to pick peaches with her, another left a bag of peaches on the front porch and yet another sets a box out at the end of the driveway for anyone who needs a few.  I've made topping for waffles, I froze peach pie filling, I made fruit leather, I froze some for smoothies--but I also made a fresh peach pie.  Oh, this is a treat for sure!


Makes a 10" pie
7 C. sliced fresh peaches, divided (probably about 10 big peaches)
1 C. sugar
5 T. cornstarch (I might use 6 T next time)
1 T. lemon juice
1 T. butter
1 10" baked pie crust


When you make fresh peach pie you mix the raw peaches with a glaze.  I don't care for the pre-made peach sauce that you buy in plastic tubs in the produce section.  I thought I liked the box of powdered peach pie filling mix--until I made my own.  Yeah, you have to ditch the box. It won't take much extra time.

First, bake a pie crust and let it cool on the counter. You can do it any way you like, buy a frozen one, refrigerated dough or make your own.  Next, peel your peaches (I use the quick blanching method to get the skins to slip off rather than try to do it with a paring knife) and get them sliced up and in a big bowl.


You will need to put the juice that has accumulated at the bottom of your bowl as well as 1 cup of the peaches into a blender.  You should have about 1 1/2 cups of puree (add water if needed, or wait a few minutes and get a bit more juice from the peaches still in the bowl).  Add the sugar and  cornstarch and blend til smooth.


Pour the mixture into a saucepan and heat on medium until it comes to a boil. Boil for 1 minute, remove from heat and add butter and lemon juice.  Pour the hot mixture over your sliced peaches.  Gently mix with a spatula then pour into the crust.

Put the pie in the fridge for at least 4 hours and serve with whipped cream. 

Friday, September 16, 2016

Faux Canvas Wall Art

Pin It


As part of my living room redecorating I put up a new shelf, and then I had to figure out what would go on the shelf and on the rest of the wall.  I spent lots of time surfing Pinterest for wall art ideas, for quotes etc...  I finally decided that I needed a piece that was about 2 feet across and about 30 inches long (I could have probably done closer to 3 feet...maybe next time).  When I looked at stores for art, I didn't find what I wanted.  I considered buying a canvas at the craft store and using paint and my vinyl cutter.  But I thought maybe I could do a faux canvas instead--and for less! 


I have been wanting to try out the Engineering prints from Staples since I read about a blogger who did a large print of the Death Star for her boys' room.  The engineering prints are inexpensive, but they are in black and white and lower resolution.  For the one I did, it cost about $3.50 (I uploaded the .jpg and an hour later got a call from Staples that it was ready for pick up).

Next, I had to figure out how to make the photocopy look like it was canvas.  I like the wrapped canvas look, so I decided I needed something that was about 1 inch thick. I thought about foam core board or cardboard, but I'd have to put layers together.  I considered plywood or particle board (and if I had had a scrap big enough in my shed I might had gone that route).  Then I landed on rigid foam insulation--cheap, easy to haul home and cut! I didn't want a big sheet of it, but luckily, Home Depot sells it in small 2x2 and 2x4 panels.  I chose the 1" thick and it was about $3.50.

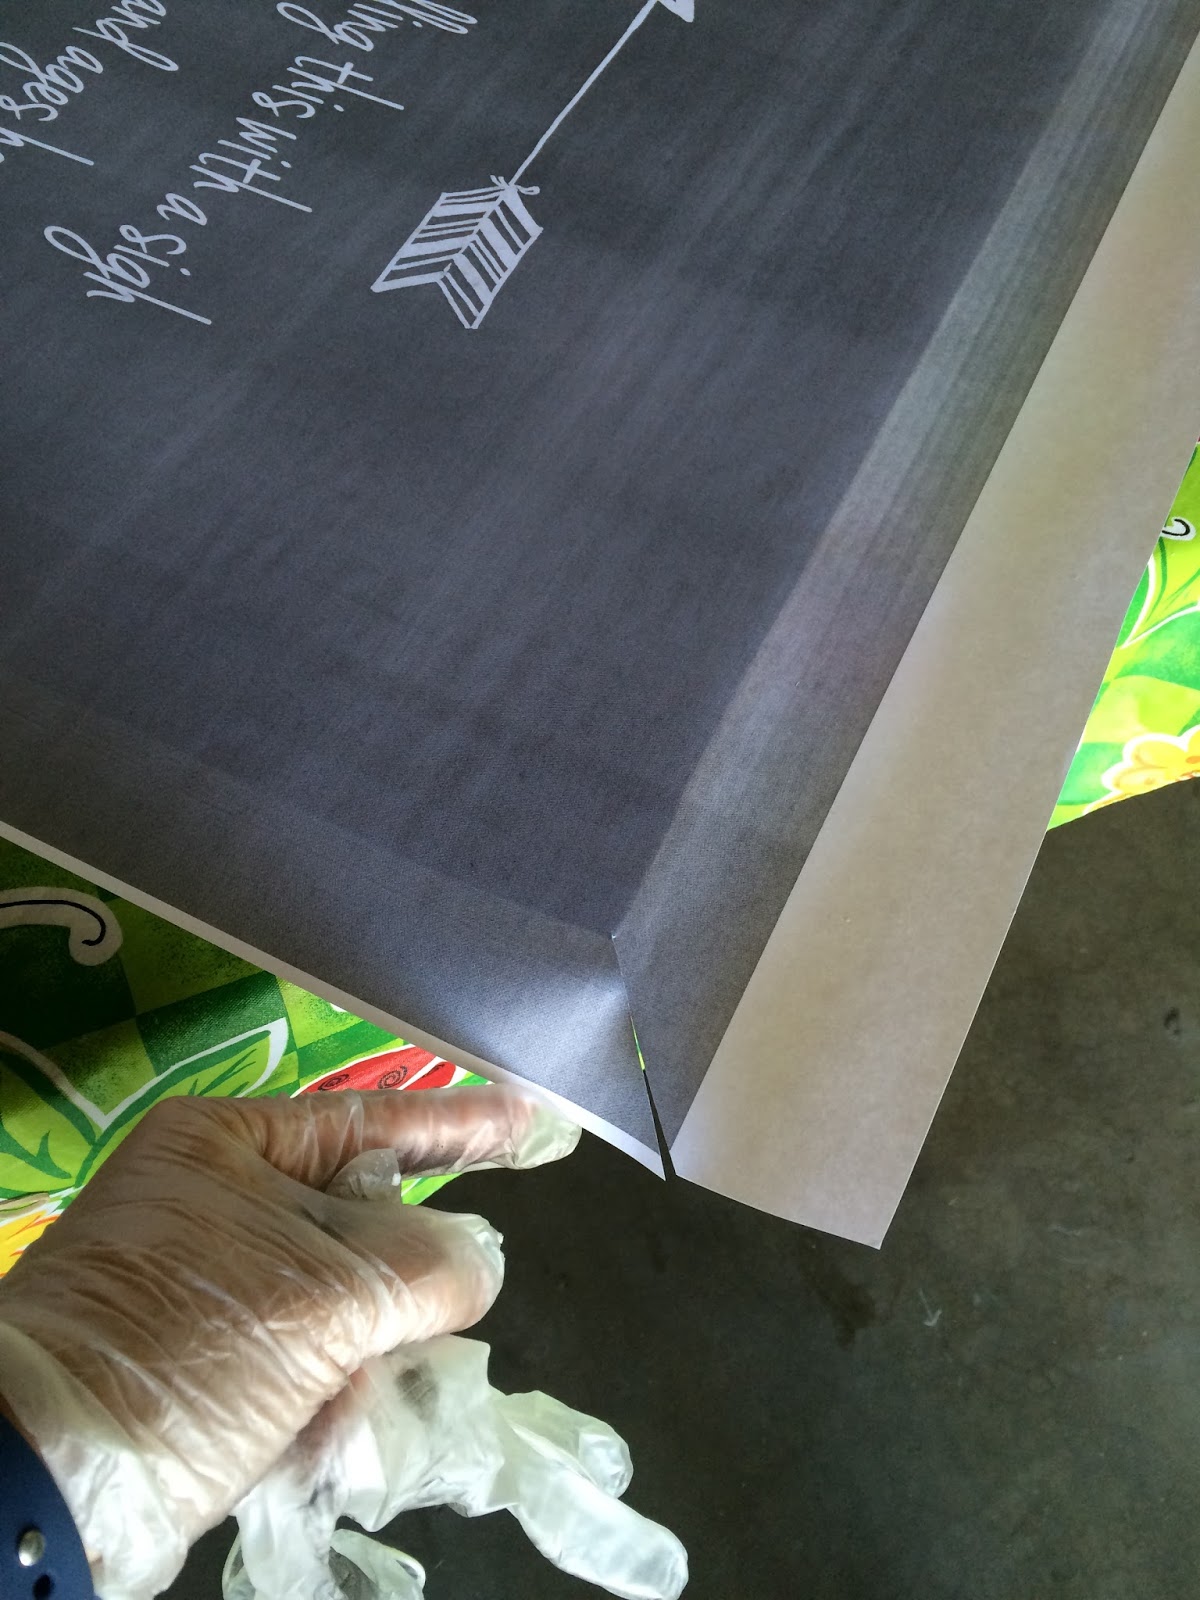
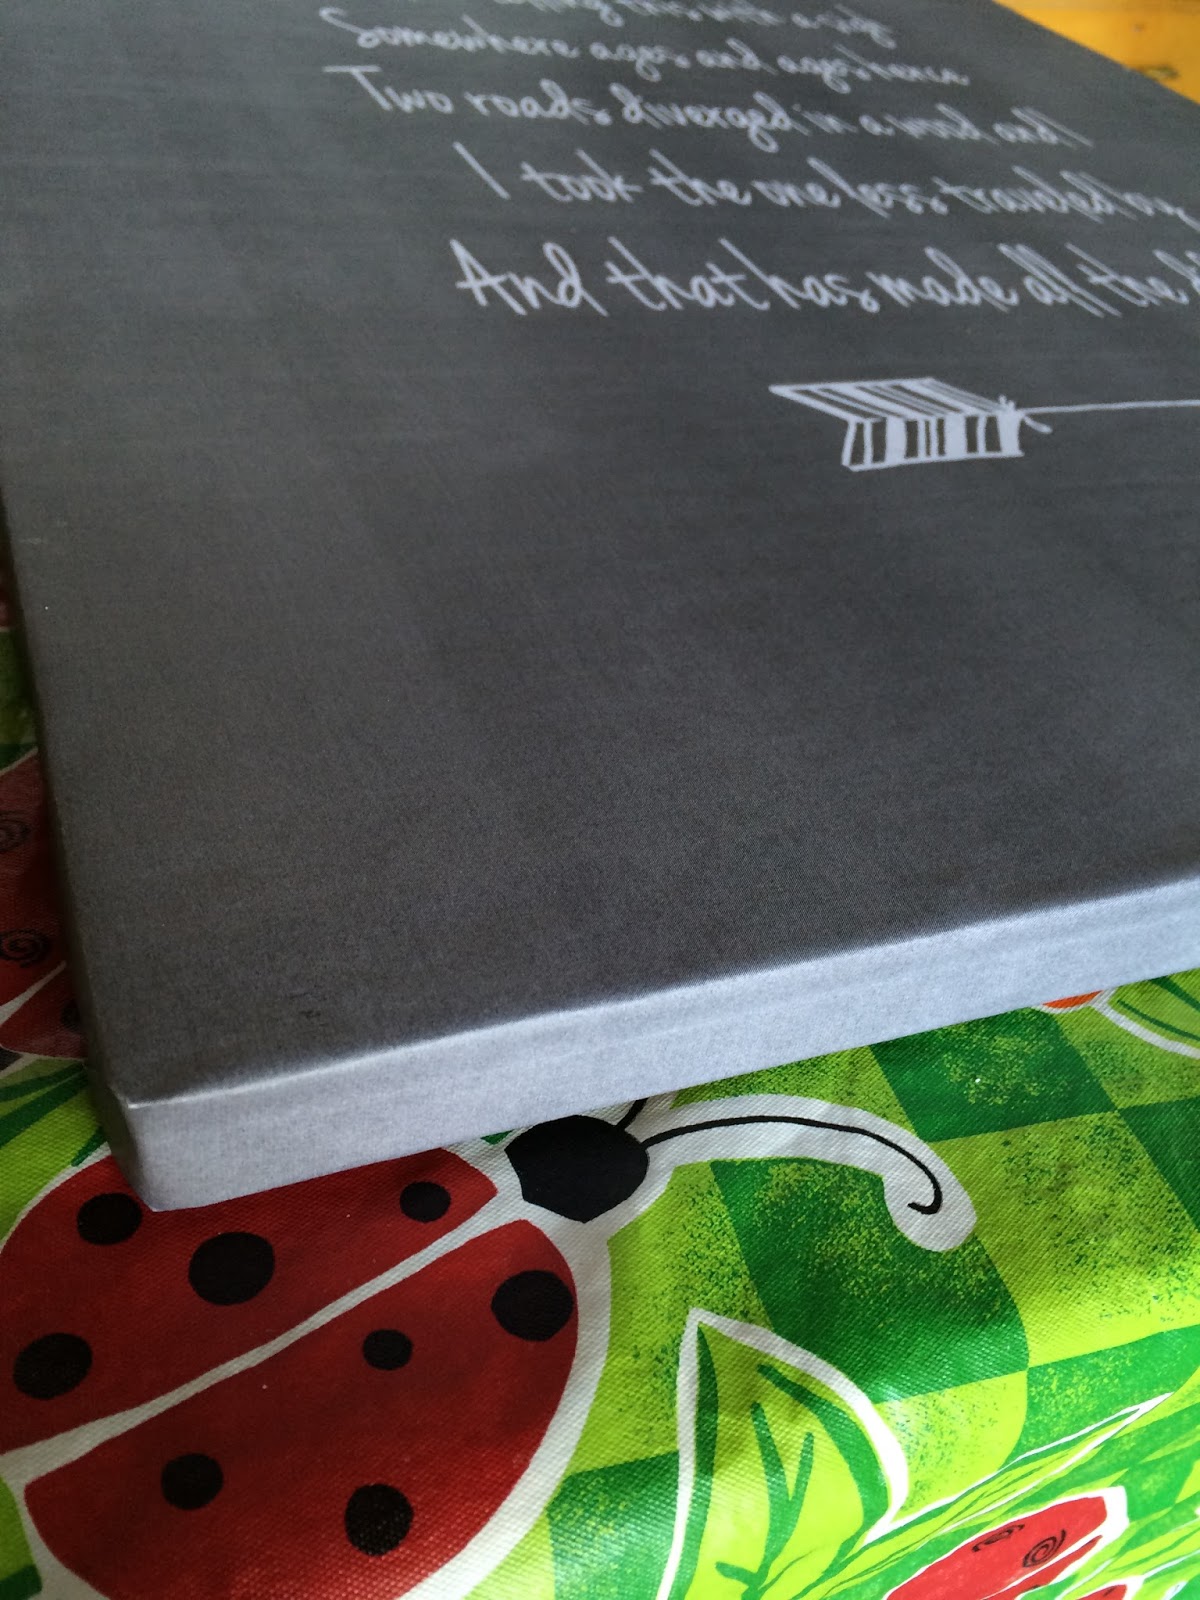
So, I brought home my print and my foam.  I used a straightedge to trim the foam and sprayed the surface with adhesive.  I centered the print over the foam and carefully smoothed it down.  I cut the corners of the paper at an angle and flipped the whole thing over and sprayed a bit more adhesive on the foam edges and the paper.  I slowly and carefully wrapped the paper around the edge and the back.  It looked a lot like a wrapped package.


 To get the illusion of canvas, I used a big paintbrush (the super cheap bristle brush from the Dollar Store) and dry brushed a bit of Modge Podge in long sweeping strokes both vertically and horizontally.  Don't use much of the glue--dab it on the brush, tap most of it off on a rag or paper towel and then lightly brush (if you get heavy handed with the liquid glue, the thin paper will wrinkle up). 

Since the foam is so light, I used a loop of twine and some duct tape to make the hanger (tie a knot in the end so the twine doesn't slide out of the tape). 


For my quote, I went with Robert Frost's The Road Not Taken.  We had sung it at choir a couple months ago and it has just stuck with me.  

Two roads diverged in a yellow wood,
And sorry I could not travel both
And be one traveler, long I stood
And looked down one as far as I could
To where it bent in the undergrowth;

Then took the other, as just as fair,
And having perhaps the better claim,
Because it was grassy and wanted wear;
Though as for that the passing there
Had worn them really about the same,

And both that morning equally lay
In leaves no step had trodden black.
Oh, I kept the first for another day!
Yet knowing how way leads on to way,
I doubted if I should ever come back.

I shall be telling this with a sigh
Somewhere ages and ages hence:
Two roads diverged in a wood, and I—
I took the one less traveled by,
And that has made all the difference.

Friday, September 9, 2016

Industrial Wood Shelf

Pin It
I've been slowly redecorating my living room.  It started with a really big couch.  I fell in love with a really expensive sofa at Restoration Hardware, but I'm not ever going to pay seven thousand for furniture.  I looked around and found a local furniture store that had one that was still a dark leather, and still 44 inches deep and 8 feet long (yeah, its about the size of a twin size bed--and yup, I love Sunday naps on it), made in America AND less than 1/4 the price of the RH one.  With a big new couch I thought I needed new artwork over the back of it.  

This shelf was really easy--and not terribly expensive.  I hit the cull bin at the back of Home Depot and found a 10 foot board that is 6 inches deep and 1 3/4 thick.  The end of the board was damaged, so I got the whole thing for $8.  I cut it into a 5 foot length. 
Next was plenty of sanding and then some dark stain and a coat of poly.  Total time in making the shelf:  about an hour.  I let it dry for a couple days outside so that it wouldn't smell too much when I installed it.  
 
The shelf is set on 2 brackets made out of plumbing fittings.  I debated 1/2" vs 3/4" pipe fittings--and decided that the 1/2" looked just right (3/4 seemed a bit too fat).  You need the floor flange, a 6" straight piece and a pipe cap.  The flange was the most expensive at around $6 each.  

I was lucky that I had a stud to hang one end of the shelf in, but the other bracket wasn't on a stud, so I used the drywall anchors.  

Easy.  Total cost for the shelf was less than $20.  FYI, I don't have any little people that could potentially pull or knock the shelf off the wall.  If you do, you may want to add some L-brackets at the back of the shelf and screw it to the wall, just in case.