Pin It
I go through color crushes...red, green, gray...now aqua blue! I've had a pair of these end tables in my garage for a year and this week was the week that they got some love. They are not high quality furniture-just veneer, but they have nice lines and a delicate quality that I liked.
I have to say that I really love how this color blue turned out. Its Aqua Smoke from Home Depot. While I was working with it outside, it seemed too light, but once I brought it inside, I just loved it!
First, a very light sanding on all but the table top (decided to leave it) and a good cleaning. Next, 2 coats of Kilz primer. I love how quickly it dries. I used a foam brush for most of the job, but I brought out my 1/2" craft painting brush to get at the detail work on the spindles and door.
Two coats of the Aqua Smoke were just right. Today I did two coats of water-based polyurethane in Satin (the paint was a sample, so it was flat-sheen, so I really needed the poly in order to give it the right look).
Now, what to do with this table's twin? Do it up the same? A different color? I'll admit I bought these tables with the intention of turning them into mini play kitchens for nieces and nephews...but now I'm not so sure. What do you think?
Friday, June 29, 2012
Saturday, June 16, 2012
Grilled Veggies...ah, summer
Pin It
I break out the grill several times a week during the summer, and veggies on the grill are one of my favorites. I love having zucchini, yellow squash, onion and mushrooms--but use whatever you've got.
After you've cut the veggies into similar size pieces, I like to toss them in a ziplock bag or bowl with some balsamic vinegar and oil (or just use Italian salad dressing) for 15 minutes while the grill is heating up.
I use a grill basket to keep things all contained (pick one up at TJ Maxx or Ross). I heat the grill up to med-high and keep the lid closed most of the time with occasional stirring.
It takes about 15 minutes to cook to my preferred doneness. Serve it up with whatever else you feel like.
I break out the grill several times a week during the summer, and veggies on the grill are one of my favorites. I love having zucchini, yellow squash, onion and mushrooms--but use whatever you've got.
After you've cut the veggies into similar size pieces, I like to toss them in a ziplock bag or bowl with some balsamic vinegar and oil (or just use Italian salad dressing) for 15 minutes while the grill is heating up.
I use a grill basket to keep things all contained (pick one up at TJ Maxx or Ross). I heat the grill up to med-high and keep the lid closed most of the time with occasional stirring.
Monday, May 28, 2012
Garbage Can Planter
Pin It
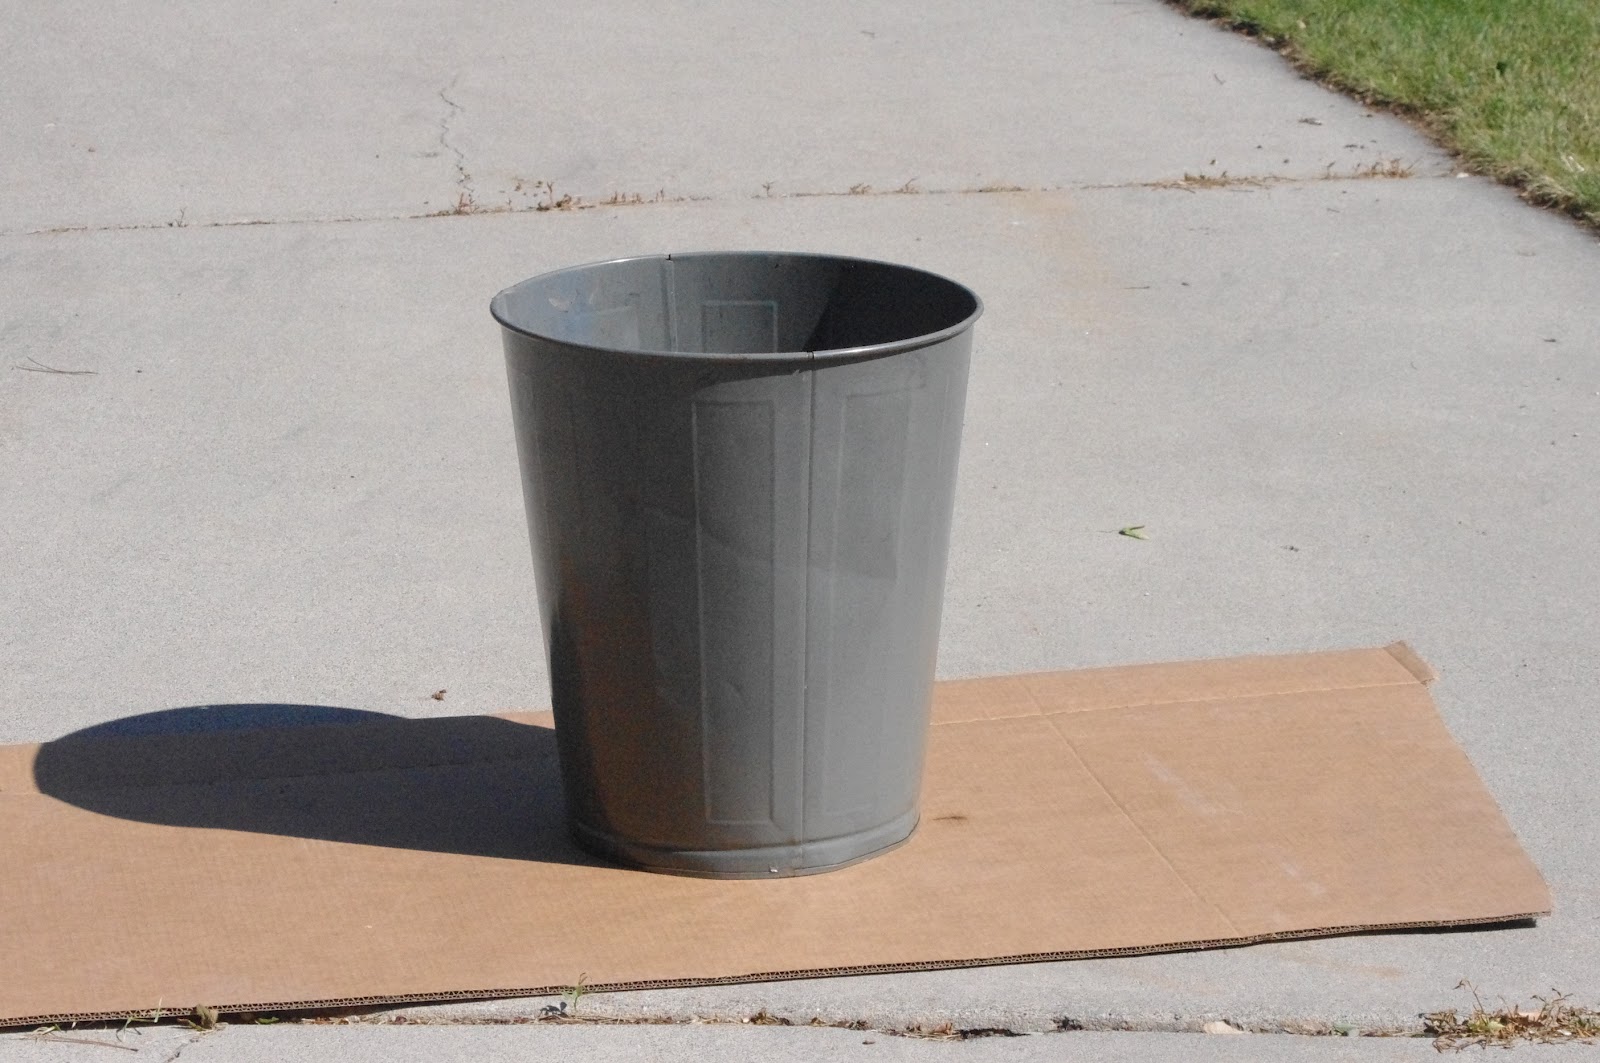
Last year I picked up several metal garbage cans from a sale from an elementary school that had been closed. I think they were about .10 each, so even if all I used them for was trash, it would be ok. Today I finally had the time to do a quick make-over on one. I sprayed it with Rust-oleum High Gloss Black and then used my Silhouette to cut out the house number and name. I spent about 10 minutes on the painting and about 10 minutes on designing the house label. After that, it was up to the Silhouette to get the job done. The lettering is about 8 inches x 11 inches total. Pretty quick project.
I like it so well, that I may do one for my own house.
Before:
After:
Note: I didn't fill the can directly with dirt, I just stuck the flowers that I bought in a plain plastic pot in it (the pre-done pot of flowers is from Walmart).
Last year I picked up several metal garbage cans from a sale from an elementary school that had been closed. I think they were about .10 each, so even if all I used them for was trash, it would be ok. Today I finally had the time to do a quick make-over on one. I sprayed it with Rust-oleum High Gloss Black and then used my Silhouette to cut out the house number and name. I spent about 10 minutes on the painting and about 10 minutes on designing the house label. After that, it was up to the Silhouette to get the job done. The lettering is about 8 inches x 11 inches total. Pretty quick project.
I like it so well, that I may do one for my own house.
Before:
After:
Rhubarb Abundance!
Pin It
I grew up in Idaho, and apparently that may have something to do with my enjoying foods that many of my friends have either never heard of or can't imagine anyone liking--rhubarb is one of those foods. I love the tartness that this "fruit" gives to pies and cobblers. I planted my own last year, but it was too small to harvest anything from this year. Lucky for me, my friend had an abundance and was willing to share with me!
I already made (and ate) the rhubarb cobbler--with no pictures. Oops. I use Paula Deen's cobbler recipe because it always works and I've tried it with lots of different kinds of fruits.
4 C. rhubarb (or any other fruit that you love)
2 C. sugar, divided
1/2 C. water
1/2 C. butter, melted
1 1/2 C. flour
3/4 tsp. salt
2 tsp. baking powder (scant)
1 1/2 C. milk
Preheat the oven to 350. On the stove in a medium saucepan mix the fruit, 1 C. sugar and the water. Bring to a boil and boil for 10 minutes. While fruit is coming to a boil: In a 3 qt baking dish, put the butter in the bottom of the dish. In a separate mixing bowl, mix 1 C. sugar, the flour, salt, baking powder and milk together to make a batter. Pour the batter on top of the melted butter; don't stir it. When fruit mixture is done, spoon or carefully pour it all over the top of the batter. Bake for about 40 minutes. During the baking time, the butter mixes in the batter, the fruit ends up on the bottom and the batter is all golden and moist on the top. Yum.
OK, since I had so much rhubarb I also made up some pie filling to use later. I've done this technique before with apple and cherry pies. Check it out here. For this recipe, I used:
4 C. chopped fresh rhubarb
1 1/2 C. sugar
3 T. instant tapicoa
Put all ingredients in a gallon size freezer bag. Zip it up and mix it up. Let it sit on the counter for about 10 minutes, then place the whole bag into a pie pan. Freeze it in the pan. Once frozen, you have a pan-shaped disc of filling mix that you can use to make a quick pie. I usually use refrigerator pie dough, so my prep time is about 2 minutes, then let it bake for 45-60 minutes (its a long time because the filling is frozen), so you'll need to use foil to shield the edges of the crust during the long baking time.
Still MORE rhubarb?
I still had more rhubarb, but I was out of tapioca for more pie filling. No worries, you can just chop up rhubarb and put it in freezer bags to use later in a cobbler, pie or some other treat. I bagged it up in 4 c. packages. Easy!
I already made (and ate) the rhubarb cobbler--with no pictures. Oops. I use Paula Deen's cobbler recipe because it always works and I've tried it with lots of different kinds of fruits.
4 C. rhubarb (or any other fruit that you love)
2 C. sugar, divided
1/2 C. water
1/2 C. butter, melted
1 1/2 C. flour
3/4 tsp. salt
2 tsp. baking powder (scant)
1 1/2 C. milk
Preheat the oven to 350. On the stove in a medium saucepan mix the fruit, 1 C. sugar and the water. Bring to a boil and boil for 10 minutes. While fruit is coming to a boil: In a 3 qt baking dish, put the butter in the bottom of the dish. In a separate mixing bowl, mix 1 C. sugar, the flour, salt, baking powder and milk together to make a batter. Pour the batter on top of the melted butter; don't stir it. When fruit mixture is done, spoon or carefully pour it all over the top of the batter. Bake for about 40 minutes. During the baking time, the butter mixes in the batter, the fruit ends up on the bottom and the batter is all golden and moist on the top. Yum.
OK, since I had so much rhubarb I also made up some pie filling to use later. I've done this technique before with apple and cherry pies. Check it out here. For this recipe, I used:
4 C. chopped fresh rhubarb
1 1/2 C. sugar
3 T. instant tapicoa
Put all ingredients in a gallon size freezer bag. Zip it up and mix it up. Let it sit on the counter for about 10 minutes, then place the whole bag into a pie pan. Freeze it in the pan. Once frozen, you have a pan-shaped disc of filling mix that you can use to make a quick pie. I usually use refrigerator pie dough, so my prep time is about 2 minutes, then let it bake for 45-60 minutes (its a long time because the filling is frozen), so you'll need to use foil to shield the edges of the crust during the long baking time.
Still MORE rhubarb?
I still had more rhubarb, but I was out of tapioca for more pie filling. No worries, you can just chop up rhubarb and put it in freezer bags to use later in a cobbler, pie or some other treat. I bagged it up in 4 c. packages. Easy!
Monday, April 23, 2012
Secretary's Week Gift
Pin It
I work in an office with many wonderful secretaries, who all help make things run smoothly. Since I've been trying to cut down on my junk food intake, I'm trying to NOT give candy as thank you gifts. And, because there are many secretaries, the cost of the gift needs to be small. Really, its about showing your appreciation, not about the money. So, here is a little gift tag I made up that will accompany a tasty, healthy orange and a classic knock knock joke! You can find a PDF with 4 cards on one sheet on this link.
Show your secretary a bit of love this week!
Sunday, April 15, 2012
Gnocchi: A "souvenir" from my trip to Italy
Pin It

I had a birthday last week (a milestone b-day), that I spent by escaping my usual life and headed to France and Italy. One of the highlights was taking cooking lessons from my innkeeper in Florence. Awesome. So, don't be surprised if you see a couple more posts related to my fun in an Italian kitchen! The pics today are a mix of ones from my lesson in Italy and back in my own kitchen.
Note: Just FYI, the wine on the counter isn't mine...I can't tell you how many times folks in Italy shook their head at me not being interested in wine :)
Gnocchi are pretty simple to make and use ingredients that you most likely have in the house at all times. My adorable Italian cooking teacher, Vary, said that while the recipe is a good starting point, it can change based on the moisture content of the potatoes-so just keep an eye on it.
1 lb potatoes (about 3-4 potatoes)
3/4 C. flour
1 egg
I used white potatoes since that is what we used during my lesson in Italy. Leave the skins on and boil the potatoes for 15-20 minutes until they are cooked through. Drain, then use a paper towel to handle the potatoes while you peel them. You will need to use a potato ricer or cheese grater to get small, uniform bits of potato.
Make a pile of the potato bits and make a well in the middle. Crack an egg into the middle. Toss about 2/3 of the flour onto the top and start folding it all together (pulling the edges to the middle). When it starts to come together, use both hands to form a ball of dough-adding more flour if you need to.


You don't want to work it too much (the potatoes and flour will start creating too much gluten and I guess that makes for dense, heavy gnocchi). When you have a nice workable dough, form a log and divide it into 4-5 chunks.

Sprinkle the counter with more flour and roll each chunk of dough into a snake about 1/2" in diameter. Use a bench scraper or knife to cut the snake into 1" long pillows. Repeat for the rest of the dough.

If you want to go super simple, you can stop now and get ready to cook the gnocchi--but if you want to make them "pretty" you need to roll each pillow against something for texture. The texture does help sauce cling (and you also create a "dimple" on the back, also good for holding more sauce). In Italy, we used the back of a cheese grater on the fine grate side. I also tried using the back of a regular dinner fork. At home, I use the edge of my pie dough cutter. You just pick up a pillow, gently press it against the tines with your thumb and roll it down gently. Press just hard enough to leave indentations. You kinda end up with a tube of gnocchi with texture on one side.


Cooking is lightning fast (so make sure your sauce is ready to go before you start cooking gnocchi). Boil a pot of water, add a generous amount of sea salt after it is boiling and then toss in some gnocchi--not so many that they clump all together--they need some space to move around. They will be done in 2 minutes-you'll know because they'll float to the top of the water.
Drain and serve with a sauce of your choice. You can freeze uncooked gnocchi to use later (don't try it with already cooked ones).
Sauces:
In Italy we made this one:
1 C. diced roma tomatoes
1 C. diced eggplant
2-3 green onions, sliced
1 T. sun dried tomatoes
1-2 T. extra virgin olive oil
salt and pepper
Heat the oil in a saucepan and add everything except the sun dried tomatoes. Cook over medium heat until the vegetables are tender. Season with salt and pepper. Toss in the sun dried tomatoes. Serve over the gnocchi with Parmesan.
At home I tried this sauce:
1 T. extra virgin olive oil
1/4 tsp. red pepper flakes
1 clove garlic, minced
1 green onion, sliced
1 c. diced tomatoes (I used canned since that is what I had)
Heat the oil in a saucepan and add everything except the tomatoes. Let cook for about 1-2 minutes until onion is translucent. Add the tomatoes and simmer for 5-10 minutes.
I had a birthday last week (a milestone b-day), that I spent by escaping my usual life and headed to France and Italy. One of the highlights was taking cooking lessons from my innkeeper in Florence. Awesome. So, don't be surprised if you see a couple more posts related to my fun in an Italian kitchen! The pics today are a mix of ones from my lesson in Italy and back in my own kitchen.
Gnocchi are pretty simple to make and use ingredients that you most likely have in the house at all times. My adorable Italian cooking teacher, Vary, said that while the recipe is a good starting point, it can change based on the moisture content of the potatoes-so just keep an eye on it.
1 lb potatoes (about 3-4 potatoes)
3/4 C. flour
1 egg
I used white potatoes since that is what we used during my lesson in Italy. Leave the skins on and boil the potatoes for 15-20 minutes until they are cooked through. Drain, then use a paper towel to handle the potatoes while you peel them. You will need to use a potato ricer or cheese grater to get small, uniform bits of potato.
Make a pile of the potato bits and make a well in the middle. Crack an egg into the middle. Toss about 2/3 of the flour onto the top and start folding it all together (pulling the edges to the middle). When it starts to come together, use both hands to form a ball of dough-adding more flour if you need to.
You don't want to work it too much (the potatoes and flour will start creating too much gluten and I guess that makes for dense, heavy gnocchi). When you have a nice workable dough, form a log and divide it into 4-5 chunks.
Sprinkle the counter with more flour and roll each chunk of dough into a snake about 1/2" in diameter. Use a bench scraper or knife to cut the snake into 1" long pillows. Repeat for the rest of the dough.
If you want to go super simple, you can stop now and get ready to cook the gnocchi--but if you want to make them "pretty" you need to roll each pillow against something for texture. The texture does help sauce cling (and you also create a "dimple" on the back, also good for holding more sauce). In Italy, we used the back of a cheese grater on the fine grate side. I also tried using the back of a regular dinner fork. At home, I use the edge of my pie dough cutter. You just pick up a pillow, gently press it against the tines with your thumb and roll it down gently. Press just hard enough to leave indentations. You kinda end up with a tube of gnocchi with texture on one side.
Cooking is lightning fast (so make sure your sauce is ready to go before you start cooking gnocchi). Boil a pot of water, add a generous amount of sea salt after it is boiling and then toss in some gnocchi--not so many that they clump all together--they need some space to move around. They will be done in 2 minutes-you'll know because they'll float to the top of the water.
Drain and serve with a sauce of your choice. You can freeze uncooked gnocchi to use later (don't try it with already cooked ones).
Sauces:
In Italy we made this one:
1 C. diced roma tomatoes
1 C. diced eggplant
2-3 green onions, sliced
1 T. sun dried tomatoes
1-2 T. extra virgin olive oil
salt and pepper
Heat the oil in a saucepan and add everything except the sun dried tomatoes. Cook over medium heat until the vegetables are tender. Season with salt and pepper. Toss in the sun dried tomatoes. Serve over the gnocchi with Parmesan.
At home I tried this sauce:
1 T. extra virgin olive oil
1/4 tsp. red pepper flakes
1 clove garlic, minced
1 green onion, sliced
1 c. diced tomatoes (I used canned since that is what I had)
Heat the oil in a saucepan and add everything except the tomatoes. Let cook for about 1-2 minutes until onion is translucent. Add the tomatoes and simmer for 5-10 minutes.
Saturday, February 18, 2012
Chicken with Mushroom and Lemon Sauce
Pin It

Like many of you, I've been working on those January "get healthy" goals (despite the last two posts of chocolate desserts). I'm participating in a team contest with Channel 2 and Gold's Gym-which is a good motivator. Knowing that my team is counting on me to stick to the plan makes me think twice before downing a theater size box of candy or reminds me to get off the couch and to the gym. So, in the spirit of health, I ordered a Bountiful Basket for this weekend. If you haven't given this food co-op a try, I recommend it. Its only $15 and you get a whole lot of fresh fruits and veggies. Of course, I brought it home this morning and wondered how I was going to use it all up. I came up with a chicken dish with a sauce that used no butter or cream :) It turned out very tasty!
Pan chicken with mushroom and lemon sauce
2 chicken breast cutlets
3 T. flour
2 tsp. vegetable oil
1 C. sliced mushrooms (I used baby bellas)
1/2 small onion, sliced
1 tsp. minced garlic
1 lemon
1 can low sodium chicken broth
1 T. flat leaf parsley, chopped
I coated the chicken with some flour and salt and pepper and put it in a medium-hot frying pan with the oil. Cook the chicken for about 5 minutes on each side (it will be golden on the outside, but not cooked through yet), and then remove the chicken from the pan. In the pan, pour in a splash of chicken stock add the onions. Sautee for about 5 minutes, then add the garlic. Stir for about 1 minute, then add the mushrooms. Stir and add a bit more chicken stock until the mushrooms are soft.
When the mushrooms are soft, add a couple tablespoons of flour to the mix and cook on medium-low for about a minute and then pour 1 cup of the chicken stock into the pan. Squeeze the juice from 1/2 the lemon and add the chicken back into the pan. Cover and simmer for about 10 minutes. Just before serving add the fresh parsley and the juice from the other half of the lemon.
Like many of you, I've been working on those January "get healthy" goals (despite the last two posts of chocolate desserts). I'm participating in a team contest with Channel 2 and Gold's Gym-which is a good motivator. Knowing that my team is counting on me to stick to the plan makes me think twice before downing a theater size box of candy or reminds me to get off the couch and to the gym. So, in the spirit of health, I ordered a Bountiful Basket for this weekend. If you haven't given this food co-op a try, I recommend it. Its only $15 and you get a whole lot of fresh fruits and veggies. Of course, I brought it home this morning and wondered how I was going to use it all up. I came up with a chicken dish with a sauce that used no butter or cream :) It turned out very tasty!
Pan chicken with mushroom and lemon sauce
2 chicken breast cutlets
3 T. flour
2 tsp. vegetable oil
1 C. sliced mushrooms (I used baby bellas)
1/2 small onion, sliced
1 tsp. minced garlic
1 lemon
1 can low sodium chicken broth
1 T. flat leaf parsley, chopped
I coated the chicken with some flour and salt and pepper and put it in a medium-hot frying pan with the oil. Cook the chicken for about 5 minutes on each side (it will be golden on the outside, but not cooked through yet), and then remove the chicken from the pan. In the pan, pour in a splash of chicken stock add the onions. Sautee for about 5 minutes, then add the garlic. Stir for about 1 minute, then add the mushrooms. Stir and add a bit more chicken stock until the mushrooms are soft.
When the mushrooms are soft, add a couple tablespoons of flour to the mix and cook on medium-low for about a minute and then pour 1 cup of the chicken stock into the pan. Squeeze the juice from 1/2 the lemon and add the chicken back into the pan. Cover and simmer for about 10 minutes. Just before serving add the fresh parsley and the juice from the other half of the lemon.
Subscribe to:
Posts (Atom)