Saturday, October 12, 2013

Applesauce

Pin It  

As a kid, I remember August and September being busy helping my mom and grandma put up fruit.  Our basement was filled with jars of peaches, cherries and pears.  I will admit to just being too lazy to do lots of canning, but I make an exception for homemade applesauce.

As with just about anything homemade (and made with homegrown items)--its going to taste better than anything at the grocery store.  The grocery store varieties are just too sweet or too much like baby food for my taste.  Applesauce is very easy, and pretty fool-proof.  Its even easier if you have a food mill, so that you don't have to peel the apples.

You will need:

Apples (I had 1/2 bushel of Ginger Gold-a sweet and spicy soft apple, terrible for eating, wonderful for sauce--I get them from my favorite vendor at the farmer's market)
Food mill
Jars with lids and bands


Since I use a food mill, I won't be peeling my apples, so I wash them in the sink.  Next, I cut the apples up using one of those apple cutters.  I put all the pieces, including the core into a large stockpot with about 1/2 cup of water.  Cover with a lid and simmer until the apples are soft (about 20 minutes)--you will need a big spoon to try and rotate the apples from the top to the bottom at least once.

Dump the soft apples into the top of the food mill and crank it out.  I use a large cake pan to collect the sauce.  Don't worry if the first bit looks a bit runny, once you have all the pulp through you can stir it up.  I run the "garbage" peels etc...3 or 4 more times to get all the goodness out that I can. I do not add anything to my applesauce--but some folks like sugar or cinnamon.


In my sterilized jars, I add the warm applesauce and leave about 3/4" of space.  Put on the lid and screw on the band.  I used my steam canner, bringing the batch up to full steam then timing it for 25 minutes.

I'm told you can freeze applesauce instead of processing it, but my freezer was kinda full...and I do like seeing the pretty jars in my storage room.  Even if you don't want to make a giant batch, make a small batch and serve it warm in a bowl like you would oatmeal (pour on some half and half, brown sugar, cinnamon and pecans)--yeah, good stuff.


Wednesday, July 31, 2013

Coffee Table Re-do

Pin It  
The industrial rustic decorating style has been holding some appeal for me lately.  I had been looking for the right project to tackle and finally found it!

This was one of the easiest and fastest furniture makeovers ever.  Really. It started with this clearance Target table (11.00).  The faux wicker and glass had to go, it was the metal base that I was interested in.
 

Next, the new top.  I headed to Home Depot and the "cull" bin at the back of the store.  I scored two pieces of lumber for only 1.01 each.  I measured the length of the old top and cut the boards to be about the same, 41 inches.  The old top was 20 inches wide, but with my lumber it was 22...close enough.


Some sanding and then I clamped the two boards together.  I cut 3 wood pieces (scraps from my shed) to connect the two pieces together.  I used the nail gun to tack them in place, then used screws to make the connection more secure.
 

More sanding with the palm sander.  I applied the stain (a mix of golden oak and kona black-it was what I had in the garage) and let it dry.  I finished it with some Minwax Finishing Paste, let it dry overnight and buffed it out.

I attached the table top to the base frame using some screws from underneath.

Total investment: $13 and 1 day of working time and a day of drying time.


Monday, July 1, 2013

Mango Coconut Vanilla Artisan Popsicles

Pin It


I recently returned from a trip that included a stop in Indianapolis, IN.  As luck would have it, I was there on a Statehouse Market day and I discovered that artisan popsicles are apparently all the rage.

Where have I been to have not known about this?  Obviously I haven't been searching Pinterest nearly enough.  Well, I am happy to step up to the plate on this one (especially since it will be over 100 degrees pretty much every day this week).

The hardest part for me was deciding what flavor to make. Like many of you, I started thinking I wanted to do this project late at night...on a Sunday...so I had to use what was in the house.  Luckily, I had a few options (ruled out, but saved for a future day are Key Lime Coconut, Strawberry, Chocolate Pudding and Pineapple/Greek yogurt).  I reviewed several recipes online for inspiration, but I really just went with what sounded good.  If you wanted to make these completely dairy free, skip the condensed milk and use sugar or honey as your sweetener instead. Don't have coconut milk?  Use half and half instead.

Here's what you need:
Popsicle molds
2 ripe mangoes
1 can coconut milk (13 oz)
1/4 tsp. vanilla bean paste (or 1 vanilla bean, seeds scraped out)
1/2 can of sweetened condensed milk


Peel and dice up the mangoes and then puree them in the blender--you may need to add a splash of water to make it easier on the blender.


Pour the mango puree through a strainer into a bowl with a pour spout (you'll strain out a bunch of stringy fibers that would otherwise make your popsicle less enjoyable to eat).  Add the coconut milk, vanilla and sweetened condensed milk.  Stir it up.

Pour into your molds and put in the freezer.  I set the timer for 1 hour and then I put the sticks in.  In my mold, if I put the sticks in right away, they sink and leave me with no handle.  If the mixture was a bit thicker to begin with, you could probably put sticks in from the get-go. 


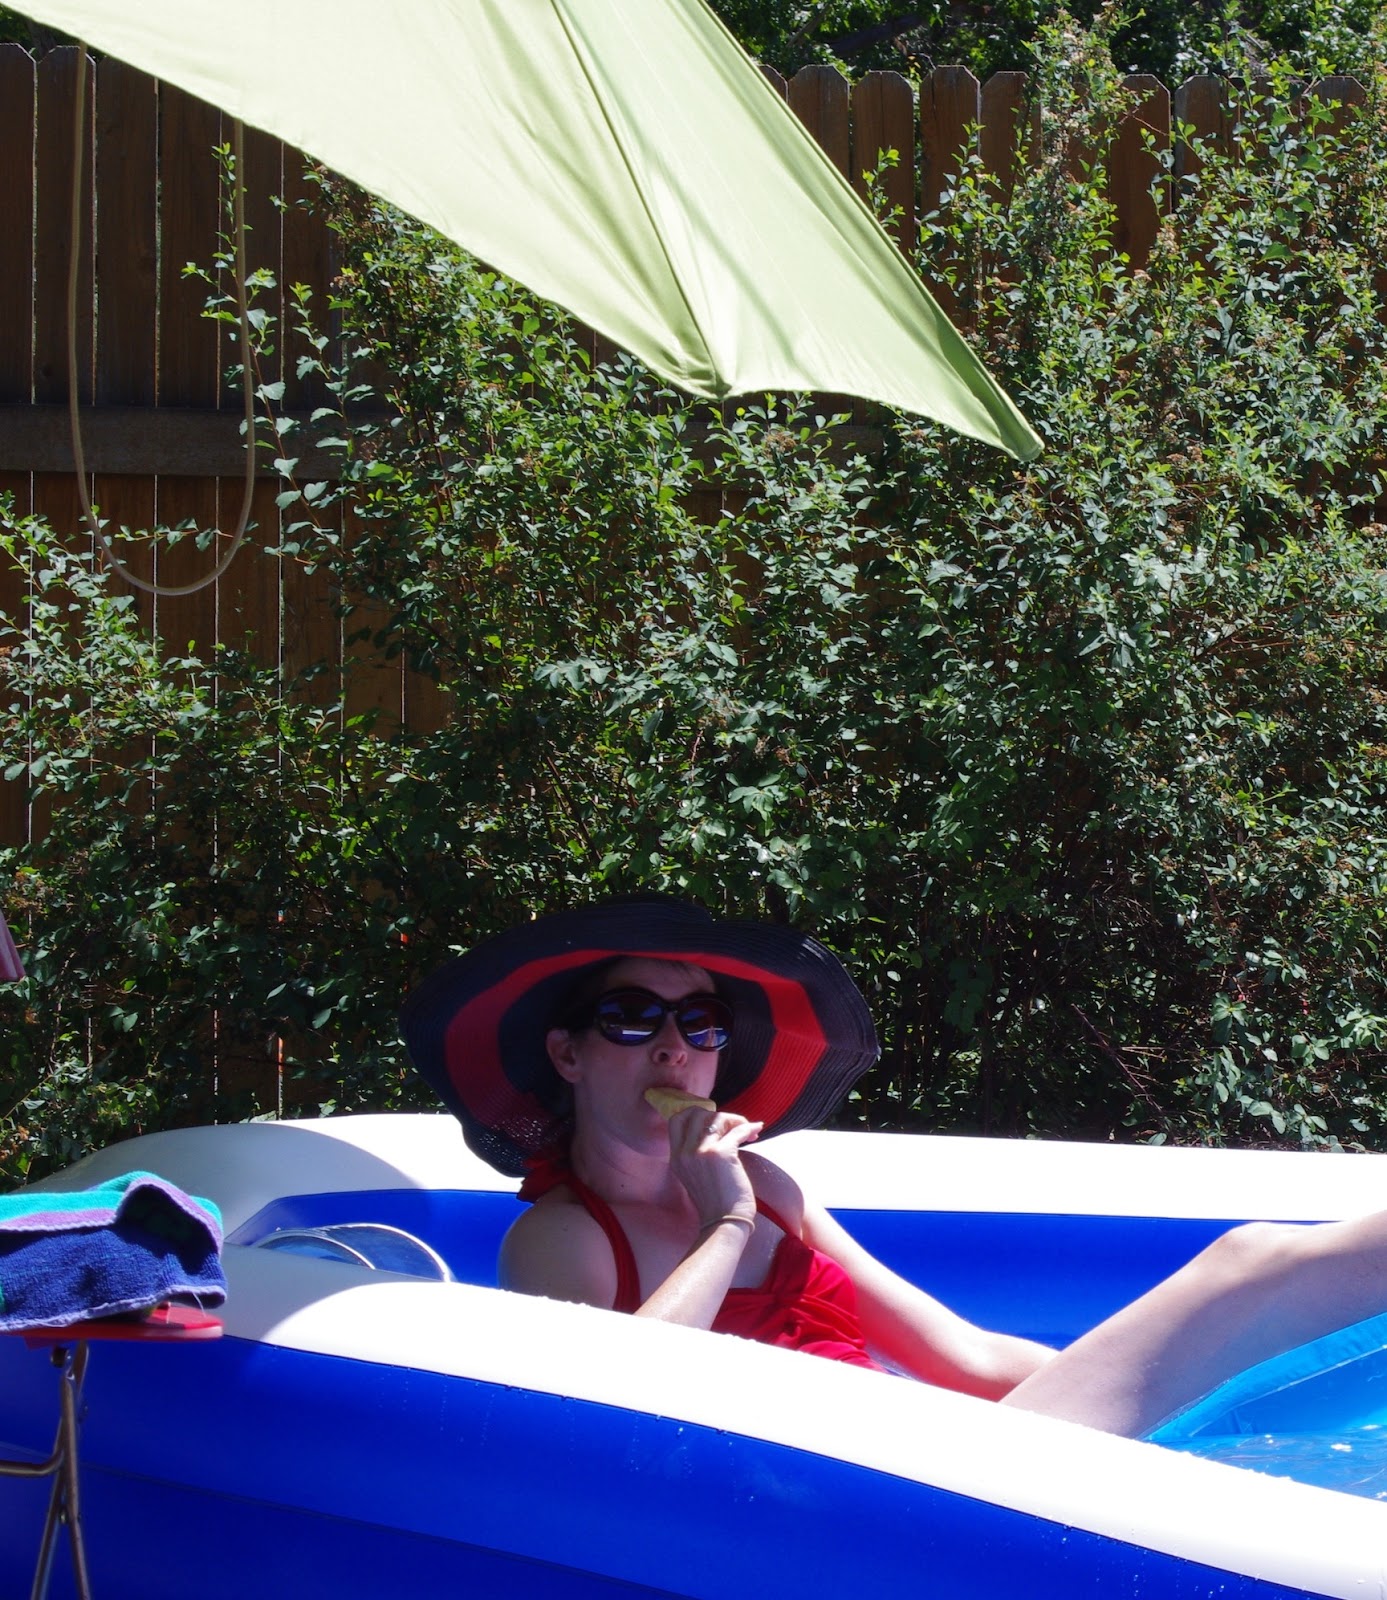
I indulged in a popsicle and some time in the inflatable pool in the backyard with one of these babies today!


Wednesday, June 5, 2013

Knit Skirt, Yoga Waistband

Pin It


I wear skirts a lot..for work, for church, for travel...they're comfy, especially when they are knit and have a fold-over waistband. I have a few in my closet that I've purchased, but who doesn't need more?  I have made about 5 of these so far, using mostly fabric I got online at Girl Charlee.  Love 'em.


Get your fabric laid out (right sides together...and if the front and the back look a lot alike, put some tape on the wrong side so you don't get mixed up later when you are working in a dim basement :) For the pattern, either use a skirt you already have as a guide, or just do some math.


For the math version:
Skirt front and back
Measure the spot around your hip/waist where you want the skirt's waistband to sit.  Let's use the number 40" since its a nice round number. 
Now divide that measurement by 4.  40/4 =10 inches
On the fold of the fabric, measure a line 10" arcross at the top of the skirt
Note:  Its stretchy fabric, so I don't leave much of a seam allowance, but you can if you want.

Now find out how many inches long you want the skirt to be, then add an inch for some hemming allowance.  (Lets say about 36 inches).
Next, you need to make the measurement for the bottom of the skirt.  You can make this as wide as you want.  I'd suggest that you make the bottom  at least 4" more than the top (our top was 10", so the bottom would need to be at least 14")--but it doesn't matter.  If you want a fuller skirt, make it 6 or 8 inches more than the top. 
For the back skirt piece.  If you have enough fabric length, just do an identical piece to the front along the fold (it depends on how long you need your skirt to be--if you are taller than my 5'7", you might need more than 2 yards of fabric--OR--don't cut it on the fold.  Instead, cut it on the leftover space from the front skirt piece.  You'll end up with two pieces that need a back seam sewed, but it works.

Now that you have a front piece and a back piece (note, if you had to cut the back in two pieces, please sew the center seam, right sides together)--you need to sew the side seams.  If you have a patterned fabric, you can try lining up the pattern, or not.  It is a pretty casual skirt.


Once you have the skirt body done, try it on--if its too big, you can always re-sew the side seams a bit closer. 

Waistband
Its time to make the fold-over (yoga style) waistband.  Let's take that waist measurement again, 40"-we'll need a rectangle of fabric that is 40"x 15" (the 15 is a flexible number.  I like my fold over waistband pretty wide, but you can make it narrower if you like).  The 40" need to be the stretchy direction (so theoretically you could stretch that 40" to more than that...if it doesn't stretch, then you're going the wrong direction on the fabric).  Note.  I like to actually measure the distance between the side seams on the skirt body and use that as my official waistband measurement.  It means that for sure the waistband will fit the skirt body precisely.

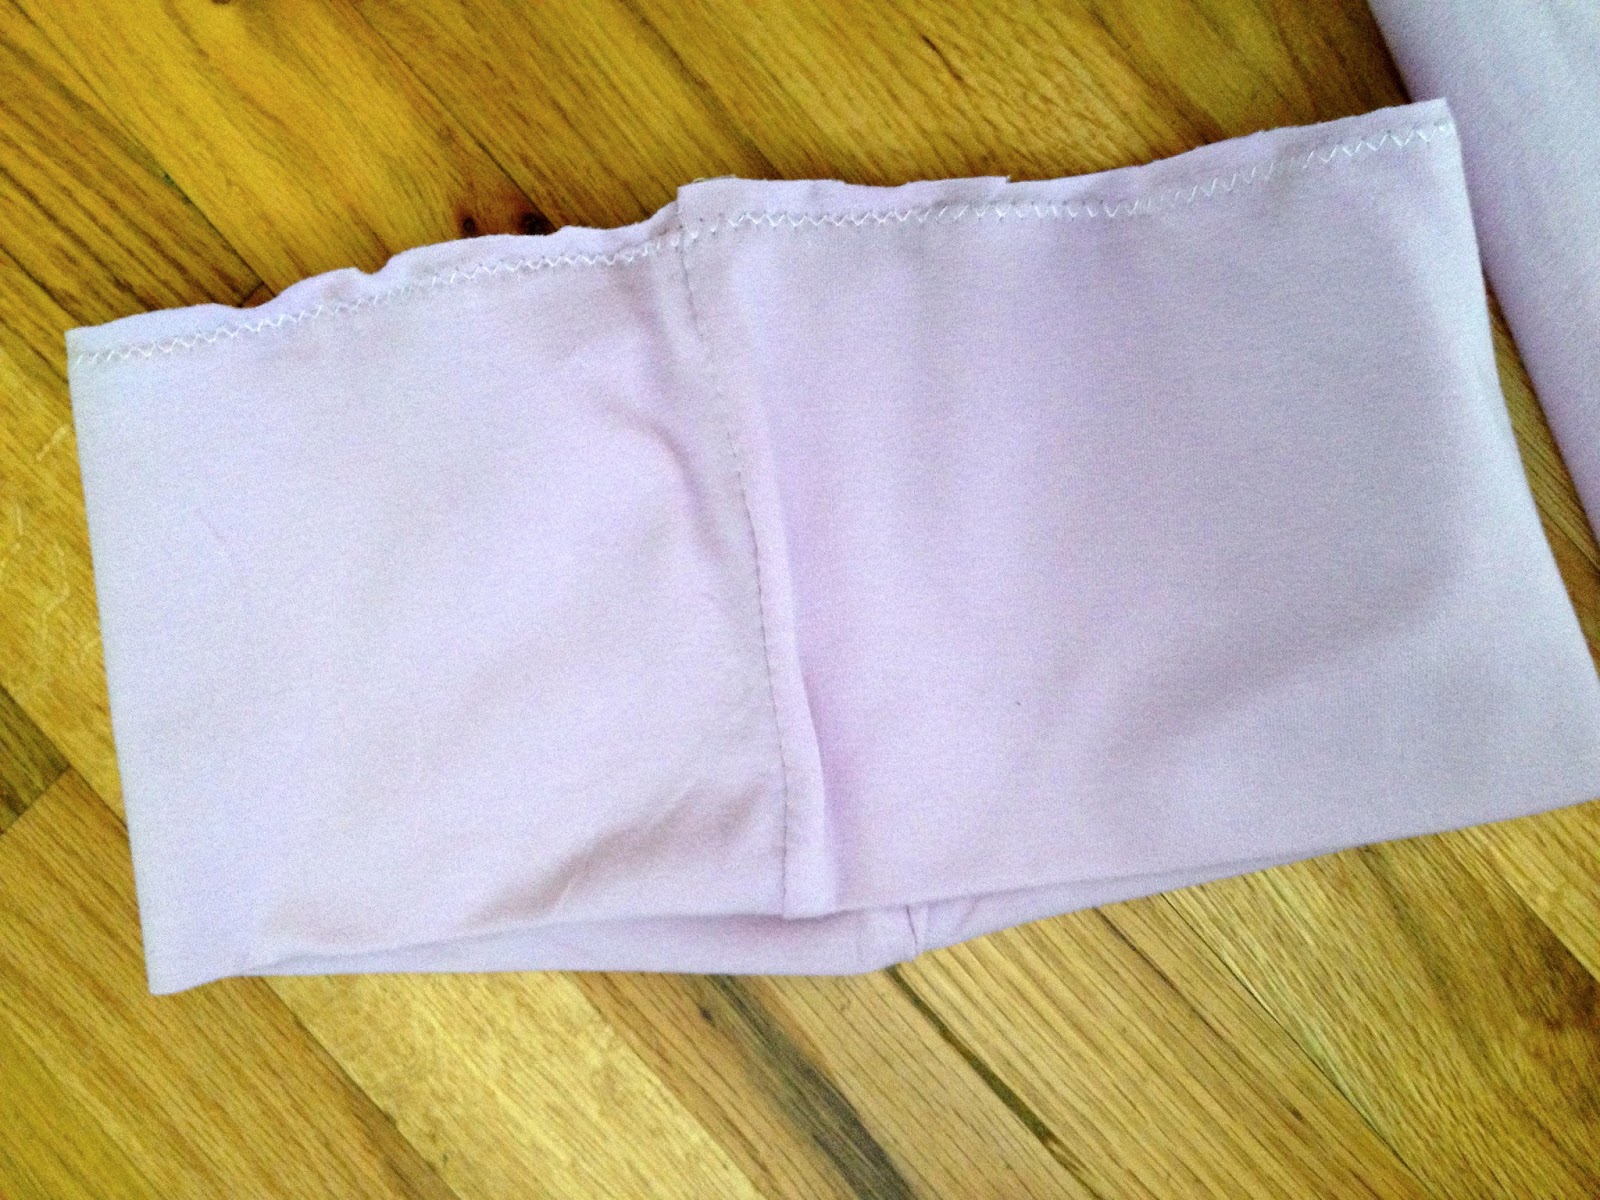
Fold the rectangle in half (right sides together) so that you end up with a 20x15 piece and sew the side seam, making a tube (You'll note that I didn't have a single piece big enough, so I did 2 20x15 pieces and sewed both edges).


Now fold the tube down so that you have a tube that is 7.5 inches tall and 20 inches (or so) across.  The right side of the fabric should be all you see on the tube. (Hmmm, I also used a quick basting stitch on the raw edges on this example, but I quit doing that because it took more time and didn't really  make a difference...I'm lazy apparently).


Last, you have to attached the waistband to the skirt.  Leave the skirt inside out.  Lay the skirt flat on the ground/table with the waist opening pointing away from you.  Leave the tube right side out. The folded edge of the tube should be pointing toward you.  

Slide the tube over the skirt so that the folded edge of the tube is pointing toward you and all the raw edges of the tube and the skirt body line up.   (sorry, no pic).  I like to line up my tube's side seam with the left seam of the skirt body.  You'll need to pin the waistband all around.  Now use a serger, or a zig-zag stitch on a regular machine to sew the waistband onto the skirt.

You may think you did the waistband backwards, except remember you will be folding the waistband down, hiding that seam :) 

Hemming.  Knit doesn't fray or ravel...so you could just leave it with no hem. Or just serge it.  Or fold it over a couple times and sew a straight stitch around.  Up to you.


Tuesday, May 28, 2013

iPad...my ultimate travel accessory

Pin It

We'll call this a follow-up post to my Traveling Light and Easy post.  When I travel, I like to keep myself entertained, but I don't have lots of space to bring things.  For several years, its seemed like every cool new gadget just added to the amount of things I brought along (laptop, Kindle, cell phone).  Hmmm.  Not saving much space.

Lets compare a road trip from 2001 to the one I'm planning for in a few weeks.

2001
Laptop+charger
Cell phone+charger
Portable DVD player+charger
Extra battery for DVD player+charger
MP3 player 
Headphones (Bose)
Camera + charger
2 paperback books
4 magazines
CD case with DVDs removed from their boxes (that's nothing.  One woman brought the VHS mini series of Pride and Prejudice)
zipper bags of candy like Mike and Ikes, Swedish Fish
Games (travel size scrabble, dice, yahtzee score sheets, playing cards)
Knitting
Address book
Scriptures
Guidebooks/maps
Tissues/medicines/lipbalm/wallet

2013
Ipad+charger
Iphone
Headphones
zipper bags of candy
Tissues/medicines/lipbalm/wallet
Maybe the knitting...I've kinda let that hobby go. 


Pretty dramatic huh?  I've gone from a "suitcase" size carry on to basically my purse, but I still have access to all the stuff I used to have--thanks to my iPad.  Other tablets may work just as well, but I don't have one to test out.

Here's how I made the switch:


Movies
I own lots of DVDs. Lots.  Many came with a digital copy, which I put in iTunes and synched to my iPad.  Others I created a digital copy using Handbrake and my home computer.  This eliminated the DVD player and discs.


Reading material
Wow, the iPad is great for condensing stacks of paper!  When I got the first-generation Kindle, I loved it (still do) for the ability to have tons of books, but not take up tons of space.  My iPad will do that too.  Some I  get from the public library.  Others, like classics, are free from Amazon.  Others still I buy/download. You can load the Kindle App on the iPad for free, even if you don't have a Kindle.


Magazines.  I have print subscriptions that come to my house that include the digital edition for free.  I set that up on my iPad.  My public library has an agreement with OverDrive and Flipster, which is an app that has magazines.  The app is free on iTunes and the Salt Lake County library has about 100 titles that are FREE.  Good titles too, like Martha Stewart, Consumer Reports and more.

Scriptures-these take up a lot of space :)  Plenty of free apps/PDFs out there so you can just keep it on your iPad instead.

Guidebooks/maps
Some I've bought digitally, most of the time though I just find a good travel website or app and skip buying a book altogether.

Games
Love that app store.  I have Scrabble, Words with Friends, Dice with Buddies (awesome free Yahtzee.  If there was a good real Yahtzee, I'd pay for it, but I couldn't find one). 


Other
I keep copies of my address book, ID/passport as PDFs or images on the iPad.  My iPad and iPhone use the same cable.  Sweet. I have a nice camera, and if I'm traveling for pleasure, I'm going to haul it along.  But, if not, my iPhone is good enough.  I've gotten some pretty good shots with that iPhone. (I also bought an adapter on Amazon that I can move my photos from the SD card on my good camera to the iPad...good as a back up). I can get by with a little bit of word processing on the iPad, which is great...eliminating the need for the laptop.

Label your stuff.  If you get an honest person (sometimes you do) you have a chance of getting your stuff back.

So I now have plenty of space for other things I think I need or pick up along the way.  If I were die-hard, I'd skip the iPad and load all this stuff on my iPhone.  But my eyes are not as young as they once were, and I like the larger screen of my iPad. 


Sunday, May 26, 2013

Monkey Bread...and the Dutch Oven

Pin It


I decided to merge two of my latest projects together...the one-hour bread recipe and dutch oven cooking.  This one turned out great--of course, its hard to go wrong when butter and brown sugar are involved.

You'll need
10-inch dutch oven
24-30 briquettes
1 recipe of bread dough, here
3/4 c. brown sugar
1 Tbs. cinnamon
3/4 c. butter, melted

Get the dough made (or cheat and buy a can of biscuits or frozen roll dough...but the dough took me 5 minutes to mix up-which I did in my kitchen before we headed up to the campground).  Divide the dough into 4 pieces and roll each piece into a rope about 1" in diameter.  Cut the rope into 1" pieces.  Toss the pieces into a zipper bag with the sugar and cinnamon.


I lined the dutch oven with foil and sprayed with Pam.  Toss in the 1/2 coated dough pieces--no rhyme or reason, just toss them in.  Pour 1/2 the melted butter over the dough, then put in the rest of the dough and butter.  Let rise for about 30 minutes.  While the dough is raising, get the briquettes lit so they will be hot and ready to go.


Put on the lid and place the dutch oven on top of 12-14 hot coals and put 12-14 coals on top of the lid.  Every 5 minutes, turn the pot about 1/4 turn.  I baked mine for about 30 minutes.  Immediately dump the baked bread onto a plate (or big piece of foil like I did, since we were at a campground and I didn't have all my kitchen with me).

Tasty stuff. Wish I had brought along a tub of frosting or some milk, but that didn't stop us from eating it.


Monday, May 20, 2013

Traveling Light and Easy

Pin It


Packing

Once upon a time, I was not good at packing...at all.  Of course, back in those days, there was no motivation to be an efficient packer since there were no weight limits, or charges for checked bags.  I learned, the hard way that packing light is really a better option (you try hauling 4 bags around LAX by yourself and you will become a believer of traveling light).

I rarely check luggage, it just adds time to my trip (getting there early enough to check it in and waiting for it to get off the plane)--not to mention the cost or worry of someone rifling through the bag, forget it.  I go carry-on almost always.  I've done two trips to Europe and one to China using only a carry-on bag and it was great.  So, I'm here to share some of my tips with you.

First, I choose a clothing color scheme, usually black, tan and a bright color.  For an upcoming 10-day trip, I'm thinking about gray, black and coral with a pop of green.  I'm traveling, so I don't take the whole closet or bathroom cabinet.  Pare it down-add a couple cute accessories and I'm fine with repeating clothes. Trust me, no one cares if you wear the same shirt twice.  I do wash out underwear while traveling...its easy to do in a sink and dries super fast, so why take up space?  I don't usually wash the rest of the stuff-I plan on wearing each shirt/skirt twice--something I do at home without laundering in between.


Couple things before you get started--get some packing cubes/packing organizers, and plan on rolling up the clothes rather than folding them.  Packing cubes are amazing. You can get them at stores like REI, but I got mine on Amazon (and my old black ones I found at Ross)--I find that the small and medium size bags work best for me, but men might like the "large" bag for slacks. I tried something new this time called a packing envelope (another Amazon purchase). UPDATE:  Ikea sells packing cubes too--last I looked they were upstairs near the entrance to the cafe, very reasonable price.


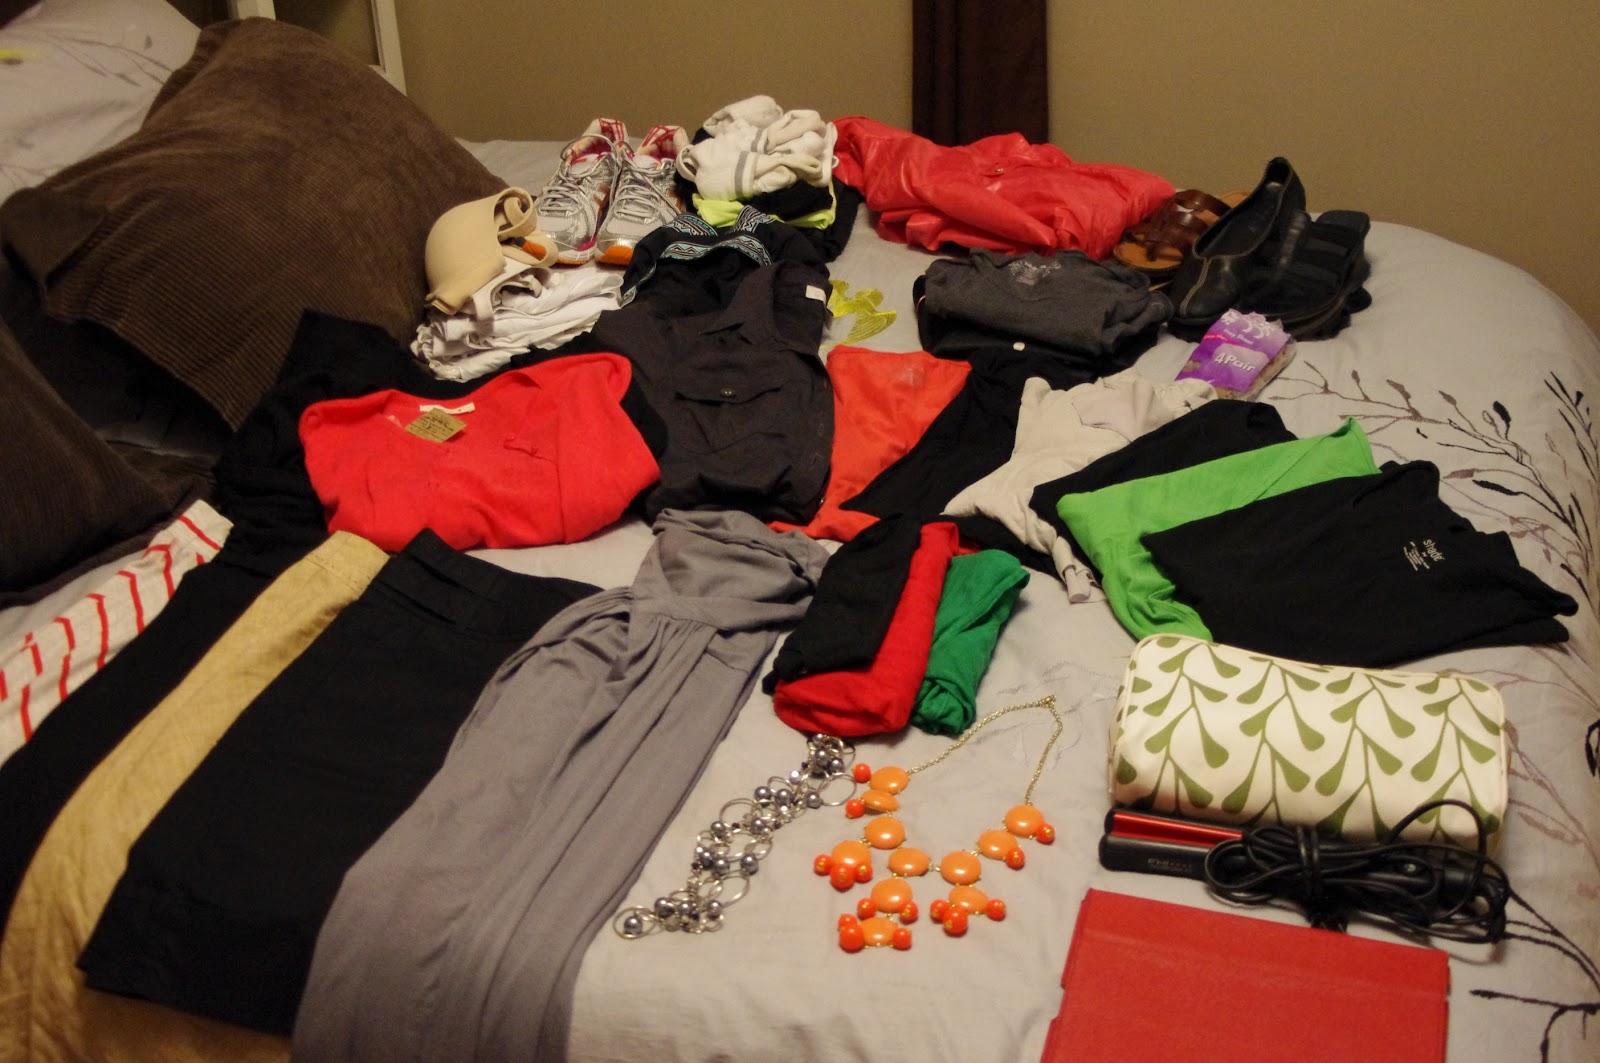
Here's what I've got laid out on the bed for a 10-day trip to the midwest in the summer.
4 skirts (if I were just vacationing, I'd add pants/shorts, but this trip isn't a personal trip)
1 knit dress
6 knit tops
1 black blouse
2 cardigans
2 pashminas (scarf)
3 pair undies
PJ pants/top
workout pants
2 workout shirts
2 sports bras
2 regular bras
swimsuit
knee highs
rain jacket
black sandals
brown sandals
black flats
running shoes
2 necklaces
make up bag/flat iron


In the smallest packing cube, I rolled up my PJ's and my undies and lined them up along the bottom of the cube, I placed the two regular bras on top before zipping it up.


In the medium bag (my favorite size) I've rolled up the 6 knit shirts, 2 scarves and 1 undershirt.
 I laid the two cardigans on top of the rolled up knit shirts before zipping up the medium cube.

 I tried out the packing envelope on my skirts and dress.  There is a plastic card that you fold the clothes around to make sure they are the right size.  I stacked the items up and folded up the Velcro flaps (medium  size envelope).
 This is my old packing cube, and its another medium size.  I rolled up the exercise clothes, socks, swimwear, accessories and rain jacket.  There was still room in the cube.
 Take a look at what the pile of clothes is reduced to once its all in the packing cubes.
 I stacked all the cubes into the bag along with my shoes and hair/make up stuff. I get asked about my hair all the time...and while traveling I don't carry my own hairdryer.  I also take travel size make up.  I put lotions/washes/foundation in small pots/bottles (pick them up at REI or the travel section at Target/Walmart).  At home I have a giant Caboodle (yes, I still have one) of choices of make-up, but when traveling I pick just a few items and go with it. I only wash my hair a couple times a week anyway, so I can get away with travel size shampoo too.  I realize that doesn't work for everyone, but for me, it works.  I'm willing to sacrifice some fashion/hair/makeup choices for the ease of moving around.
 Ta-da!  All zipped up.  Ready for moving between 5 cities in 10 days.  Because I choose fabrics that are easy to travel with, and I roll them, wrinkles are not an issue for me.  If they are, touch up with the iron that is in the hotel room (even older places have irons, you sometimes just have to get them from the front desk).
 I'll also have a little bag to keep with me on the bus during this 10-day trip.  I keep stuff like my ipad, chargers, snacks, blanket and neck pillow in this bag. (I prefer using a backpack because its easier on my back and I can go hands-free, but for this particular trip, we've been asked to not bring backpacks).
The great thing about the packing cubes is you can throw stuff out of the suitcase without getting everything in a big mess.

Honestly, I will probably sort through these outfits and eliminate at least one and I'll be wearing one on travel day-freeing up both clothes and shoe space.   Since the trip I'm packing for now isn't really about sight-seeing, I didn't leave much space for souvenirs, but I could unzip the suitcase extenders if I needed to. Also, I am not traveling with kids, which I understand is a completely different animal :)

I also have an Excel spreadsheet that I use as a planning guide for what to bring on trips.  It helps me feel ready to walk out the door and know that I have everything I need (key word is need...you can always buy stuff while traveling).  I'm posting both the Excel and a PDF.  Its a 2-page document, where page 1 is the women's list and page 2 is a men's packing list.

Packing List-PDF
Packing List-Excel (editable)

(I tried giving you a direct link to the file, but it didn't work, so just scroll down the list to find the Packing list files, alphabetical--be sure to use the "download" button, not just the "view").

Good luck with the packing and safe travels.

Part II:  The ipad....my ultimate travel accessory