
I thought I'd share some of the tricks I've learned about taking discs I already own and converting them into digital files for my iPad. First, I have a Mac laptop, but I think the software works on PCs too. I downloaded the program Handbrake (here) first.
Put in a dvd (not a blu ray) and let the Mac's DVD player get started and get into the actual movie (not just the previews or the menu, but the actual movie).
You see, it is important to know which title on the disc has the actual movie and not the title that has the extra features or the fake-out movie version (Ah-ha, perhaps you've tried Handbrake before and ended up with a movie that skips the chapters all out of order? That is because Handbrake will default to the longest title, and sometimes the DVD maker puts fake long titles on the disc that are all scrambled).
OK, now you know exactly what Title you need, stop the movie and open up Handbrake.
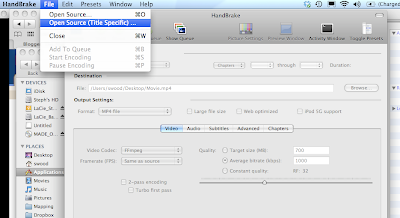
Click on the File menu and choose "Open Source (Title Specific). Do not use the movie-clapper icon that says "source"--otherwise it will scan all the titles on the disc (which takes a LONG time, sometimes stalls and sometimes chooses the wrong title).
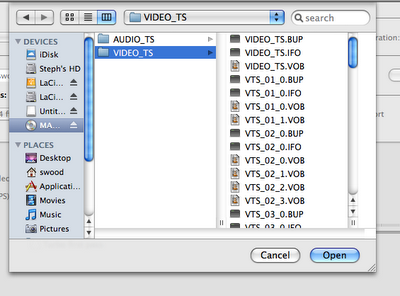
Click on the DVD icon and then on the video file
A window will pop up asking which title, so type it in (in my case, title 21...this can vary from dvd to dvd)
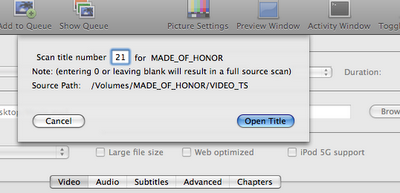
Now the program will scan just the correct title (instead of all 98 extra fake ones).
Be sure to click the type of output device (iPhone, iPad, etc...) over on the right side.

There is also a line to tell the computer where you want the finished file to be saved. I change it to my external hard drive so that I don't slow down my computer with lots of large movie files (each about 1 gig), but you can put it wherever you want.
Click the green start icon near the top of the window. Should take between 30-45 minutes.
When its done, I open up iTunes, click Add to Library and browse to where I saved the movie file. I then right click on the movie in iTunes and choose Get Info so that I can add in the cover artwork--which I have previously found online and saved in the album art file of iTunes (note: if you are buying stuff directly from iTunes, or a have a free digital code that came with your movie, the artwork will show up automatically).
So, now you can start moving your giant collection of DVDs to your computer. Hours of entertainment await :)
So, now you can start moving your giant collection of DVDs to your computer. Hours of entertainment await :)

1 comment:
I got excited until I saw you did it on a Mac. I will have to see if there is a way for us PC users to do the same.
Rob
Post a Comment
Thank you for taking time to comment!
Note: Only a member of this blog may post a comment.