Showing posts with label freezer cooking. Show all posts

Sunday, February 5, 2017

Pressure Cooker Chile Verde Soup

Pin It

I am loving my electric pressure cooker.  I  bought one last year on Black Friday with deals, coupons, etc... so it was less than $50.  I'm finding its awesome for slower-cooker style meals without needing the advanced planning (I am at work early, so sometimes getting a meal in the slow cooker before work isn't practical).

This is a soup recipe, but if you left out the beans, and cooked it down a bit--it would make really awesome sauce for burritos too. 


Ingredients
1.5 lb pork, cut into small cubes
1 medium onion, diced
1  can green enchilada sauce
1  can low sodium chicken broth
1 Tbs cumin
2 tsp chili powder
1 tsp garlic powder
1 tsp celery salt
1/2 tsp oregano
1 Tbs corn starch, dissolved in 2 Tbs of water.
8 4 oz. cans diced green chilies.  Puree 4 of the cans and leave the others diced.
1 Tbs green or red pepper hot sauce
1/2 one jalapeƱo, seeded and chopped
1-2 cans cannellini beans, drained and rinsed


Garnish
cilantro
sour cream
tortillas or corn chips
shredded jack cheese

Turn the electric pressure cooker to the meat/sautee function and toss in the pork and onions (use 1 Tbs vegetable oil if your pork is lean).  Brown meat for 3-4 minutes.  Dump all the ingredients except the beans and the garnish into the pot and stir until mixed.  Put the lid on the pot and press the soup/stew button and adjust the cook time to 25 minutes.  When the timer goes off, use the quick pressure release and open the pot and add in the beans.

Serve with warm flour tortillas, corn chips, shredded cheese, sour cream and cilantro.  Freezes nicely too.

I tried this with chicken and I didn't love it as much (not enough fat..maybe if I used chicken thighs).  I usually buy the least expensive pork I can find--the pressure cooker makes it cook up tender and delicious.  Buying the chilies in 4 oz cans can be pricey--your store might have frozen ones in the freezer section.  My Hispanic grocery store carried a 32 oz can that was economical.


Sunday, January 22, 2017

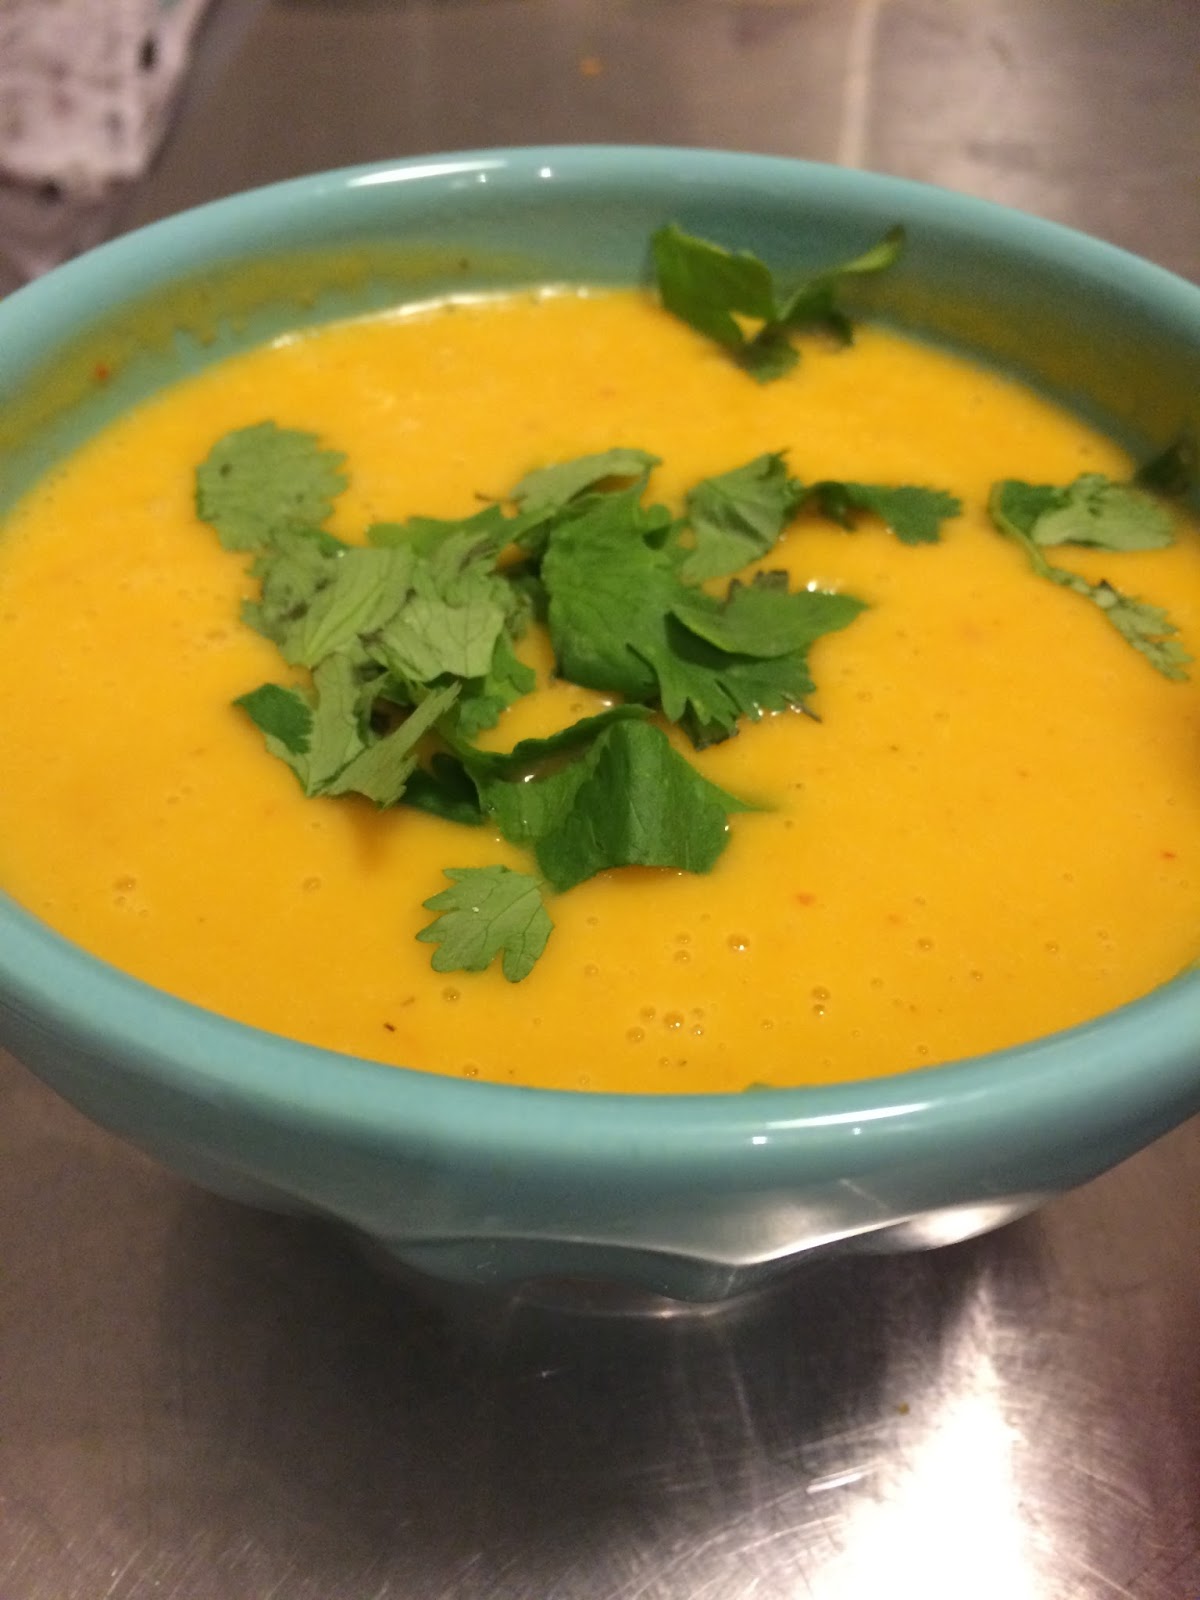
Butternut Squash Soup--Thai Style

Pin It


I love butternut squash.  But I can almost never purchase pre-made or restaurant items with butternut squash because invariably, they have pumpkin pie spices in them--that does not work for me.  I like it savory-no pie flavors.

I've made butternut squash soup before, I used cumin as my seasoning and cream and it was good.  This recipe is a take on a dish my mom ordered at a Thai place in Mesa, AZ.  Instead of white potatoes in the curry, it had diced pumpkin.  This soup has most of the ingredients of a curry, but then it gets all pureed into a smooth and non-dairy soup.  This soup is a one-pot dish and can be done in about 30 minutes if you have a pressure cooker.


Ingredients

4 cups diced butternut squash
1 Tbs vegetable oil
1 medium onion, rough dice
1 Tbs ginger, diced
2 cloves garlic, chopped
1-2 Tbs Curry paste (red is spicy, massaman is mild)
14 oz can coconut milk
14 oz can chicken broth
Cilantro, lime for garnish

In my electric pressure cooker, I turned it to the meat/saute feature and sauteed the diced onions in oil for about 5 minutes, then added the garlic, ginger and red curry paste and sauteed another minute.  Add in the chicken broth, coconut milk and diced raw butternut squash.  I put the lid on, pressed the stew button and adjusted the time to 20 minutes.  It took my cooker about 10 minutes to come to pressure and then it cooked for the 20 minutes.  I used the quick release method to reduce the pressure and open the pot.  If you have an immersion blender, you could puree the soup right in the pot--if not, scoop it into a blender and puree in batches (use a towel as a lid to avoid the blender lid popping off and soup flying everywhere).


You can doctor up each bowl of soup with diced cilantro, squeeze of lime, sriacha or even add some veggies (mushrooms, bok choy, gnocchis...hmmm all of those sound good at the moment).

This freezes well too.  

Saturday, November 21, 2015

Make and Freeze Thanksgiving

Pin It Thanksgiving is a great holiday.  I have great memories of helping prepare food with my mom and my grandmother.  In the last couple years, my mom and I have noticed that even doing dishes as you go all day long, there is still a mountain of dishes at the end of the meal.  I love to cook--but I hate dishes.  Even though I'm not hosting Turkey Day at my house, I love the once-a-year foods for this meal, so I'm cooking my favorites and I'm doing some tricks to make things easier.

Make and Freeze Dressing
Serves 4-5
1 pkg  herbed bread cubes
1/2 c. butter
1 c. onion, chopped (1 medium)
1 c. celery, chopped (2-3 stalks)
1 can low sodium chicken broth (14 oz)
1 tsp. sage (or poultry seasoning)

Chop up the onion and celery finely and saute in the butter in a skillet over medium heat for about 10-12 minutes, until translucent and soft.  In a large mixing bowl, pour the cooked onion mixture over the breadcrumbs and stir.  Slowly pour about half of the chicken broth over bread and mix.  Add more broth until the cubes have absorbed and they are soft but not soggy.  Add the sage and stir.

Here's the time saver--at this point, you have two choices.  1.  Let the mixture come to room temperature, put it in a zipper bag and freeze it.  On Thanksgiving, you can put the mix in the nice baking dish and cover with foil and bake at 350 for about an hour or in a crock pot on low for 2-3 hours (you may need to add a bit more chicken stock as you bake).  2.  You  bake the dressing immediately then freeze and just use the microwave to reheat on meal day.

P.S.  I was watching America's Test Kitchen this morning, and they put their dressing in the bottom of the roasting pan and placed a "deconstructed" turkey (the breast and the thigh/legs) on top and baked it that way for extra turkey flavor.  Looked good to me, I might have to try that. 


Make ahead fruit pie
I'm afraid that pumpkin pie is not my thing--although I can make one (and you can do it the day before).  If you want to do pie the easy way, like me.  Make the fruit pie filling in advance and freeze it in a zipper bag.  When you are ready to make the pie, just put it in the crust and bake.  No, I don't make my own crust--Pillsbury works for me.  You CAN make and freeze an entire pie, before you bake--it just takes about 2 hours to bake from frozen (and you have to shield the edges of the crust so they don't burn).  Here's how I do pie filling for the whole year all at once.  http://theprojectspot.blogspot.com/2011/11/apple-pie-filling-for-now-or-freezer.html


Cranberry Sauce

If you haven't ever made your own cranberry sauce, try it this year.  It takes about 15 minutes and its so delicious.  I did some instructions a few years ago, so give it a go and throw it in the fridge or freezer until Thursday.
http://theprojectspot.blogspot.com/2010/11/homemade-cranberry-sauce.html


Thursday, September 27, 2012

Freezer Meals for a New Mom

Pin It

I am so excited for this weekend!  I get to go and see my new niece who is 3 weeks old.  Of course my plan is to just cuddle her the whole time, but I thought I could probably be of some help to my sister-in-law by bringing a cooler full of freezer meals.  I spent a few nights getting these all put together (if I had a whole day I could have done one of those cook-for-a-month-in-a-day things, but I only had evenings after work).  I made dishes that I know our family has always enjoyed and that would be really easy for them to prepare.  Many of the pins and blogs and recipe books about freezer meals had "mostly ready" meals where you had to stir fry the meat or cook side dishes, but I wanted things that were pretty much self contained.

I stopped at Dollar Tree and found packages of foil containers (4 for $1)--I thought I had enough rectangle ones, but oh well, lasagna in a round pan will taste just fine.   I ended up with 5 entrees, each making two pans...10 meals ready to go!  (Its just my brother and his wife needing the meals, so if you are making things for larger families, you could just use larger pans and end up with 5 meals, or double things up).


Enchiladas
16-20 Corn tortillas
1 1/2 lb. Shredded cooked chicken
1 small onion, diced and sauted
1/2 tsp cumin  
2 cans green enchilada sauce
8 oz. Shredded mexican cheese mix


Dice the onions and saute until soft and add cumin.   In a bowl, add the chicken, onion, half the cheese and about 1/2 cup of enchilada sauce.  Clean out pan and heat some oil and lightly fry the tortillas (keep warm in paper towels while filling).   In the bottom of the baking pan spread some sauce. Fill each with about 1/4 cup of filling. Roll the tortilla and place seam side down in the pan.   Once the pan is full, pour sauce all over making sure all the tortillas are covered.    Sprinkle cheese on top.
Bake from frozen:  350 for about 40-60 minutes.


Meatloaf
1 lb ground beef
1 c. quick oats
1 sm. onion, finely diced
1 egg
1 can tomato sauce
1 tsp each salt and pepper


Mix everything up in a bowl and place in a small loaf pan or disposable pan.   You can top the meatloaf with your favorite bbq sauce before baking, or make your own sauce by mixing ketchup and brown sugar. Freeze raw meatloaf (you'll get a better result than cooking and then freezing). When ready to cook:  Thaw in fridge overnight, then bake for 50 minutes at 450.  Serve with the twice baked potatoes. Or toss a couple baking potatoes into the oven about 15 minutes before you add the meatloaf to the oven. 
 

Twice Baked Potatoes
4 russet potatoes
milk
butter
salt and pepper
cheddar cheese

Bake the potatoes at 350 for about 60-80 minutes (depends on how big the potato) until tender.  While still hot, use a paper towel or pot holder to hold the potato while you cut it in half and scoop the potato into a bowl.  Add butter and milk and whip the potatoes with a mixer.  Refill the potato shells and top with a thin slice of cheddar cheese.  Cool, then freeze in a zipper bag.  To bake from frozen:  Bake at 350 for about 30 minutes.  


Chicken Pot Pie
I used the America's Test Kitchen recipe (free sign up with your email address)
When ready to cook, put frozen pie in 400 degree oven for 40 minutes and let rest 10 minutes before serving.

chicken
celery
onion
carrots
chicken broth
frozen peas
flour
butter
prepared pie crust (I used the Betty Crocker mix)


Thai Coconut Chicken Curry
1 lb chicken, cut into pieces
1 each red, green, yellow pepper, cut into same size pieces as chicken
1 onion, cut into pieces
2 carrots, sliced in rounds
3 mushrooms, sliced
2 T. green Thai curry mix (I buy a bottle of seasoning at Ross or TJ Maxx)
1 can coconut milk

Toss the chicken with the curry powder mix.  Put the chicken in the bottom of a zipper bag then pile up the veggies.  Freeze.  When ready to cook:  Thaw in fridge, toss in crock pot with a can of coconut milk for 4 hours on  high.  Serve over rice (I pre cooked rice and put it in a zipper bag too--thaw in fridge, reheat in microwave with a bit of extra water added).


Lasagna (makes 2-3 small casseroles)
1 lb ground beef
1 lb ground pork
1 clove garlic
2 tsp. basil (dry)
2 small cans crushed tomatoes
2 cans tomato paste
1/2 c. apple juice
1 tsp each salt and pepper
3 c. cottage cheese or ricotta
2 eggs
1/2 c. parmesan cheese
2 T. parsley flakes
1 tsp salt and pepper
No-cook lasagna noodles (but I place them in a pan of hot tap water to soften)
1 lb Mozzarella, shredded

Cook the meat in a large pot.  Drain any excess fat.  Add the garlic and cook for about one minute.  Add tomatoes, paste, basil, apple juice, salt and pepper to the meat.

In a bowl, make the cheese mixture:  Cottage cheese (small curd), parmesan, parsley, eggs, salt and pepper.  Mix it well.

To make the casserole:  Put a bit of sauce on the bottom of the pan.  Layer noodle, then a layer of meat sauce, then a layer of cheese mixture, then shredded mozzarella.  Repeat the layers, ending with shredded mozzarella.

I chose to bake the lasagnas, then cool then freeze.  When ready to cook:  Bake for about 1 hour at 350 on a cookie sheet to catch any spillover.


Peach Pie
I had a few peaches from a neighbor's tree, so I made a single crust pie using the same technique I've done with freezer pies before.

4 C. peaches
1 c. sugar
1 tsp. cinnamon
1/4 c. instant tapioca
1 Tbs. lemon juice
1 Tbs. butter
prepared pie crust (I used just a top crust that I made with a Betty Crocker mix)

Mix it all together and put in a 8" pan, dot with butter and place the crust on the top. Freeze.  When ready to bake, do not defrost, just bake from frozen at 350 for about 1 hour (may need to wrap some foil around the edges to keep the crust from getting too brown). 


Saturday, September 1, 2012

Freezing Corn

Pin It

As a kid, I remember my family spending the end of summer putting up food for the winter.  Mom bottled peaches, bing cherries, pears and pickles.  She also made use of our avocado green  upright freezer (which I think may still be around somewhere...) by freezing corn.  Corn was a veggie that all of us kids would definitely eat.  Since I was just a kid, it seemed like a literal mountain of corn that would be piled out in the  yard and my brothers and I were assigned to husk it all (with the reward of a trip to A&W for a rootbeer float after).  I figure that it was probably around 12 dozen ears of corn...wow, lots of corn.  Big family.

Twelve dozen would be serious overload for me, so I usually do just 1.5 dozen, sometimes 2.  If the ears of corn are good sized, you'll get about 1 c. of kernels per ear.  Start to finish for my 1.5 dozen was about an hour.

Get the corn husked and rinsed to get off as much of the silk as you can.


If you are doing a large amount of corn, you'll want to buy a block of ice and fill up one side of the sink with the ice block and water--the other side of the sink is just cold water. If you do a small batch, like me, you can get away without the ice block.

Bring your water to a boil and add as much corn as will fit.  Bring back up to boil and put the lid on the pot--boil for 4 minutes.

Remove the corn from the boiling water and leave it in a bowl for a few minutes while you go get more corn for the pot.

Once the next batch of corn is on the timer, you put the cooked corn in the side of the sink WITHOUT the ice to cool a bit.  As you keep bringing corn from the stove, you'll move corn out of the water side and into the ice side.  (See, if you go straight from the pot to the ice side, you'll melt the ice...what you want is to cool the corn a bit first in the water, then get it nice and cold so that it stops cooking and will be easy to handle).

Pull the corn out of the ice water and place on a clean towel.

You can either get all the corn cooked and cooled before you start cutting it off the cob, or you can just do each batch as it is ready.

To cut the corn off the cob I like to use a pan with low sides (like the broiler pan)-although today I used a serving platter and a sharp butcher knife.  There are gadgets that are designed for cutting kernel off, but a sharp knife works really well. (I couldn't hold the camera, the knife and the corn all at the same time, so be sure to use both hands :)

Hold the corn with the fat end on the tray and cut the kernels off close to the cob.  With a couple tries you'll find just the right spot where you're getting all the corn off the cob, but not getting any of the tough cob in the process.

Once the corn is cut off, you have a pile off corn strips that everyone who walks by will snag.  Use your hands to reach in and break up the corn.  I do not add anything to the corn. 

All that is left is to measure it into freezer bags.  I make small 1-cup serving portions and put it in regular sandwich bags, because I like to put several bags into a larger freezer bag.  My mom used to do 3-cup bags for our family of 7.


This corn is so tasty in January when generally there is no good produce to be found.  Well, I think a rootbeer float is in order!


Monday, May 28, 2012

Rhubarb Abundance!

Pin It
I grew up in Idaho, and apparently that may have something to do with my enjoying foods that many of my friends have either never heard of or can't imagine anyone liking--rhubarb is one of those foods.  I love the tartness that this "fruit" gives to pies and cobblers.  I planted my own last year, but it was too small to harvest anything from this year.  Lucky for me, my friend had an abundance and was willing to share with me!

I already made (and ate) the rhubarb cobbler--with no pictures.  Oops.  I use Paula Deen's cobbler recipe because it always works and I've tried it with lots of different kinds of fruits.

4 C. rhubarb (or any other fruit that you love)
2 C. sugar, divided
1/2 C. water
1/2 C. butter, melted
1 1/2 C. flour
3/4 tsp. salt
2 tsp. baking powder (scant)
1 1/2 C. milk

Preheat the oven to 350.  On the stove in a medium saucepan mix the fruit, 1 C. sugar and the water.  Bring to a boil and boil for 10 minutes.  While fruit is coming to a boil:  In a 3 qt baking dish, put the butter in the bottom of the dish.  In a separate mixing bowl, mix 1 C. sugar, the flour, salt, baking powder and milk together to make a batter.  Pour the batter on top of the melted butter; don't stir it.   When fruit mixture is done, spoon or carefully pour it all over the top of the batter.  Bake for about 40 minutes.  During the baking time, the butter mixes in the batter, the fruit ends up on the bottom and the batter is all golden and moist on the top.  Yum.


OK, since I had so much rhubarb I also made up some pie filling to use later.  I've done this technique before with apple and cherry pies.  Check it out here.  For this recipe, I used:

4 C. chopped fresh rhubarb
1 1/2 C. sugar
3 T. instant tapicoa

Put all ingredients in a gallon size freezer bag.  Zip it up and mix it up.  Let it sit on the counter for about 10 minutes, then place the whole bag into a pie pan.  Freeze it in the pan.  Once frozen, you have a pan-shaped disc of filling mix that you can use to make a quick pie.  I usually use refrigerator pie dough, so my prep time is about 2 minutes, then let it bake for 45-60 minutes (its a long time because the filling is frozen), so you'll need to use foil to shield the edges of the crust during the long baking time.

Still MORE rhubarb?


I still had more rhubarb, but I was out of tapioca for more pie filling.  No worries, you can just chop up rhubarb and put it in freezer bags to use later in a cobbler, pie or some other treat.  I bagged it up in 4 c. packages.  Easy!


Friday, November 18, 2011

Apple Pie Filling for Now or the Freezer

Pin It

I had the good fortune of having some friends with an apple tree with so many apples, that they gave me a large bag! I love eating apples, but this was more than I could really eat in a timely fashion. So, I decided to get some apple pie filling made and frozen. I'm planning on using it for the Thanksgiving pies that I'm responsible for at the family dinner.


Recipe:

6 C. sliced apples
1 T. lemon juice
3/4 C. sugar
1/4 t. salt
2 T. instant tapioca
1/2 t. cinnamon
butter
pie crust

I used an apple/peeler/corer to get all my apples done (I ended up with enough apples for five 9" pies). I mixed up each batch of dry ingredients and apples separately, mostly because I don't have a bowl big enough for 30 cups of apples! In a bowl mix the apples and lemon juice. In a smaller container mix the sugar, salt, tapioca and cinnamon. Mix the dry ingredients into the apples. Let the mixture rest on the counter for at least 15 minutes.


Option 1:
Make the pie right now! Put the bottom crust in your pan and pour the apple filling in, dot with butter; top with crust and pinch the seams together. Cut vent slits in the top. Bake for 50-60 minutes at 400 degrees.


Option 2:

Freeze just the raw filling so you can use in future pies. To freeze the pie filling, dump the 6 cups of apple mix into a large zipper freezer bag and squeeze out the air and close it. Put the zipper bag of apples into the pie pan that you will eventually be using to bake the pie. Smoosh the apples around until you have a pan-shaped pile of apples. Leave the bag in the pan and put both in the freezer. After the apples are frozen, you can take the bag out of the pan and just keep the bag in the freezer. You may want to double bag to help avoid freezer burn.


When you are ready to make the pie, get the bottom crust into the pan and put the frozen apples in it. Dot with a couple tablespoons of butter and put on the top crust. Cut some slits in the top and bake for 50-60 minutes on 400 degrees (you'll need to wrap the edges of the pie in foil so that the crust doesn't get too brown). Don't let the apples defrost before using them; they'll get too juicy and make for a soggy pie.

Option 3: Freeze a whole raw pie to bake later.

Make up the pie, as if you were going to bake it right away (crust and all) and freeze the whole thing, just don't cut the vent holes yet. Wrap it in plastic wrap and then foil (or if you have those giant freezer bags, you could try them too). When you are ready to use, take it out of the freezer, cut the vent holes and bake, do not defrost first--it will take nearly 2 hours at 400 degrees, so be sure to use foil around the edges for at least the first hour. (I did this method as a test run for Thanksgiving and it turned out PERFECT!!)


Now I'm stocked up on apple pie makings!

Update: I tried it with cherries and it also turned out super yummy. The recipe is slightly different. 4 C. sour cherries, 3 T. tapioca, 1 t. almond extract, 1 C. sugar