Wednesday, April 27, 2011

Royal Wedding Celebrations

Pin It


Do you remember the 1981 royal wedding (have a scrapbook perhaps?) So, its 30 years later, gulp, how did that happen? Friday is a National Holiday in England so that folks can celebrate the wedding of Wills & Kate--so at the very least, I had to do some crafting. Last week, for spring break, I was in Arizona and stopped in a cute little shop in Carefree, AZ (home of the World's 2nd Largest Sundial!) that had decked itself with all things royal or British. Check out this cute pillow. This cue'd my crafting mode. OK, I'm finally done, the wedding is in the morning and we're doing "crowns and cupcakes" tomorrow!

Inspiration pillow that started my royal crafting frenzy!

Printable
I started with the easy project...a quick sign for my frame that usually has my subway word art. Super easy and just cheesy enough right? (If you're going to print, remember to click on the thumbnail to bring up the full size image).


Princess Pillows and Freezer Paper

Next, an excuse to really make myself learn how to use my Silhouette SD...which I think I'll probably love, eventually, but the learning curve is STEEP (and it isn't the software that is the hard part...its getting the vinyl or paper to thread through, cut correctly and not get all jammed up). Argh. But after a few fits and starts I did manage to get a design of my own choosing loaded, cut on freezer paper and ready for use. Tip: set the thickness to 1 and the speed to 2 or 3 and place the paper on the carrier shiny side UP.


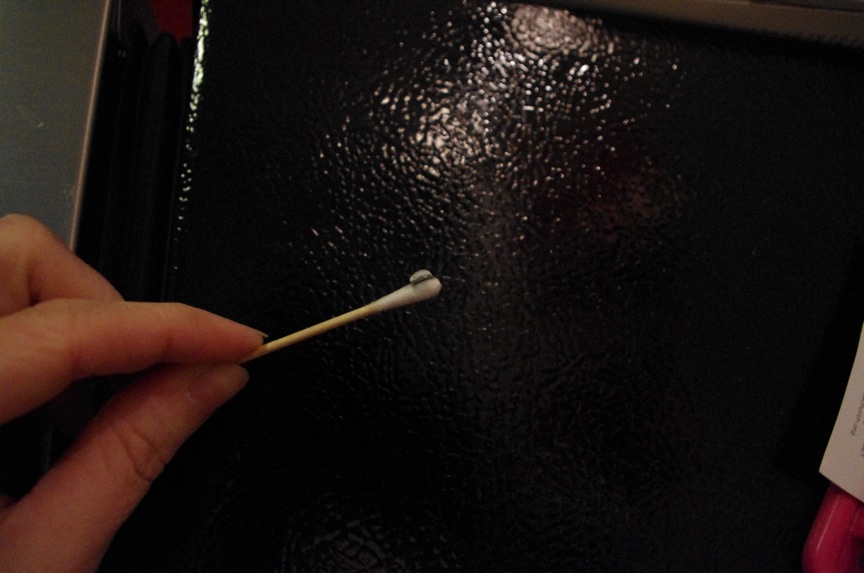
The freezer-paper-as-silk-screen-template is brilliant! You cut your shape out so that the shiny side of the paper will be face down. Place your cut out over your fabric and iron it in place. There is just enough wax on the paper to hold it in place. Since this project won't be going through the wash, I just used acrylic craft paint. Go super light on the paint and just go over the spots multiple times (this will help prevent paint from seeping under the edges of the template). I put some newsprint between layers of fabric to avoid bleed-through. I pulled the paper off when the paint was dry enough not to smear. I had so much fun I did it again (but I used an old skirt for the fabric and blinged it out with some rhinestones!).


Go slowly with the paint, especially around the edges.

I sewed up around the edges, leaving a gap for stuffing, then used a needle and thread to stitch the hole closed.

Burlap remnant from JoAnne's $1.43 (enough for 4 pillows), stuffing I already had.
Ivory/green printed linen skirt a $4 thrift store find, pillow form I already had.


London Bobby Pins


Next-I love hair accessories, so when I spotted some blank bobby pins with a bezel (shallow pad that you can add decorations to) at the Hobby Lobby (on sale! $1.19 pkg) I knew I needed some--and I'll be wearing mine tomorrow for sure. I printed some royal graphics with my laser jet. I used Microsoft Word to insert the images and re-sized them. The square is 5/8", so re-size the image on your computer to .625 for both the width and height. The round one is 1/2", BUT I had to re-size the circle to .55 inches. Cut out the images, brush a thin layer of glue on the back of the image (not in the box on the pin) and press it into place--I needed to use a small rectangle of plastic to get the corners in firmly. Let dry, then fill the wells up with Judy's Diamond Glaze and let dry (I used some playdough as a base to keep the pin level and unmoving). Ta-da! Office appropriate wedding celebration accessories :)


Above: Before I added the Diamond Glaze


Above: After I puddled the Diamond Glaze (fill it up so that it nearly spills out of the top)


Here are some graphics that you can print and use:


Royal Cupcakes


OK, this was my first experience with marshmallow fondant, and it was pretty nice to work with but I wish I had come up with the ring cupcake first--so, so much easier and faster than the Union Jack. Oh well...they taste yummy too! If you want to do some of your own tasty treats, you really should make the fondant the day before, so here's the link to the recipe


Little Princesses

Wait, we're not done yet! I got a link from my Disney Rewards account with a couple of super cute printables for the younger princesses at your house. Check out the Princess Kate paper doll and tiara

Friday, April 22, 2011

Poppy Seed Danish

Pin It Picture from Marthastewart.com


Did you see the new Martha Stewart magazine this month with all the craft/recipe projects on the theme of poppies? I was visiting my cousin in Phoenix and one afternoon we decided to give the Poppy Seed Danish recipe a whirl. We made a few changes, but they sure were tasty!

For the original recipe (and magazine perfect pictures) MarthaStewart.com

Ingredients

  • FOR THE DOUGH
  • 1 cup whole milk
  • 1 stick unsalted butter, cut into 8 pieces, plus more for bowl
  • 1/3 cup granulated sugar
  • 2 1/4 teaspoons (one 1/4-ounce envelope) active dry yeast
  • 3 1/2 to 4 cups all-purpose flour, plus more for surface and hands
  • Salt
  • 2 large eggs
  • 1 large egg yolk lightly beaten with 1 tablespoon heavy cream, for egg wash
  • FOR THE FILLING
  • 8 ounces cream cheese, room temperature
  • 1/4 cup confectioners' sugar
  • 1/2 teaspoon pure vanilla extract
  • 1 large egg yolk
  • 1 tablespoon plus 2 teaspoons poppy seeds
  • 1/3 cup cherry preserves (I used raspberry since that is what we had)
  • FOR THE GLAZE
  • 1 cup confectioners' sugar
  • 3 tablespoons whole milk or heavy cream

Directions

  1. Make the dough: Warm milk, butter, and granulated sugar in a small saucepan over a low heat until mixture reaches 120 degrees on a candy thermometer. (Butter will not melt completely.) Pour warm milk mixture over yeast in the bowl of a mixer; whisk to combine. Cover with 2 cups flour and 1 teaspoon salt (do not stir). Let stand for 5 minutes.

  1. Using the dough-hook attachment, mix dough on medium speed, scraping down sides of bowl, until a sticky dough forms. Mix in eggs, 1 at a time. Reduce speed to low, and mix in 1 1/2 cups flour. (If dough is too sticky, mix in an additional 1/2 cup flour, 1 tablespoon at a time.) Continue to mix until dough is smooth and pulls away from sides of bowl, about 5 minutes more.
  2. Using floured hands, turn out dough onto a lightly floured surface. Knead dough into a ball, and transfer to a large buttered bowl. Cover with plastic wrap, and let stand in a warm place until dough is doubled in volume, about 1 hour.
  3. Return dough to lightly floured surface, and punch down. Reshape into a ball. Let stand, covered, for 10 minutes.
  4. Meanwhile, make the filling: Beat cream cheese, confectioners' sugar, and vanilla with a mixer on medium-high speed until pale and fluffy, about 2 minutes. Beat in egg yolk. Add poppy seeds, and beat until evenly distributed.
  5. Preheat oven to 375 degrees. Roll out dough on a lightly floured surface into a 18-inch square. Trim edges using a sharp paring knife to form a 15-inch square. (If dough seems too warm or too elastic, refrigerate or freeze for 10 minutes.) Cut dough into 12 5-inch squares, and divide between 2 baking sheets. (this is a change from the original recipe. It called for getting only 9 danishes, but the dough was too thick, so I rolled it out thinner and ended up with more danishes...bonus!)
  6. Cut a 2-inch line from the 4 corners of each square into the center. Spread a heaping tablespoon filling onto each. Dollop centers with a heaping teaspoon preserves. Fold the 2 top corners into the center of each square. Repeat with remaining corners to form petals. Brush petals with egg wash. Bake until deep golden brown, 16 to 18 minutes. Let cool slightly.
  7. Meanwhile, make the glaze: Mix together confectioners' sugar and milk until smooth. Cover with plastic wrap until ready to use. (If glaze gets stiff, add more milk, 1 teaspoon at a time, until desired consistency is achieved.)
  8. Drizzle Danishes with glaze, and let stand for 10 minutes.

Saturday, April 16, 2011

Rub N Buff Resin to Pewter

Pin It Wow, I have discovered a miracle in a tube! Apparently Rub N Buff has been around forever, but I just discovered it. I've got lots of other ideas running through my head on how I can turn brass stuff into silver (thinking about the hardware on my old dresser)--or a mirror, or...well, you get the idea.

I love pineapples since they are the symbol for hospitality. I found this poor little guy at the D.I. for $1. Its made of plastic resin. I sprayed it with black spray paint (thought about leaving it shiny black, because it looked pretty good, but then I wouldn't get to use my new tube of Rub N Buff). I put tiny amounts of the paint on the end of the q-tip and gently spread it over an area, then rubbed it out with a t-shirt. Took about 5 minutes. Now I have a "pewter" pineapple!


This stuff was really easy to use. Couple things to keep in mind. First, it is oil based, so it smells and if you get it on your fingers, you'll need mineral spirits to clean up (I wore gloves and used q-tips so I didn't have to do any cleaning). Next, you use a TINY amount of paint. You don't have much work time, so put it on in the spot you are working on, then quickly grab your cloth and start rubbing and buffing. That's about all there is to know about the product!

Wednesday, April 13, 2011

Another Ruffley T-Shirt Redo

Pin It

I have really enjoyed the last ruffle t-shirt that I made, so when I came across Tea Rose's blog, I knew I had to give this one a go. I hit the Downeast Clearance Center (the one in West Valley is HUGE, but be prepared for a treasure hunt, since you never know what will be there) and got 2 identical T-shirts for only $2.50 each. I had to laugh when I wore the shirt to work today; when people asked where I got it, I said I'd made it and every time the response was "no way!"


I followed Tea Rose's instructions pretty much as is, but when I placed my large ruffles on the t-shirt I spaced them only 1 1/4" inches apart instead of 1 1/2". I used my rotary cutter to make short work of the strips. I've got another project in mind for the leftover shirt fabric. Rather than give you all the step by step here, I'll just send you over to Tea Rose's site (and she has lots of other T-shirt projects).