Showing posts with label home. Show all posts

Friday, September 30, 2016

Quick Door Decor Upcycle

Pin It
Super easy project!  I love pineapples--I've been on quite a kick lately (on my last trip to Hawaii I tried to find a cute skirt with a pineapple print with no luck--I went to all the fabric stores and found hardly ANY pineapple fabric, and none of it cute--but I did find a fun t shirt at Ann Taylor Loft).  Anyway...I'm always on the lookout for cute pineapple stuff.  I saw this plaster door medallion at the High School Yard Sale for $1.  Nice.  

30 minutes later and it fits my door decor much better.  I used acrylic craft paint and then a bit of silver Rub N' Buff to give it a nice sheen.  


Friday, September 23, 2016

DIY Barn Door

Pin It
 

I have been in my house for about 13 years and I've always wished I had a door to the laundry room in the basement.  I have a TV downstairs and my sewing area, so it was noisy when the washer was running and I wanted to use the family room. The door to the laundry was framed out without a door--and a traditional swinging door would take up precious space in the narrow room (or make it really hard to move the washer out should I ever need to replace it).  

I decided to give the barn door trend a go.  I went to Habitat for Humanity's ReStore and picked up a hollow core sliding closet door and painted it with chalkboard paint (with white trim).  It was a steal since the door was only $5 and I had the paint left over from other projects. I had to build my own track because my ceiling is only 7 feet and all the hardware I could find needed a bit more headroom than I had. 

Next, I added a wooden header across the whole opening and screwed it into the studs (which are not 16" on center...darn old houses).  Then I undid my work because I realized that the trim around the door stood out further than my bracket.  I put in spacers and hung the wood back up. 


My friend made me some J track with holes for screws, which I screwed into the wood header.  
To hang the door, I used closet door hardware as well as a couple of casters on the bottom of the door.  The hanging closet hardware keeps the door on the track; the casters hold all the door's weight. It rolls across the carpet fairly easily--if I were doing it again, I'd probably use larger casters. 


Friday, September 16, 2016

Faux Canvas Wall Art

Pin It


As part of my living room redecorating I put up a new shelf, and then I had to figure out what would go on the shelf and on the rest of the wall.  I spent lots of time surfing Pinterest for wall art ideas, for quotes etc...  I finally decided that I needed a piece that was about 2 feet across and about 30 inches long (I could have probably done closer to 3 feet...maybe next time).  When I looked at stores for art, I didn't find what I wanted.  I considered buying a canvas at the craft store and using paint and my vinyl cutter.  But I thought maybe I could do a faux canvas instead--and for less! 


I have been wanting to try out the Engineering prints from Staples since I read about a blogger who did a large print of the Death Star for her boys' room.  The engineering prints are inexpensive, but they are in black and white and lower resolution.  For the one I did, it cost about $3.50 (I uploaded the .jpg and an hour later got a call from Staples that it was ready for pick up).

Next, I had to figure out how to make the photocopy look like it was canvas.  I like the wrapped canvas look, so I decided I needed something that was about 1 inch thick. I thought about foam core board or cardboard, but I'd have to put layers together.  I considered plywood or particle board (and if I had had a scrap big enough in my shed I might had gone that route).  Then I landed on rigid foam insulation--cheap, easy to haul home and cut! I didn't want a big sheet of it, but luckily, Home Depot sells it in small 2x2 and 2x4 panels.  I chose the 1" thick and it was about $3.50.

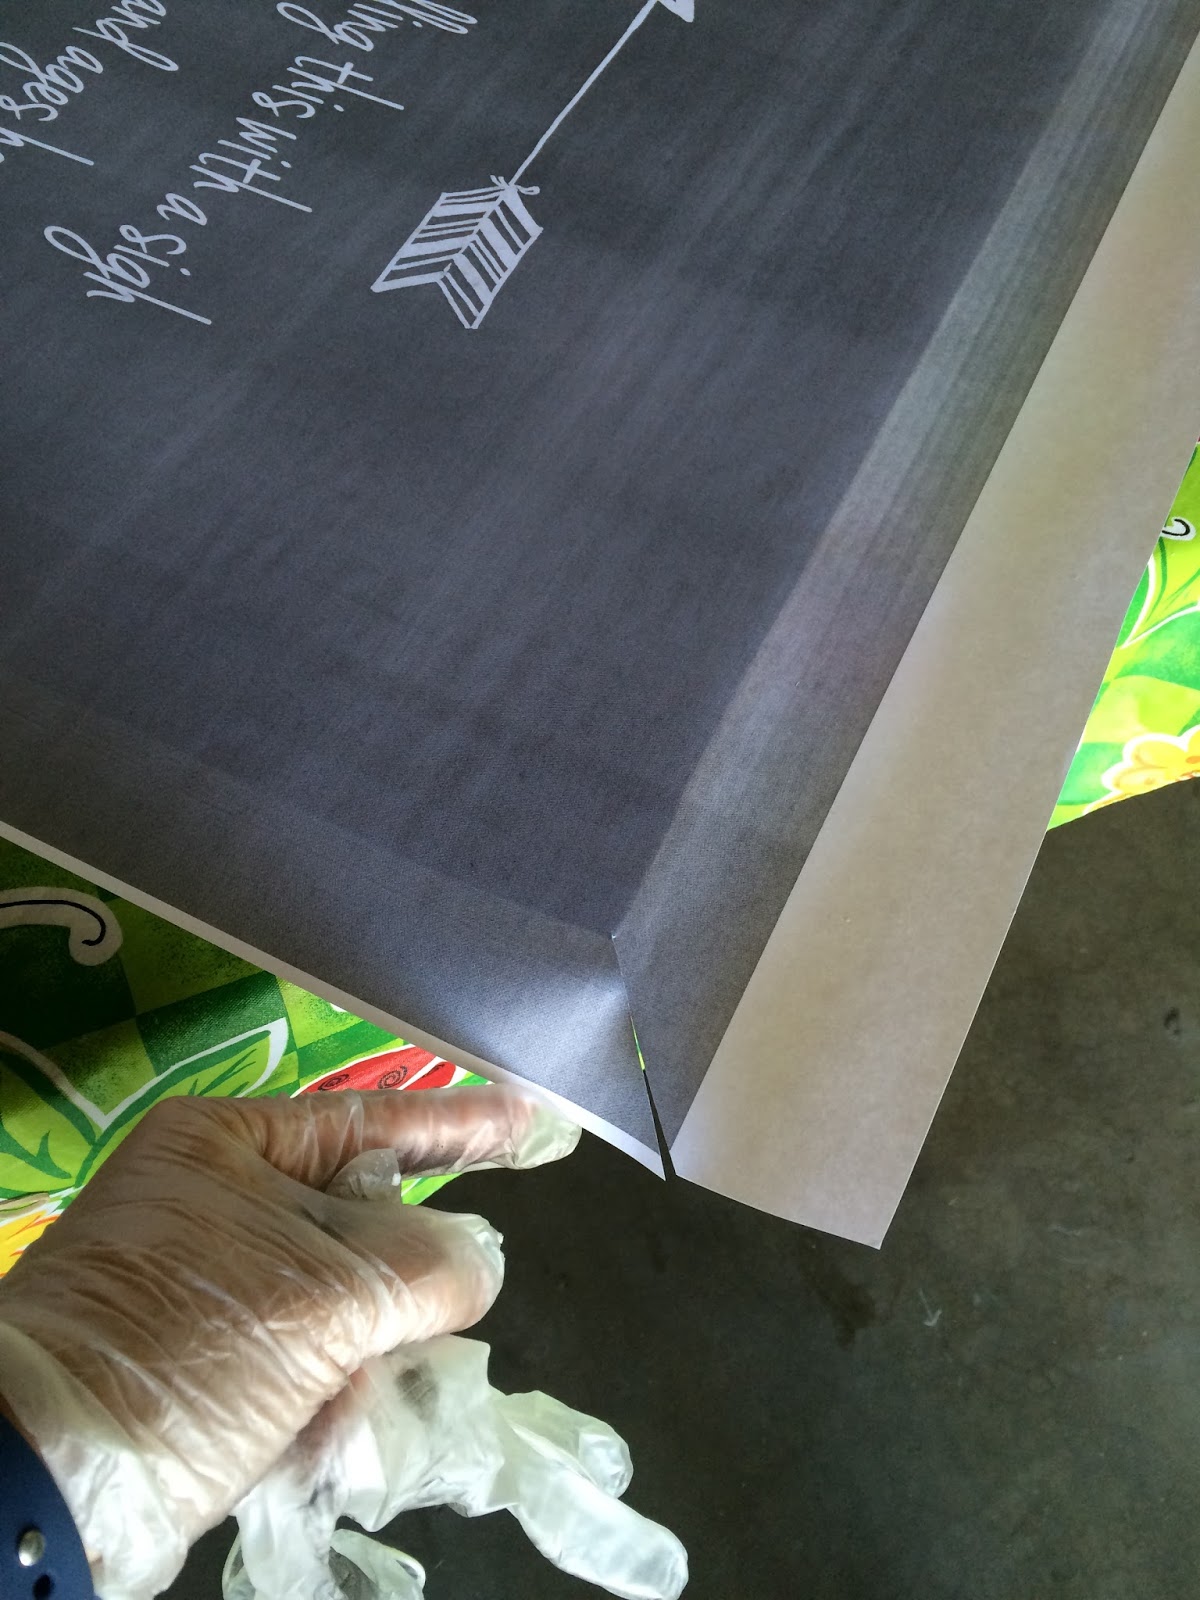
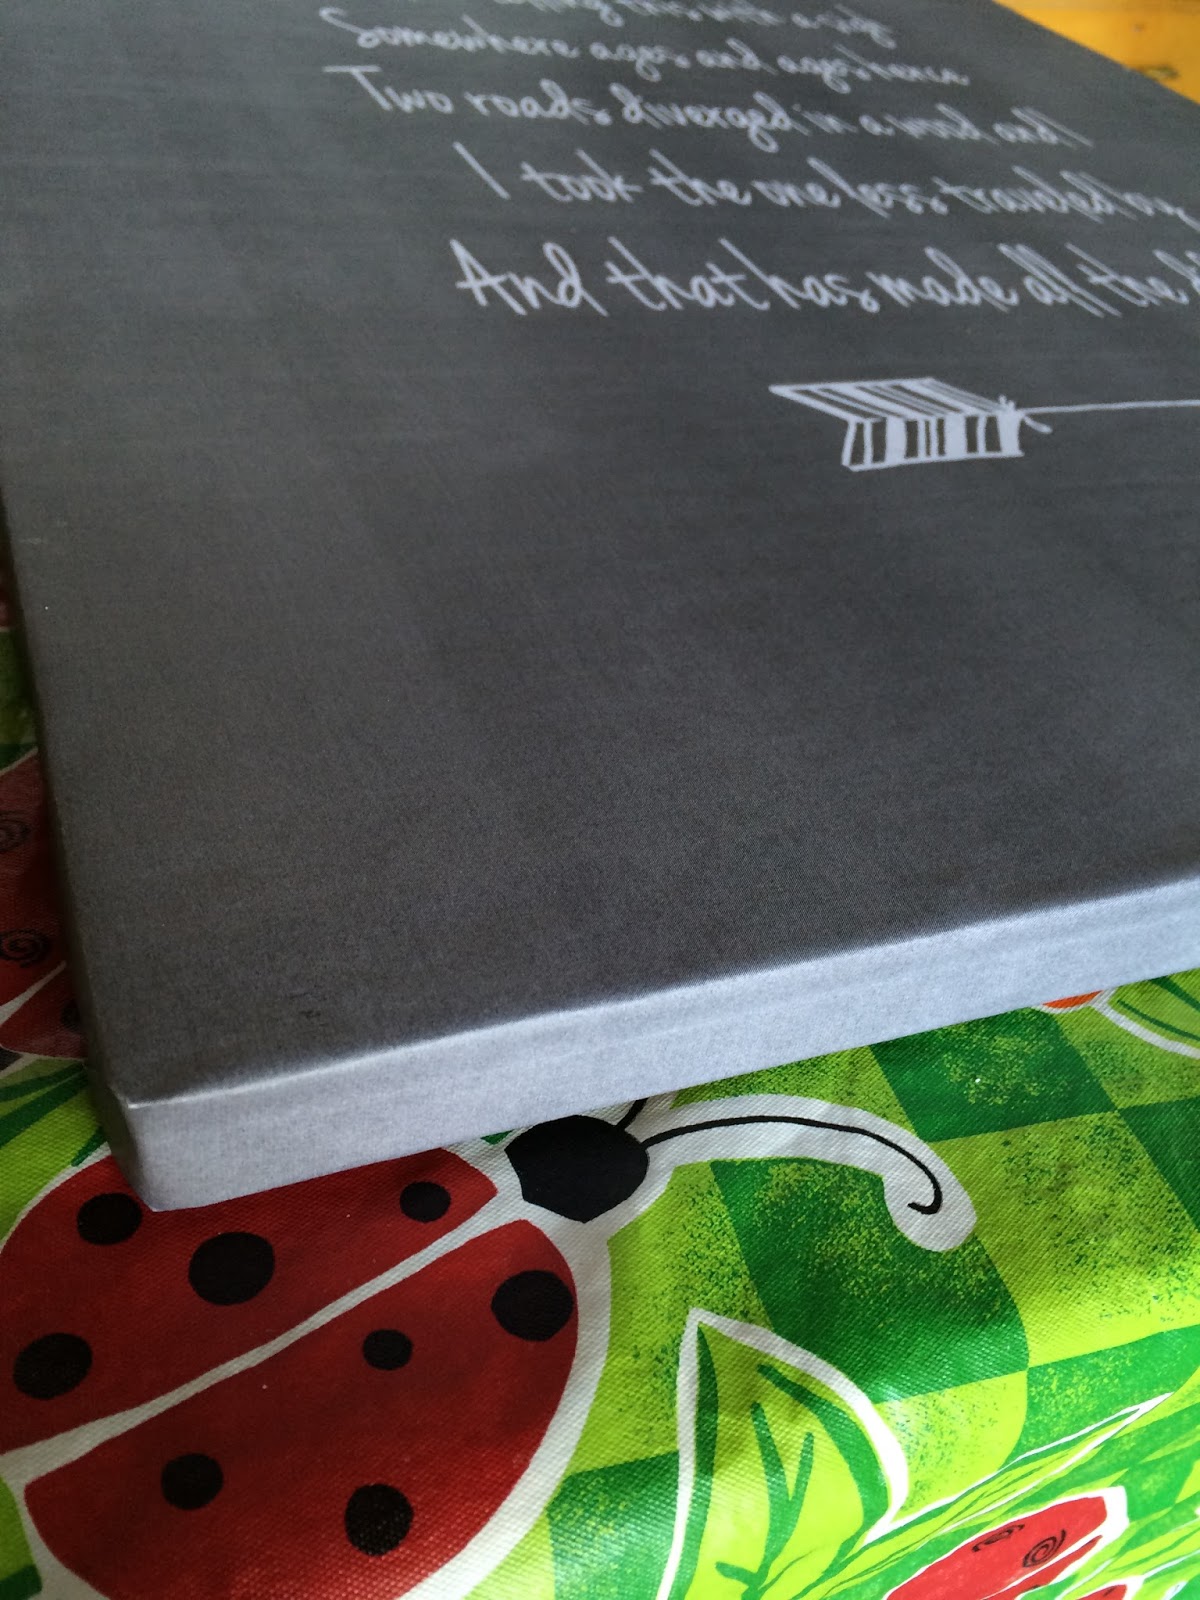
So, I brought home my print and my foam.  I used a straightedge to trim the foam and sprayed the surface with adhesive.  I centered the print over the foam and carefully smoothed it down.  I cut the corners of the paper at an angle and flipped the whole thing over and sprayed a bit more adhesive on the foam edges and the paper.  I slowly and carefully wrapped the paper around the edge and the back.  It looked a lot like a wrapped package.


 To get the illusion of canvas, I used a big paintbrush (the super cheap bristle brush from the Dollar Store) and dry brushed a bit of Modge Podge in long sweeping strokes both vertically and horizontally.  Don't use much of the glue--dab it on the brush, tap most of it off on a rag or paper towel and then lightly brush (if you get heavy handed with the liquid glue, the thin paper will wrinkle up). 

Since the foam is so light, I used a loop of twine and some duct tape to make the hanger (tie a knot in the end so the twine doesn't slide out of the tape). 


For my quote, I went with Robert Frost's The Road Not Taken.  We had sung it at choir a couple months ago and it has just stuck with me.  

Two roads diverged in a yellow wood,
And sorry I could not travel both
And be one traveler, long I stood
And looked down one as far as I could
To where it bent in the undergrowth;

Then took the other, as just as fair,
And having perhaps the better claim,
Because it was grassy and wanted wear;
Though as for that the passing there
Had worn them really about the same,

And both that morning equally lay
In leaves no step had trodden black.
Oh, I kept the first for another day!
Yet knowing how way leads on to way,
I doubted if I should ever come back.

I shall be telling this with a sigh
Somewhere ages and ages hence:
Two roads diverged in a wood, and I—
I took the one less traveled by,
And that has made all the difference.

Saturday, February 27, 2016

Cheater Faux Pallet Wall

Pin It
I have way too many "inspiration rooms" pinned to my boards for my bedroom.  I really like the idea of a dark accent wall behind my bed--but I've been really enamored of the rustic/modern look of weathered barn wood (I've been re-working my living room and I've built an industrial shelf with lumber and plumbing fittings, post coming eventually).  I also know I'm a commitment-phobe when it comes to decorating. Maybe its more like a short attention span for trends. My last bedroom update resulted in cute wall vinyl decoration.
 

At any rate, I was leaning toward paint since I know I can change it out really easily, as opposed to nailed-on boards.  And then I saw this bulletin board paper at JoAnn Fabric (in the "kids craft" section).

http://www.joann.com/busy-kids-learning-fadeless-designs-weathered-wood/10795243.html#q=wood+paper&start=33
JoAnn

The ideas started flowing.  The paper comes in a roll 12 feet x 4 feet and was only 7.99--if you use your 40% off coupon, it was only $5 a roll including tax.  Bargain!  I might have preferred a darker color wood, but on the plus side, this weathered color blends nicely with the rest of the paint in my room.

I measured my wall 10.5 feet across and its vaulted, so 89.5 inches on one end and 100 inches on the other.  Math was required for this project.  I calculated the rise/run of the slope of my ceiling and found that I needed to slope 4.25 inches for every 4 feet.  I needed 2 rolls of paper, so I opened them both and lined up the "boards" and used a long straight-edge to draw the angle and cut the top of the paper.


I used painters tape and clear thumbtacks to hold up the top while I used a level to make sure things weren't all skiwampus.  Once I got the first sheet up, I tacked up the 2nd sheet and carefully matched all the seams of the boards and smoothed it up on the wall.  I used more painters tape behind the paper.

I cheated behind the headboard--the paper only goes down about 8 inches behind the bed.  That left me with enough of the roll of paper to do the last bit of wall (since the wall is 10 feet and the paper combined to make 8 feet).  I overlapped the paper and once again lined up the boards and tacked it up.

So, for a couple hours total (that includes measuring, math calculations, furniture moving and pinning/taping) I've got a pretty good facsimile of a pallet wall.  I bought two rolls of paper (check that both are in the same dye lot), so I only spent $10 and I still have paper left over-enough for a "headboard" for a twin size bed maybe. 


Friday, May 27, 2011

New Outdoor Lights

Pin It


I've had really ugly brass (corroded brass at that) light fixtures outside on my garage. I've finally gotten around to replacing them. Eventually I'll do the ones over the front door too, but not today.

The first fixture took about 40 minutes, the second one about 5 minutes! Swapping sconces is pretty simple.

Turn the power off at the breaker box.

Unscrew the old fixture from the wall.

Undo the wire nuts and pull the fixture off.


I had to add a new mounting bracket since I didn't have one with the old fixture, but if you've already got a bracket, just skip to the next step.

Match the black wire from the new fixture to the black wire in the wall and screw together with the wire nut.

Match the white wire from the new fixture to the white wire in the wall and screw together with the wire nut.

Wrap the plain copper wire (sometimes coated in green plastic) around the green "ground" screw.

Cover it all up with the new fixture and screw it in place (depends on the fixture on how that is going to go).


Ta-da! So much better don't you think? I got these cuties from Lowe's for less than $20 each!

Wednesday, April 27, 2011

Royal Wedding Celebrations

Pin It


Do you remember the 1981 royal wedding (have a scrapbook perhaps?) So, its 30 years later, gulp, how did that happen? Friday is a National Holiday in England so that folks can celebrate the wedding of Wills & Kate--so at the very least, I had to do some crafting. Last week, for spring break, I was in Arizona and stopped in a cute little shop in Carefree, AZ (home of the World's 2nd Largest Sundial!) that had decked itself with all things royal or British. Check out this cute pillow. This cue'd my crafting mode. OK, I'm finally done, the wedding is in the morning and we're doing "crowns and cupcakes" tomorrow!

Inspiration pillow that started my royal crafting frenzy!

Printable
I started with the easy project...a quick sign for my frame that usually has my subway word art. Super easy and just cheesy enough right? (If you're going to print, remember to click on the thumbnail to bring up the full size image).


Princess Pillows and Freezer Paper

Next, an excuse to really make myself learn how to use my Silhouette SD...which I think I'll probably love, eventually, but the learning curve is STEEP (and it isn't the software that is the hard part...its getting the vinyl or paper to thread through, cut correctly and not get all jammed up). Argh. But after a few fits and starts I did manage to get a design of my own choosing loaded, cut on freezer paper and ready for use. Tip: set the thickness to 1 and the speed to 2 or 3 and place the paper on the carrier shiny side UP.


The freezer-paper-as-silk-screen-template is brilliant! You cut your shape out so that the shiny side of the paper will be face down. Place your cut out over your fabric and iron it in place. There is just enough wax on the paper to hold it in place. Since this project won't be going through the wash, I just used acrylic craft paint. Go super light on the paint and just go over the spots multiple times (this will help prevent paint from seeping under the edges of the template). I put some newsprint between layers of fabric to avoid bleed-through. I pulled the paper off when the paint was dry enough not to smear. I had so much fun I did it again (but I used an old skirt for the fabric and blinged it out with some rhinestones!).


Go slowly with the paint, especially around the edges.

I sewed up around the edges, leaving a gap for stuffing, then used a needle and thread to stitch the hole closed.

Burlap remnant from JoAnne's $1.43 (enough for 4 pillows), stuffing I already had.
Ivory/green printed linen skirt a $4 thrift store find, pillow form I already had.


London Bobby Pins


Next-I love hair accessories, so when I spotted some blank bobby pins with a bezel (shallow pad that you can add decorations to) at the Hobby Lobby (on sale! $1.19 pkg) I knew I needed some--and I'll be wearing mine tomorrow for sure. I printed some royal graphics with my laser jet. I used Microsoft Word to insert the images and re-sized them. The square is 5/8", so re-size the image on your computer to .625 for both the width and height. The round one is 1/2", BUT I had to re-size the circle to .55 inches. Cut out the images, brush a thin layer of glue on the back of the image (not in the box on the pin) and press it into place--I needed to use a small rectangle of plastic to get the corners in firmly. Let dry, then fill the wells up with Judy's Diamond Glaze and let dry (I used some playdough as a base to keep the pin level and unmoving). Ta-da! Office appropriate wedding celebration accessories :)


Above: Before I added the Diamond Glaze


Above: After I puddled the Diamond Glaze (fill it up so that it nearly spills out of the top)


Here are some graphics that you can print and use:


Royal Cupcakes


OK, this was my first experience with marshmallow fondant, and it was pretty nice to work with but I wish I had come up with the ring cupcake first--so, so much easier and faster than the Union Jack. Oh well...they taste yummy too! If you want to do some of your own tasty treats, you really should make the fondant the day before, so here's the link to the recipe


Little Princesses

Wait, we're not done yet! I got a link from my Disney Rewards account with a couple of super cute printables for the younger princesses at your house. Check out the Princess Kate paper doll and tiara

Friday, March 25, 2011

Bedroom Update

Pin It

I've been continuing to tweak my bedroom remodel. I thought I was going to get all new bed linens, but the new headboard made things look so much better, that I decided to recycle what I already had.
I have also been trying to figure out if I could put some kind of photos or pictures above the bed, and then I ran into these "wall stickers" at TJ Maxx. I haven't ever done any of the vinyl decoration around the house, but this set of stickers was only $9.99 and in the perfect colors, so I thought I'd give it a shot.

Couple of things about the stickers. The package says they are repositionable, but they are not. The pieces that I placed exactly in the right spot the first time are doing great, but the ones I moved around a couple times gave me some grief.


I picked up the silver-tone frame from my mom's house, now I just need to decide what to put in it.