Showing posts with label bread. Show all posts

Sunday, November 15, 2020

Sourdough Bread for Beginners

Pin It


I love bread.  I especially love homemade bread.  I've been doing the rustic no-knead bread for many years and love the simplicity.  Turns out sourdough isn't hard--it just takes good time management (and an active starter).  

Equipment you need

Large mixing bowl (I use a metal or a plastic bowl)

Wooden spoon

Kitchen scale

Cooking pot with lid -between 4-6 quart size (cast iron dutch oven is ideal)

Parchment paper


Ingredients

90 grams (1/3 C) of starter at the peak of activity (info below)

385 grams ( 1 7/8 C) of water

10 grams (1 3/4 tsp) of kosher salt 

520 grams (4 C) of bread flour 


Timing (start one day, finish the next)

3:00-4:00 pm feed your starter

8:00-9:00 pm mix your dough

Overnight-let dough rest on counter

Morning (8:00-10:00 am)-Shape and let rest for about 30-60 minutes

Late morning bake your bread


1. Prep your starter.  Feed your starter the afternoon before you want to bake.  My starter is very active and will go from unfed to peak activity (increased in volume nearly 3x) in about 4 hours in my kitchen--could take longer or less time in your kitchen.  

2.  Use your kitchen scale and use the tare feature (the zero-out feature) so that every time you add an item you can start the gram count over.  Don't forget to zero out the first time when you put the large mixing bowl on it. Add the 90 g of starter, zero out scale.  Add the 385 g water, zero out the scale.  Add the 10 g salt and stir it gently to dissolve salt and starter. 

3. Zero out the scale and add the 520 g of flour.  Remove from the scale and use the wooden spoon to stir everything together until it is all mixed and shaggy (takes about 1-2 minutes).  Dough will not have any dry flour, but it won't be a pretty ball either. 

4.  Set the timer for 15 minutes and cover the bowl.  When the timer goes off, you will do a "mini knead" called the stretch and fold.  This will help develop the dough's gluten and start making the dough look like dough!  Get your fingers a bit wet to keep them from sticking and grab one edge of the dough and pull it up 3-4 inches and then fold it down to the center of the dough.  Turn the bowl a 1/4 turn and do it again until you've gone around the bowl a couple times.  Set the timer for another 15 minutes and then do it again. You'll notice a pretty dramatic difference in the dough over the 2 stretch and folds.  

5.  Cover with plastic wrap or a damp towel (my bowl has a lid, perfect!) and leave it on the counter over night.  You want the dough to nearly double in size--in my kitchen that takes about 10 hours.  

6.  Morning!  Time to get the bread ready for baking.  Your dough needs one last set of stretch and folds, but this time, you'll stretch it a lot more.  Get your fingers wet and use a hand on each side of the dough to slide underneath the ball and pull it up and out of the bowl about 12-18 inches.  Let the dough start to just hang down and stretch as far is it will go.  Pile the dough back onto itself into the bowl, turn the bowl a 1/4 turn and do it again (you'll notice it won't want to stretch/dangle quite as far, but keep gently shaking/jiggling to get the dough to stretch out more).  Repeat 2 more times.

7. Prep a medium bowl to hold the shaped loaf while it rests (proofs) before baking.  Put a piece of parchment into the bowl and sprinkle with flour. 

8. Shape the dough--after you've done the stretches, pick it up the same way and tuck the ends under to start making a ball with a smooth top.  Grab a small handful of flour and rub it over the smooth, round top.  Carefully turn it and put some flour on the bottom too.   Now place the dough round into your parchment lined bowl with the bottom of the dough on the bottom of the bowl so that you see the pretty, smooth top.  Note:  If you want to get fancy and have a banneton, you put the dough in upside down--but don't do a banneton your first time.  My banneton took about 2 times to get "seasoned" and not end up with dough sticking to the basket).  

9.  Let the bowl with the shaped dough rest in the fridge for about 45 minutes while the oven preheats (NOTE: If you need to let the dough hang out in the fridge for longer than 45 minutes, no problem...leave it in the banneton all day if you need to and bake when you have time). 

10. Preheat oven to 475 degrees for a full 30-45 minutes.  

11. Take your dough from the fridge and carefully grab the parchment and place the whole thing, parchment and all, into your baking pot.  Slash a relief cut across the dough (use a very sharp knife or a fancy razor called a lame).  Put the lid on and place in the oven (I like to set my pot on a cookie sheet to make sure the bottom doesn't get too browned).  Bake covered for 30 minutes. 

12. Remove the cover on the pot and bake an additional 20-25 minutes until it is very golden and the internal temp is between 202-206 degrees on an instant read thermometer.

Place bread on a rack to cool for about an hour before cutting. 


Alternate:  Baguettes


You can use the same dough and shape it into baguettes!  After step 6 where you do the last stretch and folds, instead of forming one ball to rest, divide the dough into 2 or 3 pieces and lightly flour your counter.  Form a rectangle and roll it up to make the tube. Pinch the seam closed and roll the dough to get a longer loaf.  Its best if you have a baguette pan so that the bread will hold its shape.  Let the baguettes rest on the counter until doubled in size (about 2 hours).  Preheat your oven, but put a pan on the bottom rack with a couple cups of water in it.  The pan of water will provide the steam to get the crusty exterior (with the round loaf you don't do this because the lid on the pot keeps moisture inside and is self-steaming).  My oven happens to have a steam mode, so if yours does, use it!  Bake at 450 for about 30 minutes until nicely golden.


Saturday, February 9, 2013

Soft Pretzels

Pin It


I was staring out the window today at yet another snow storm and decided that it was a bread kind of day.  I remember making pretzels once when I was a kid, maybe 10 or 11, pretty sure they did not turn out so good.  Fast forward a few decades and I think I've done a bit better this time.

Start to finish, it took about 2 1/2 hours.


In the bowl of your Kitchenaid:
1 1/2 C. warm water
2 T. brown sugar
2 1/4 tsp. yeast
1/2 c. melted butter

Let the yeast mixture sit for about 5 minutes.
 
Add 1 1/2 tsp. kosher salt
4 1/2 C. all purpose flour

Mix with the dough hook on low until the flour is incorporated, then turn up to medium to get the dough into a ball that pulls away from the sides of the bowl.
 

Leave the dough in the mixer and cover the bowl with a dish towel.  Let the dough rise until double in size, which will take about an hour.   After it has risen, turn the mixer back on for a few turns to get the dough back into a manageable size ball.

 
Before you start forming the pretzel shapes, boil 3 quarts of water and preheat the oven to 425 degrees (when the water is actually boiling, SLOWLY add 2/3 cup of baking soda...it will get very foamy right at first, so go slow).


Divide the dough into 8 equal pieces.  Roll each piece into about an 18" long rope.  It was easiest to do this without any extra flour by rolling against the counter top.

 
Form the ropes into a pretzel shape.  Pick up each pretzel carefully and dunk it in the boiling solution for 30 seconds (my big pot could do just 2 at a time).  Pull the pretzel out with a large slotted spatula or spoon and place on a parchment lined baking sheet. You may be wondering why boil with the baking soda?  Its a chemical thing.  Baking soda is a base (as opposed to an acid) and the quick dip starts a chemical reaction where the dough starts yellowing and will let the pretzel brown nice and dark in the oven-it also adds that chewiness pretzels are famous for.  The egg wash you do later adds a bit of shine.  Apparently you can get even more spectacular results if you use food-grade lye, but...I don't have any of that, so baking soda it is.


These are big pretzels, so  you'll get 4 on a sheet.  Brush with a beaten egg and sprinkle with coarse salt (or sprinkle with cinnamon and sugar).

Bake for about 15 minutes until they are a dark pretzel color ( I rotated the baking sheet half way through so they cooked evenly).


I like my pretzels with mustard, but they'd be good with caramel or cheese sauce too. Tasty, warm snack on a cold day.

Tuesday, December 13, 2011

Artisan Bread-Easier than you think!

Pin It

This recipe is tasty! I was sitting next to a friend at choir rehearsal who was describing this super easy and tasty bread recipe and I knew I had to try it out. Apparently the recipe first showed up in the NY Times from Mark Bittman, but I found this version at Steamy Kitchen.

First, I had to hit the store because I did not have bread flour or instant yeast. This recipe is super easy, but it is not super fast. You have to start the dough the night before and you need to have a couple hours of raising time the day that you want to bake it. You don't need a fancy mixer, but you should have an enamel cast iron baking dish with a lid that can handle oven temps of 450 degrees.


Ingredients

3 C. bread flour (I used King Arthur)
1/4 t. instant yeast
1 tsp. salt (table)
1 1/2 C. warm water


In a med/large bowl add all the dry ingredients and stir. Add the water and stir it up until you get a messy lump of dough. Cover with plastic wrap and set on the counter overnight.


The next day the bowl will have a light and fluffy dough. I laid out a dish towel and sprinkled it generously with flour and then dumped the contents of the bowl onto the towel. I used the edges of the towel to form the dough into a ball, then wrapped the cloth around it to let it rise for a couple hours.


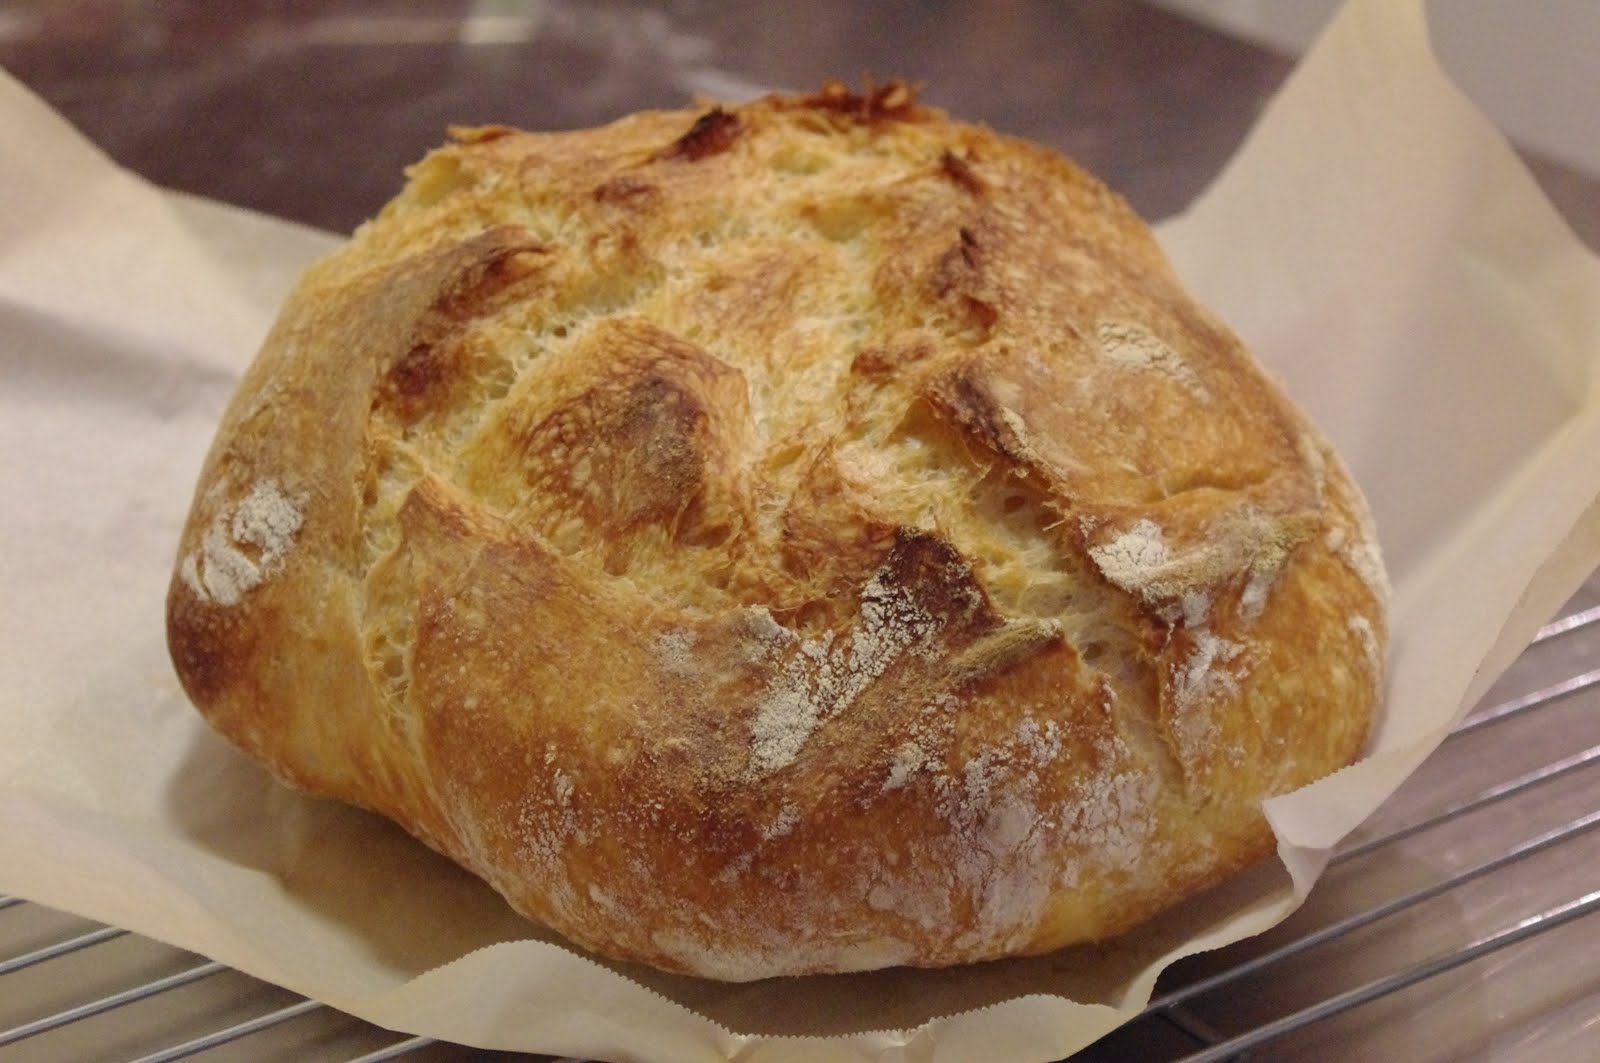
As instructed by the Steamy Kitchen, the last 30 minutes of raising, I preheated the oven to 450 degrees with the baking dish inside the oven. I dumped the dough from the towel onto a piece of parchment paper and slipped it into the pot. Put the lid on the pot and bake at 450 degrees for 30 minutes. After 30 minutes, take the lid off and bake for another 10-15 minutes until it is a beautiful golden color. Remove it from the pot and let it cool on a wire rack.  NOTE:  After seeing America's Test Kitchen do this bread too, they didn't pre-heat the pot and it seemed to work fine.  Last time I did the bread, after I shaped the dough into a ball, I placed it on the parchment and right into my cast iron pot to rise and put it in the 450 degree oven when it was ready.  Seemed fine.  I also had a cold house that day, so I put the pot in the powder room with a space heater...it made it rise nice and fast).


I bundled up this gorgeous loaf of bread up with some homemade strawberry jam and a dishtowel that I imprinted with the Citrasolve method and took it as a gift to some good friends. When she served it at dinner, everyone wanted to know which bakery I had stopped at to pick it up! One friend immediately wanted to know how to make it because it reminded her of the kind of bread her husband loves from Portugal. So, it was a hit! Try it out, you will not be sorry :)

Saturday, October 29, 2011

Multi Grain Bread

Pin It

Last weekend was a long weekend for me and I enjoyed lazing around on Saturday morning, including some time watching America's Test Kitchen. I love that show. They tell you why you should or should not do something in a recipe and everything they make is always super delicious looking. The episode was on making multi-grain bread, and they showed examples of breads that may be super nutritious, but they are so heavy and dense that they aren't very tasty. That is exactly what I have thought about healthy bread recipes I've made in the past, but this one looked so yummy, that I knew I had to try it out. I waited all week to try it (because I know that I shouldn't start a recipe that takes 3-4 hours when I get home from work).

The surprise ingredient in this recipe is hot 7-grain breakfast cereal. What genius, since a bag of cereal is less than $3 and I don't end up with bags of grains that I'd never use up. It turned out so great! It took longer for the dough to raise than the recipe suggested, but it was probably because my house wasn't super warm. The bread turned out so light and with good "chew". You could make a really great sandwich with this bread and have it not fall apart (like home made wheat bread sometimes can). I followed the recipe exactly, including the checking the bread's temp before removing from the oven. I even managed to wait 2 hours before I cut into it (torture).

Recipe from America's Test Kitchen
Ingredients
  • 1 1/4 C . 7-grain hot cereal mix (I used Bob's Red Mill brand)
  • 2 1/2 C. boiling water
  • 3 C. all-purpose flour, plus extra for dusting work surface
  • 1 1/2 C. whole wheat flour
  • 4 T honey
  • 4 T unsalted butter , melted and cooled slightly
  • 2 1/2 tsp instant yeast
  • 1 T table salt
  • 3/4 cup pumpkin seeds or sunflower seeds, (unsalted-I did not add these, I don't like seeds in my bread)
  • 1/2 cup old-fashioned rolled oats or quick oats
Instructions
  • 1. Place cereal mix in bowl of standing mixer and pour boiling water over it; let stand, stirring occasionally, until mixture cools to 100 degrees and resembles thick porridge, about 1 hour. Whisk flours in separate medium bowl.

  • 2. Once grain mixture has cooled, add honey, melted butter, and yeast and stir to combine. Attach bowl to standing mixer fitted with dough hook. With mixer running on low speed, add flours, 1/2 cup at a time, and knead until dough forms ball, 1 1/2 to 2 minutes; cover bowl with plastic and let dough rest 20 minutes. Add salt and knead on medium-low speed until dough clears sides of bowl, 3 to 4 minutes (if it does not clear sides, add 2 to 3 tablespoons additional all-purpose flour and continue mixing); continue to knead dough for 5 more minutes. Add seeds and knead for another 15 seconds. Transfer dough to floured work surface and knead by hand until seeds are dispersed evenly and dough forms smooth, taut ball. Place dough into greased container with 4-quart capacity; cover with plastic wrap and allow to rise until doubled, 45 to 60 minutes.


  • 3. Adjust oven rack to middle position; heat oven to 375 degrees. Spray two 9 by 5-inch loaf pans with nonstick cooking spray. Transfer dough to lightly floured work surface and pat into 12 by 9-inch rectangle; cut dough in half crosswise with knife or bench scraper. Shape each piece into a loaf by rolling it up; roll to coat with oats; cover lightly with plastic wrap and let rise until almost doubled in size, 30 to 40 minutes. (Dough should barely spring back when poked with knuckle.) Bake until internal temperature registers 200 degrees on instant-read thermometer, 35 to 40 minutes. Remove loaves from pans and cool on wire rack before slicing, about 3 hours.