Wednesday, July 25, 2012

Table re-do with French graphic transfer

Pin It


I've had this little table in my garage for a while, and it needed some love.  I know it is solid, but someone did some tole painting on it many years ago, and then it looks like it spent some time outside before I found it.


I knew that removing paint would be a really trying job considering all the curves and crevices, so I decided to get the top looking great and let the legs be a bit shabby chic.

Using some of the "less toxic" paint stripper (the kind that is orange scented) I coated it thickly and laid the plastic tarp over it to let it do its work for about 50 minutes.  Some scraping and most of the paint came off, revealing what appeared to be walnut!  Another coat of stripper and another 30 minutes and the top was pretty clean.  I let it dry and sanded the top clean.  The legs, I used the palm sander to remove some of the paint, but left some too.


I re-stained the top using a dark walnut stain and let it dry.

To do the image transfer, first I picked out a graphic from The Graphics Fairy.  This one is a chocolate label, so of course I love it! I had to flip the image so that the words were backwards (I resized the image in Word, then used the Rotation menu to flip it).  I printed out my image on freezer paper.  I tried it on wax paper and my ink jet printer DID NOT like the light weight of wax paper (it just ate it).  Freezer paper has paper on one side and wax on the other. So just cut a piece of freezer paper to the same size as regular printer paper.  Just set it up so that the image will print on the waxy side.  Be super careful when you remove the paper from the printer that you don't smudge it.

I wiped the table top down with a damp paper towel before I laid the graphic down, waxy side down (the side with the ink on it).  If I were doing it again, I'd cut away all the extra paper from around the image so that it would be easier to center.  Once you set down the image, don't move it.  The ink jet ink will start to transfer to the slightly damp table.  I used a credit card to smooth down the image and get a good ink transfer.


I wiped the table with wax and called it good.  Cute huh?

Wednesday, July 18, 2012

French Macarons

Pin It

I spent my birthday back in April in Paris, where every day was one delicious food experience after another.  One of the most fun was eating these bite size bits of meringue!  They look so simple, so I was surprised when I did research when I got home about how difficult they are to make.  I think the research paid off, because using tips from other bakers, mine turned out pretty darn perfect.

I read My Sweet Life in Paris by David Lebovitz and his blog for tips, but then I came across this blog that had very detailed instructions that were really helpful.

A few things before you begin:
Leave the egg whites out the night before.
Use a kitchen scale.
Use an oven thermometer (my oven was off 20 degrees)
Make the ganache filling before you make the cookies if you want to fill them right away.
Pick a day when it is not humid outside (not usually a problem in my home state).

Ingredients
4.5 oz powdered sugar
2.5 oz almond meal (I used Bob's Red Mill brand-expensive, wish I could have found it in bulk so I could just buy what I needed, about 3/4 of a cup)
2 lg egg whites, room temperature
pinch of cream of tarter
1.5 oz superfine sugar (baker's sugar)
Filling of your choice (jam, ganache, buttercream)


 In a food processor, blend the powdered sugar and almond meal.
 Sift the sugar/meal mixture 2 times.
 Whip the egg whites on medium until a soft foam and add the pinch of cream of tarter.
 Keep whipping  on med-high until soft peaks form, then slowly add the superfine sugar.
 Keep whipping until stiff peaks form (add the food coloring or flavoring just before finished).
 Sift the dry mix onto the meringue and fold gently.  I ended up using 70 folds to get the batter looking just right.  I tested it by dolloping a bit on a plate to see if the peak would melt back down and not stay upright.  Then I put the batter in a pastry bag with a #12 Wilton round tip. 
 Line the baking sheet with parchment and pipe a 3/4" cookie.  I held the tip perfectly vertical and then squeezed the bag, letting the batter poof up around the tip.  I swirled the tip a bit and pulled it off to the side.  Most of the time I got pretty perfect circles that flattened out pretty quickly.  Rap the sheet on the counter to get any extra air bubbles out, then do the other sheet of cookies. 
Let the cookies sit on the counter for about 30-40 minutes to develop a bit of a skin (preheat the oven during this time).  Preheat to 375.  Put cookies in oven and immediately turn down to 325.  Set timer for 5 minutes.  When timer goes off, quickly turn the sheet around and continue baking for another 5 minutes.  I might do it for only 4 minutes each time next time because mine got just a bit golden on a few cookies and you don't want that. Once you've pulled the first tray out, turn the oven back up to 375 and let the oven get hot again.  Put in your second tray of cookies and again, close the door and immediately turn the temperature down to 325 degrees. 

The cookies cooled for about 2 minutes, then I put them on cooling racks.  I had no trouble with sticking.


I filled mine with dark chocolate ganache.  Yummy.

1/2 c. cream
3.5 oz dark chocolate, finely chopped
1/2 T. butter, softened

Bring the cream to a boil slowly, then pour over the chopped chocolate.  Let sit for a minute, then stir until combined.  Add the butter and keep stirring until mixed in.  Chill to stiffen before using as filling.

I ended up with 40 individual cookies, so enough for 20 sandwiches.  I filled some right away, the rest I froze without filling and will use later.

It took about 2 hours of hands-on time for these cookies, so they are more of a special occasion cookie-but they sure are tasty.  I had zero trouble with these cookies--there are lots of steps involved, but they weren't too terrible.

Tuesday, July 10, 2012

Star Wars Palooza!

Pin It Star Wars party

Each year I celebrate "Day with Aunt Steph" with my brothers' kids.  I've learned that it isn't about fancy or expensive, its just about spending time together (and ditching the parents).  Our tradition includes lunch and a chocolate fountain. This year I thought I'd combine our  mutual love of Star Wars with our special day and did a Star Wars Palooza.

I've found tons of great Star Wars party ideas on Pinterest.  I have been adding to my kitchen collection of Star Wars supplies for a while.  From Williams-Sonoma, I have the cookie cutters, pancake molds and sandwich cutters.  From Amazon, I  found some silicone trays for ice cubes/chocolates (just do a search for Star Wars silicone tray).  As for entertainment, I thought a pinata would be cool, as well as light-sabers and then an outdoor movie. 


We started the day with Star Wars pancakes.  Couple of things to make this go smoothly.  First, if you have more than one person eating with you, start a bit earlier than when the kids are all sitting at the table waiting!  I used Krusteaz pancake mix and made it just a little thinner than usual (not really thin, just a bit more pourable) and put it in a large water bottle with a squeeze cap.  Preheat your griddle to around 250-300 degrees with the pancake molds sitting on the griddle (you want them to be hot too).  Spray them very generously with non-stick spray.  Squirt the batter into all the crevices.  Careful--you don't want to fill more than 1/2 full otherwise the batter puffs up over the top of the mold and then things get really messy and stuck.  Once the batter is fairly dry looking and bubbles have stopped, gently pull off the mold and then flip the pancake with a larger turner. 


This day took some advance prep, so I started with making the cookies and froze them.   Apparently I took no pictures of the process, but I modified this recipe by leaving out the espresso powder.  I also did 1/2 batch for Darth Vader and the other 1/2 batch for Yoda (so, how do you get 1/2 an egg?  you crack it open, scramble it and then divide it in half...since I was going to make two mini batches of cookie anyway, it worked out great).  Also used this blog post  and this one for help.

 
For Darth Vader, I used regular cocoa powder and black gel food coloring.  Refrigerating the dough for 30 minutes before rolling out helped.  You need to pop the tray of cookies in the freezer before you bake them for about 10 minutes (this helps keep them from getting too puffy and losing their details while baking).

For Yoda, I reduced the cocoa to 1 Tablespoon and a few drops of regular green food coloring, which made for the perfect Yoda green (one of the recipes used green tea powder, but I didn't want to)!  I also chose to use lemon extract instead of vanilla on these cookies.  Ditto on the refrigerating the dough and freezing the tray before baking. 

I did think about making sandwich cookies out of these, but I suspected the kids would probably dunk them in the chocolate fountain anyway, so I didn't (no one cared that they had no frosting...come on, they look like Yoda and Darth Vader!)
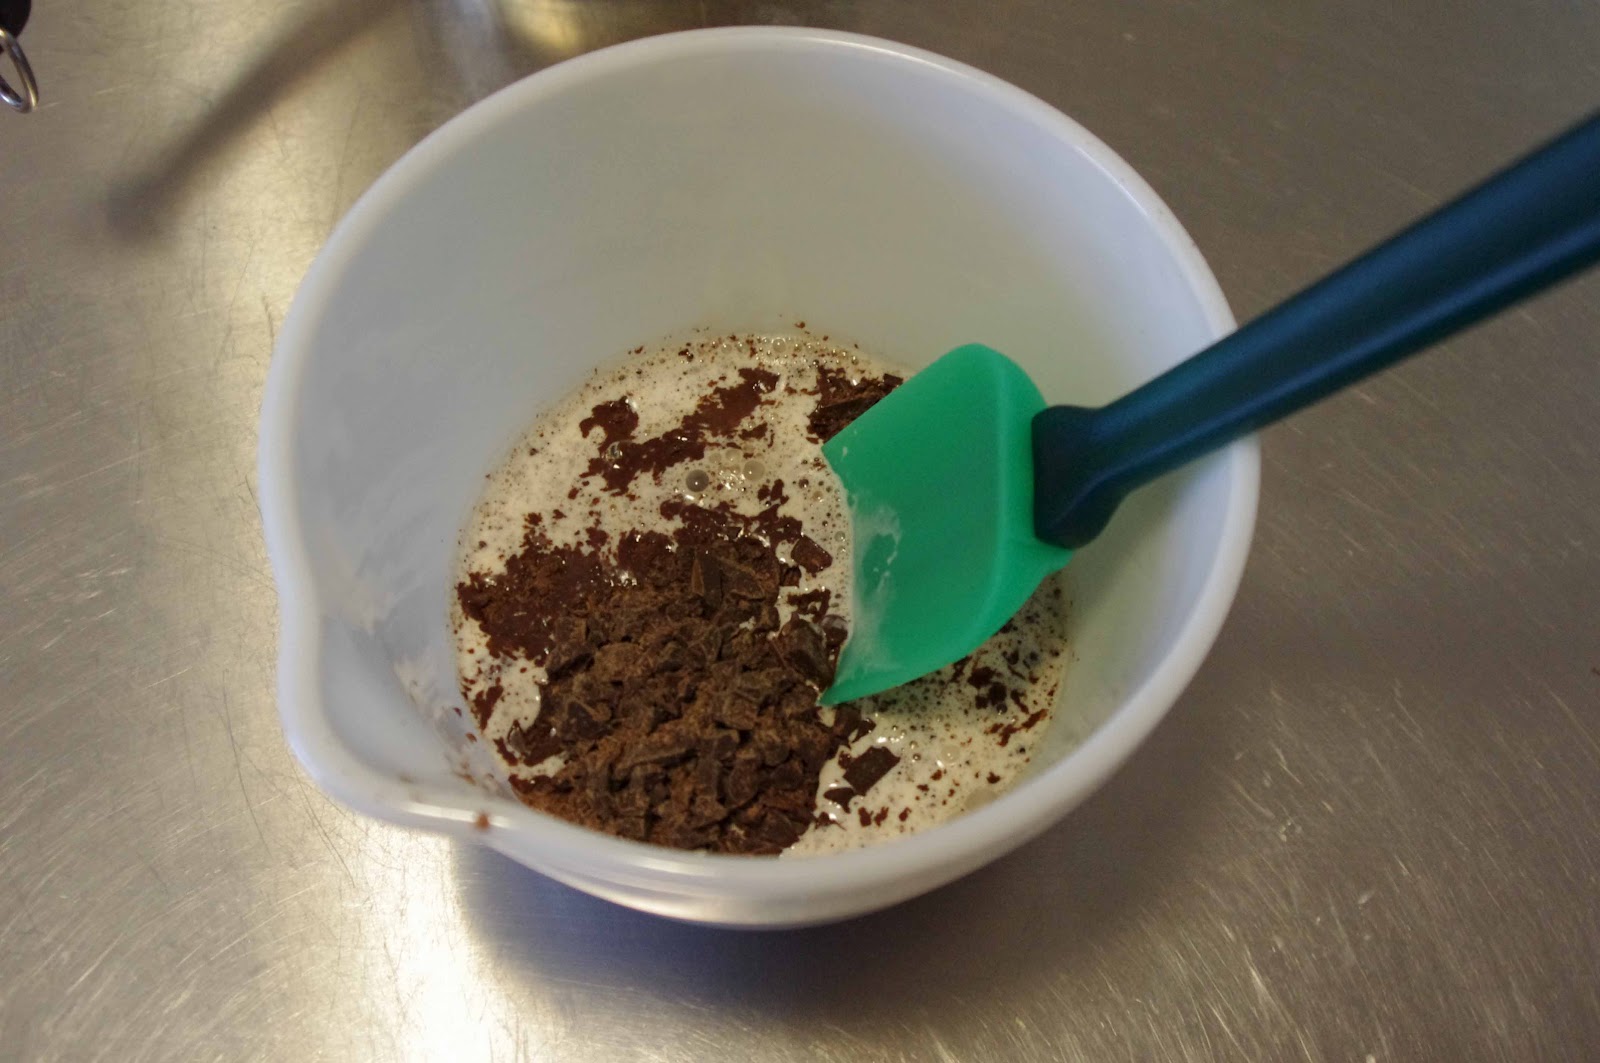
Chocolates


Next on my prep list was the Star Wars chocolates.  I bought the molds from Amazon.com  They were each about $9.  I will say that the X-wing and R2D2 molds were disappointing.  They have such fine details and small parts that they did not unmold successfully.  Han Solo in carbonite and Darth Vader worked really, really well (so did the large Millennium Falcon).

I started with a tray of melting chocolate (OK, this party was for kids under the age of 12, so I did not spring for expensive chocolate).  I melted it up in the microwave right in its tray. 

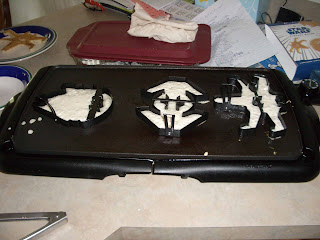
I got all the molds ready and pulled out a spoon and some skewers.

 I filled each mold with the spoon and then used the skewer to make sure that chocolate filled in all the little details.


 You can see how the X Wing fighters are all broken.  Not one got the small wing tips out. 

Light Sabers
From http://havocmayhem.blogspot.com

I made Light Sabers for each of the kids out of pool noodles.  I used this tutorial:
http://www.jedibroadsquad.net/FoamSaber.html  Which while keeping an eye on  8 kids (4 of them are 3 yrs old) I didn't get a chance to snap any clear pics of the Light Sabers, oh well).

I found the shiny silver duct tape at WalMart and used it for covering the handle (the tutorial used black).  I used electrical tape to add the decorations around each handle.  Super easy and the kids loved whacking stuff with them, including the pinata!

Pinata

A pinata  you say? Yup, a big "hit" to be sure. The easiest one I could think of was a Death Star.  I got some punch ball balloons at WalMart because they are supposed to be round...but it was pretty oval shaped. Oh well.  If I were to do it again, I'd hit the dollar store for an inflatable beach ball instead.  The pinata took a whole day to make (luckily it was a sunny and windy day, so it dried quickly).

Mix up the glue; 2 c. water, 1 c. flour.  Tear up some strips of newspaper and smooth them all around the balloon.  I did this outside on the lawn in my work clothes, because this is messy. I had a large bowl to set the balloon in while I worked.  I hung the pinata to dry from the punch balloon rubber band.  When layer one was done, I did it again.  Since most of the kids would be under 8, two layers was plenty, but if they were older, you'd probably want 4 layers.

I sprayed the dried pinata with gray primer since that is what I had in the garage.  Once the paint was dry, I poked the balloon and let the air out.  I used black electrical tape to make the equator and some shiny duct tape to add the decor and large round spot.  I also used the duct tape to cover over the hole left at the top where I stuffed the candy.

I filled the pinata with some Star Wars chocolate coins that I found at WalMart at Christmas time and some other candy.  


The Food!

There are lots and lots of great ideas for Star Wars themed party food.  My brother and his wife even gave me the Star Wars cook book for my birthday.  I used the book for some of the food titles, some titles I found on other blogs and still others I just put together.  I was loved the classic Star Wars detailing of the food labels over at Hello My Sweet so I used them as inspiration for mine. I even did water bottle labels that I printed and taped on Costco brand water.  I'll be honest, I created LOTS more labels than I would have needed, and ended up trying to keep things simple.  After the kids had been playing at the park and a stop at the grocery store for fruit for dipping, they were starved, so I had to hustle to get things set out.  So, no fancy display table, but the kids didn't care one bit!

Wanna know the funniest?  Of all the items on the table, which one do you think got eaten up first and had none left over?  The broccoli from the veggie tray.  Hilarious (and what good sisters-in-law I have for teaching their kids to enjoy vegetables!) 

On the table:
Padowan Pizza
Vader Veggies w/ Droid Dip
Light Sabers (fat pretzel sticks, plain. The kids dipped them in dip or chocolate fountain)
Yoda/Darth Vader Cookies
Hoth Chocolates
The Force Fruit
Chewbaca's Chocolate Fountain (Hershey's Syrup in a fountain I found at Ross for $15)


Wednesday, July 4, 2012

Chile Lime Flank Steak and Cilantro Potato Salad

Pin It


For the 4th of July I tried out something new for the grill, and it was YUMMY!  Total time from start to eating was about 60 minutes.  The recipe was one I tore out of my Better Homes and Gardens magazine, May 2012 Pg 168.

Flank Steak

Marinade
2 T. olive oil
2 T. lime juice
2 T. chili powder
2 t. cumin
1 t. minced garlic
1 t. salt
1 lb flank steak (would work with a skirt steak or flat iron steak too)

Mix up all the ingredients and place in a zipper bag with the steak.  Leave on the counter to marinate while you get the salad going.

Chipotle Corn and Red Potato Salad
1 lb. red potatoes, diced in 1/2 inch cubes
2 ears corn
1 ripe avocado
4 medium radishes, sliced
2 scallions, sliced
1/4 c. fresh cilantro, chopped
2 T. lime juice
1 chipotle chile pepper in adobe sauce, minced-caution, these are spicy, so you could use less, or scrape out the seeds).
1 clove garlic, minced
salt & pepper to taste (about 1 t. each for me)
1/2 c. olive oil

1. Bring a pot of water to a boil and add the potatoes and corn.  Pull corn out after 5 minutes.  Keep an eye on the potatoes, they will probably take less than 10 minutes since they are diced fairly small.  You want the potatoes to be cooked firm (not still raw in the middle, but close--otherwise they'll be mushy in the salad).  Drain, rinse with cold water, drain some more and put in the fridge in the bowl you plan to serve in.

2. Pre-heat the grill on high.

3. Chop/cut up the avocado, radishes, scallions, cilantro and pepper while the grill heats up.


4. Spray the corn with a bit of non-stick spray and place on the grill.  Rotate it often so that you get nice brown spots all around.  Bring the corn back in and let it cool a bit.  As soon as its cool enough (or use a paper towel to hold the end) cut the kernels off the cobs.

5. Mix up the dressing with the chile peppers, lime juice, garlic, salt and pepper.  Slowly whisk in the oil so that it emulsifies.

6. Add all the ingredients to the bowl with the potatoes and pour the dressing over and carefully mix with a rubber spatula.  Refrigerate while you cook the steak.

7. On the still high-heat grill, place the marinated steak.  For medium, it will be about 4 minutes per side (that is the brilliance of the flank steak...its thin, so it cooks quickly).  Set the timer!

8. Remove the steak from the grill and cover with foil for about 15 minutes to let the meat relax and the juices redistribute.


9. Serve it up with fresh tortillas if you want.  Yeah, this is a keeper.  Serves 4 easily. 

This would also make great left overs as a salad--some greens on the bottom of the plate, a few spoon fulls of the potato salad mix and steak on the top.  Maybe fancy up some ranch dressing with more cilantro, lime and chile-or some cotija cheese.  Dang, making me hungry all over again.