Showing posts with label travel. Show all posts

Sunday, July 30, 2017

Traveling Light--Summer trip to Europe

Pin It

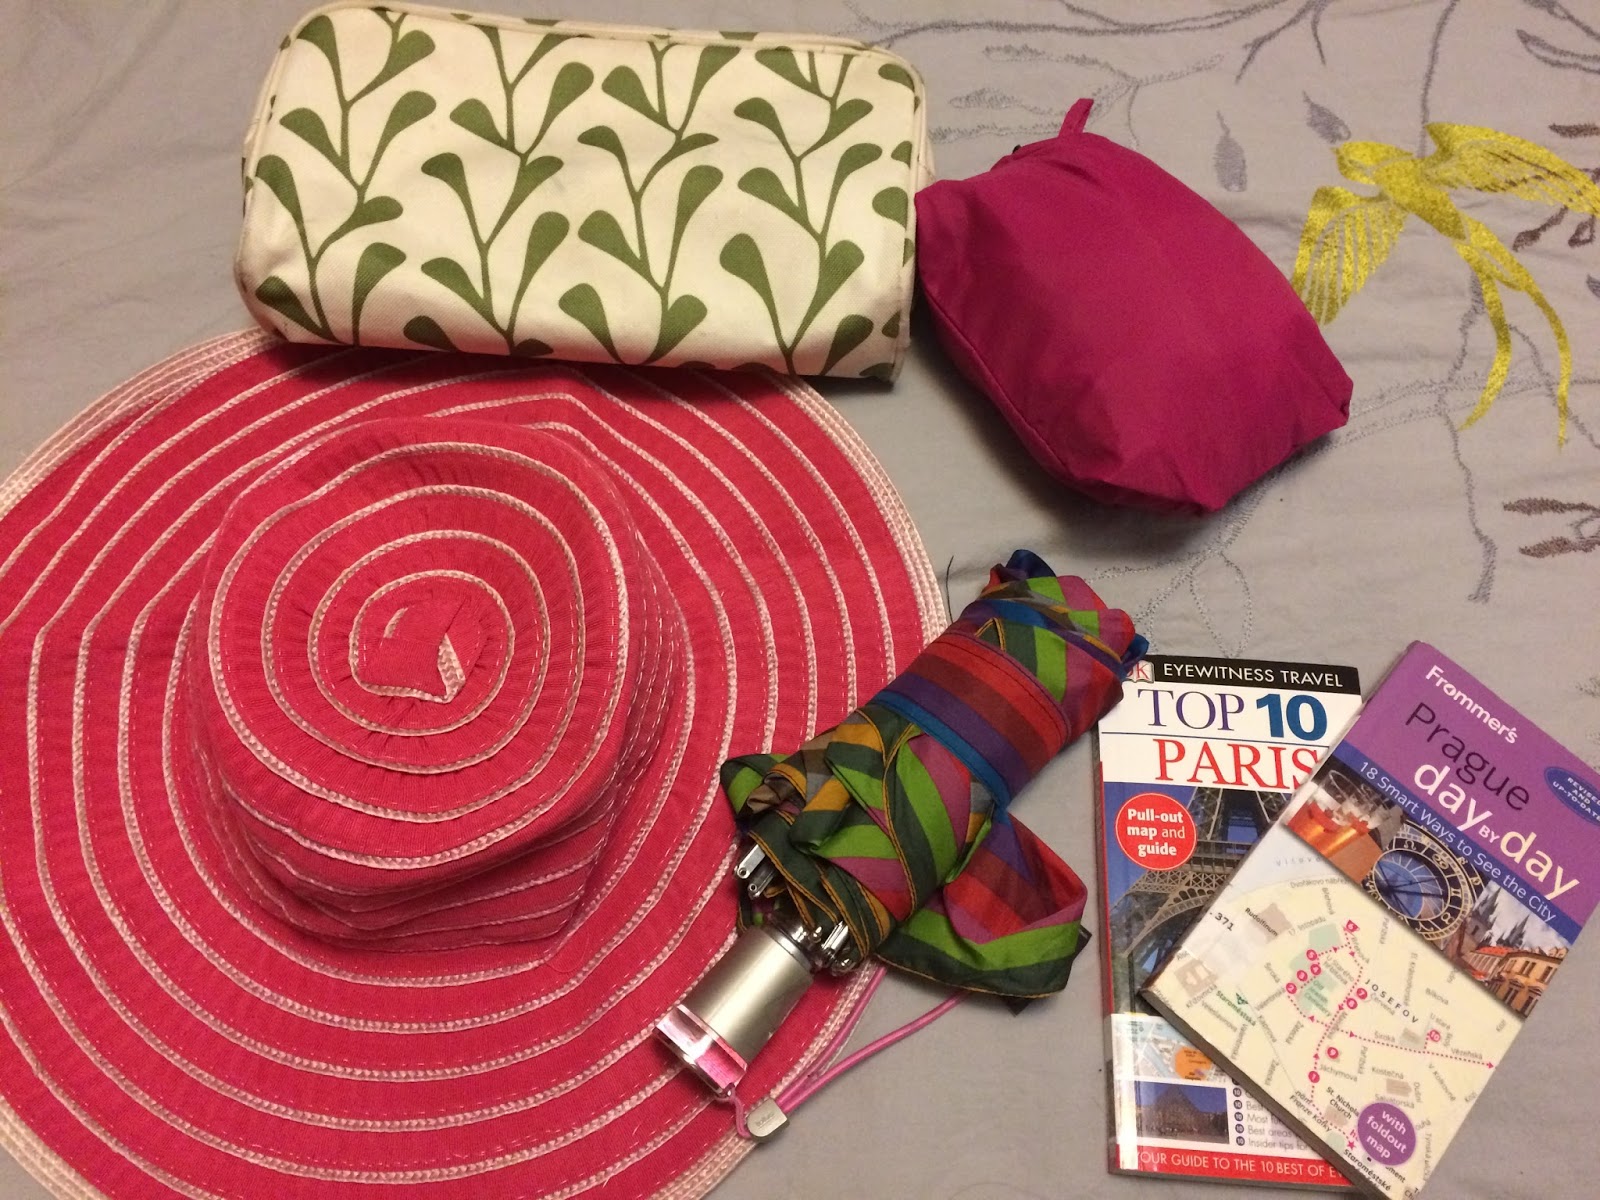
I just got back from 8 days in Paris and Prague with my brother.  I'm a fan of packing light, and have done posts on packing light before.  I thought I'd share what I took with me for a July trip. It was hot and we walked everywhere.

While I was only gone for 8 days, the things I had with me I could have done 2-3 weeks if I did laundry more often.  I only washed underwear on this short trip, but I was down to my last clean shirt on the last day. 

Bags

Osprey Porter 46
This is a great backpack.  Its slightly larger than my regular backpack, but it isn't in the category of "backpacking through Europe" either.  Its main draw is that it unzips and opens up like a suitcase, so its easy to get in and out of.  Its comfortable enough for wearing from the airport, on the subway etc...but you do get tired of it--it doesn't have hip belts to distribute weight.  But you don't want roller bags in Europe--too many cobble stone sidewalks and stairs.  This bag also has some cinch straps, so if you need to smash it in order to make it fit as a carry on, you can (It easily fit in the overhead on my Delta and Air France flights, but I don't know about the budget European carriers).

Keen travel purse
I love this purse.  It is heavy duty nylon with lots of zippers and pockets. 


Packing cubes

I had 2 long rectangle and 2 small rectangle cubes.  (Try eBags or Amazon Basic for some inexpensive ones).  The long rectangles were great for the backpack.  I used them for my clothes.  The small rectangles I used for socks, underwear and electronics. 


What I took

Clothes
1 Pair travel pants
1 pair leggings
2 skirts (these were reversible, found them at Costco)
1 knit dress (Banana Republic)
4 black t shirts
1 stripe short sleeve top
1 stripe long sleeve top
1 gray long sleeve thin sweater
1 pink thin cardigan
2 scarves
4 pairs of socks
4 pairs of underwear
1 sun hat
1 rain jacket (that folds into its own pocket)

Shoes
black sandals
black Sketcher mary janes
running shoes

Toiletries
sunscreen
minimal make up
medicine
ear plugs
band aids
laundry soap (Tide liquid travel packs)


Other
small guidebooks
umbrella
sunglasses
back up battery
phone
mini ipad (I could have left at home...plane had plenty of in seat entertainment)
noise cancelling headphones
power converter/adapter


I could have gotten by with 1 less black shirt and I wore the dress once--but could have worn a skirt another time.  I am so glad I took the running shoes.  Everyone says that Paris needs to be dressier, that you'll stand out as an American if you wear tennis shoes.  Guess what, you'll look like an American no matter what.  Its your trip and your feet--wear the tennis shoes.  I wore my black sandals on the first day (landed at 11:15 am and powered through the day until about 8:00 and with the hot, sweaty weather, I ended up with a large blister on the bottom of my foot.  These sandals have never given me trouble any other time and I've had them for years).  Wear the tennis shoes--don't put fashion over function, not even for Paris.  I do love my Sketcher Mary Janes--and wore them all last year on my Europe trip, but I know I walked WAY more on this trip (at a minimum of 12 miles per day)--and with the blister from day one, I needed to wear socks, so the Mary Janes didn't get the wear that I thought they would.    


Blister help:  I had a big blister on the bottom of my heel by the end of day one.  It had not popped and I had 7 more days of walking to do.  Blisters happen because of friction--so you want to reduce friction and add support.  I didn't take my body glide that I use when I run (should have, for my feet but also other places that got sweaty and chafed with all the walking and sweating)--so I pulled out my stick deodorant and used my fingernail to dig out a dollop and put it on top of the blister, then covered it with a good bandage.  Then I smeared some deodorant on top of the bandage.  I then put on my socks (luckily, I took my double knit running socks, which help reduce friction).  By wearing the bandage with the deodorant, socks and my tennis shoes I was able to walk all day on day 2 without being miserable and by day three the blister had receded on its own.  My brother had a similar problem, so we did the same fix for him. 

Thursday, July 27, 2017

Travel Pant Refashion-Tapering and Waistband adjustment

Pin It

I am traveling to Europe this summer--and even though I was there last summer, I find that once again, I'm shopping for just the right clothes.  This trip is a short time frame and the weather will probably be warm, but I get cold on planes, so pants make sense.   So, I started looking for some great travel pants.  I found great ones from Athleta--they are called the Trekkie Jogger, but they are $89.  I do love Athleta, and have many of their clothes--but $89 just wasn't in the budget (car repairs last week, upcoming dental expenses...not to mention the cost of the upcoming trip).  I tried to love something already in my wardrobe, but couldn't.  I wanted something lightweight, non-wrinkly, easy to dry and ankle length--plus I wanted secure pockets with zippers to hold things.  Tall order--but the Athleta pants did all that, for a price.

So I decided I'd hit my favorite thrift store and cross my fingers that I'd find the perfect pants (I actually have a lot of Athleta from thrift stores).  No luck--no one had purchased the Trekkie Jogger and donated it for me to find.  But I did find a pair of Eddie Bauer hiking pants that had potential.  The fabric was right, the size was close, they had some zippered pockets and they were long--and they were $4.  But they were also really boxy.


I've been using my sewing machine a lot this summer.  Mostly small mending projects--but I've done lots of alterations.  T-shirts that were just a little wide--a quick seam down each side and now its a fitted shirt! A clearance find shirt that the store only had in size 1X (great length for leggings though)--or how about tacking the top of a swimsuit in about an inch (more hips than chest for me).  These are not complicated alterations--but it makes my clothes fit right, which makes me feel more confident in them and more likely to wear them.   I can't tell you how grateful I am that my mom and grandma taught me to sew.  I bet I've fixed/changed about 7 items just this summer.  I usually avoid sewing pants, but tapering the legs seemed do-able; and it was.  It took about 1 hour to complete.

What you'll need:
Pants to taper
sewing machine
pins
thread
straight edge and chalk pencil (or washable marker)
elastic

Difficulty:  Beginner (if you can sew a straight line, you can do this)

Put the pants on inside out.  If you have a friend to help with the pinning, it would be easier, but I did it on myself--just be careful!  Figure out how narrow you want the pants to be at the ankle (test pin it and put your foot in and out to make sure it fits).  Then pin from ankle to crotch in a diagonal line that makes your taper evenly go down the pant leg. 

Once I had them pinned, I removed them, laid them flat on the table and fidgeted with the pinning so that the fabric was flat and I could see the general line that I would follow for sewing.  I got out my quilting ruler and used a chalk pencil to draw the line I would sew.  Then I unpinned and repinned the pants so  that everything was flat and smooth.

I used the longest stitch on my machine and did not backstitch and sewed along the chalk line.  I created an angle seam from the crotch all the way to the ankle.  Repeat for the other pant leg.  Take out the pins, turn the pants right side out and try them on.  If they are tapered to your liking, great!  If not, redraw the line to make them wider/narrower and sew again (if you accidentally made them too narrow the first time, you will have to unpick the seam and try again.  If they were too wide the first time, no big deal--just sew another line).  Once you are satisfied with the fit you can go back over the seam, backstitch the beginning and end, or be like me and use a serger to cut off the extra fabric and make the raw edges neat and tidy.  Just don't cut off the extra fabric of the pants until you are SURE that they are just the way you want them. 


Don't they look better?  More feminine?  Yeah, I thought so too.  But I did a bit more tweaking.  The pants were 1 size too big to begin with--so the waistband gapped in the back.  No one wants to see underwear hanging out the back of someone's pants.  Here's an easy trick.  Put in a bit of elastic in the back of the waistband.  Nothing that would scream "senior citizen" pants, but just enough stretch to keep the back of the pants from gapping.  I flipped the pants inside out again, and made two small cuts into the inside of the waist.  I decided I wanted the elastic to go from the outer edge of each pocket, which was about 10 inches total.


Note:  The zig zag line on the waistband was part of the original pants, I didn't do that.


I took a piece of 1/4" elastic that was about 14 inches long and put a safety pin on one end and threaded it through the two holes I'd made. I stretched it about 1 1/2 inches past the hole and pinned it in place--and did the same on the opposite end.  It looked really gathered laying on my sewing table, but when I tried the pants on, the gathers nearly disappeared.  Once I was pleased with the amount of stretch, I sewed over the end of the elastic a few times with the machine and then trimmed off the ends.  I used a tight zig-zag stitch to cover/close up the holes I had cut.  No one will notice as long as you use matching thread.


The Athleta version have elastic around the ankles, but I decided to add a gathered detail along the outside ankle instead.   The hardest part about this was getting the fabric of the ankle out of the way so that you are only sewing through the one side of fabric + the elastic. Measure up 5 inches from the hem on the wrong side of the fabric and pin the elastic on top. Place under the needle with the fabric on the bottom and elastic on the top. Sew a couple stitches to make sure the elastic won't come flying at you, then pull the elastic so its fully stretched and continue sewing along the outside seam until just before the hem.  Backstitch to hold it in place and then trim off the elastic.


Not too bad right? These altered pants now meet my needs.  They have the soft stretchy fabric that wicks moisture and dries quickly.  They have 3 pockets with zippers (and two without), they look a bit more dressy than the boxy hiking pants that they started out as.


As a last alteration, I wanted to add a temporary hidden pocket to hold my passport/money.  I sewed a rectangle pocket with a zipper at the top and then sewed it into the inside front waistband of the pants.  I will un-attach it after the trip, but it will make me feel more secure about traveling on crowded trains/subways.


There you go, my $4 version of expensive travel pants.  I'm pretty excited.  They are fitted without being uncomfortable and the fabric has plenty of stretch to make them perfect for long airplane rides.


Monday, December 5, 2016

My Favorite Disneyland Travel Tips

Pin It
I remember my first visit to Disneyland in 1977.  Not all of it...but pieces.  I remember riding Dumbo (and my mom not liking leaving the ground).  I remember eating a frozen chocolate dipped banana.  I remember it being magical.  I still love Disneyland.  Since that first visit I think I've been somewhere around 25 times! These are just my musings about what I like, what I skip, what I splurge on and how I save time and money.

Shows
See the Disneyland parade and the castle fireworks.  I'm not one for camping out for hours for a parade--and I don't love the "leave Grandma with 3 strollers, 2 blankets and 12 coats" to save a sidewalk spot. Instead, I ask a cast member what direction the parade is going (it either starts or ends by Its a Small World or Main Street) and plan on arriving at the starting side of the parade and take what I can find or I hit the train station platform and watch from above. Same deal with fireworks (the late fireworks are less busy). The Frozen musical show is pretty cute, but it is new and popular, so you’ll need a Fast Pass for it.  If you haven’t seen World of Color, then its worth seeing once (but if you have to choose between this and Disneyland fireworks, choose the fireworks).  You can get a FastPass, but I don't like to be that close, because you get wet.

Food
I have some real passion for Disneyland food.  I usually get any and all of these items.
Corndog (you can order it by itself, even though it sounds like you have to have the meal)
Dole Whip from Tiki Room
Matterhorn Macaroon from Jolly Holiday Bakery on Main
Mickey Beneigts in New Orlean’s Square
Soft Serve Cone from Cozy Cone 
Mickey Waffles at the Carnation Cafe
Caramel Apple (and I learned to make my own, here)


Rides I love
Disneyland:
  • Haunted Mansion—Holiday overlay (mixes Nightmare Before Christmas)
  • Small World-Christmas (other times of the year I skip it)
  • Pirates of the Caribbean
  • Buzz Light Year Astro Blasters
  • Indiana Jones and the Temple of the Forbidden Eye
  • Splash Mountain (if its warm—otherwise no, because you get wet)
  • Matterhorn (the left side line is usually shorter)
     Skip:
  • Finding Nemo Submarines-unless there is zero wait.  Its just not that interesting--animated Nemo images are on the window in front of you and you can see the water's surface if you look up.
  • Toon Town—its for smaller kids--but Mickey and Minnie have houses there so you might want to catch a character greeting.

California Adventure

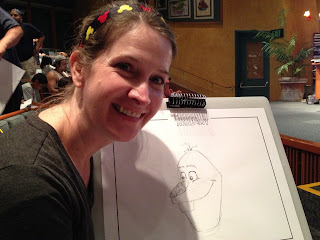
  • Animation Station—they do drawing lessons every 20 minutes—I LOVE this.  They list the characters they will teach on a board out front, so choose the one you like.  
  • Cars Land—The ride is amazing.  Get there first thing in the morning for no wait.  Get the FastPass.  Or do the single rider line.  Be sure to go back at night to see the neon lights.
  • Tower of Terror—hop on, its changing its themeing to Marvel next year
  • Soarin' over the World—love, love, love this one.  You’ll need to Fast Pass it. I always do this one twice.
  • Toy Story Mania—I love it, but the line is always 40+ minutes and no Fast Pass available
  • California Screamin’ if you like fast and upside down roller coasters, you'll like this one
  • Mater’s Junkyard Jamboree—its a toned down tea cup ride, so I manage it
  • Goofy’s Sky School
  • Ariel’s Undersea Adventure—cute, calm and never a long wait
  • Grizzly River Run—you will get wet

Skip:
  • Luigi’s Rockin' Roadsters (unless there is less than 5 min wait).  Its really short, isn't fun and has irritating music the whole time. 
  • Mickey’s Ferris Wheel—it takes FOREVER and is not entertaining
Shops:
I love looking at all the Disney stuff.  You can see most of it in the Downtown Disney World of Disney—but the Emporium on Main also has  most of it as does Eli and Co in California Adventure.


My other tips

1.  Pick the right time to go
If the park is super crowded, you won't be able to ride as many rides--because you'll be in line or fighting your way through huge crowds.  I typically head to Disneyland in mid-September or end of January.  I prefer to go in the middle of the week--crowds are lowest on Tues/Wed.

2.  Get to the park early
No matter what time of year you go, the first couple hours that the park is open is the least busy.  Line waits are often just 5-10 minutes.  If you can, get there and do the non- Fast Pass rides (like all those Fantasy Land rides) before the lines are 45 minutes long.

3.  Use the Fast Passes
At Disneyland you can only do Fast Passes once you are at the park and you can only hold one at a time (technically).  I like to grab the hard to get Fast Pass first thing and then start riding rides as soon as the park opens--I can usually get my first Fast Pass, go ride 2-3 rides then use my first Fast Pass and be eligible for my next Fast Pass by 11:30am.  There are some exceptions to the one Fast Pass rule--things like World of Color is separate from regular rides.  Also, Fast Passes at Disneyland are not connected to those at California Adventure, so you could possibly hit one park, grab passes, then run across the plaza to the other park and get another Fast Pass there.

4.  Find the shorter food line
Two of my favorite food items at Disneyland are the corn dog and the Dole whip.  The most popular place to get the corn dog is the Little Red Wagon on Main Street at Disneyland.  Sometimes the line is 30 people long.  You can find the exact same corn dog at the Golden Horseshoe cafe in Frontierland just a 5 minute walk from the Wagon (if you are DCA, the corn dogs are over by Goofy's Sky School).  The Dole Whip is only at the Tikki show--and the line outside is typically longer than the one inside.  So go into the waiting area for the show, order your Dole Whip and then choose to go to the show (or not).

5.  Use the single rider line
If your goal is to ride as many rides as possible and you don't care if you sit with your group, use the single rider line.  Splash Mountain and Indiana Jones at DL have single riders.  At DCA more rides offer single rider,  like California Screamin',  Grizzly River Rapids, Goofy Sky School, Soarin' over the World and Radiator Racers.  I've had great experiences at all of the single rider lines except at Soarin'--for some reason more than any other rides, the employees seem to treat the single riders poorly (the wait is sometimes just as long as the regular line).

6.  Ice water is free
On a hot day ice water is delicious.  Walk up to any counter service restaurant and ask for a cup of ice water--you get an 8 oz cup with a lid and straw.  I've done the "bring a backpack" and have water bottles and snacks--which is great, but if you don't want to haul a bag--go get the free water. I never feel bad about only asking for water...after all, I paid close to $100 a day to be there. 

7.  Bring a stroller
If you've got kids, bring a stroller.  Even a kid who doesn't use a stroller at home any more will at some point need a break from all the walking.  Sometimes I wish I had a stroller for me--but then I don't want to be that lady who can't drive her Jazzy chair and keep crashing into things (another tip:  I've seen many frustrated older folks try to use the scooters...maybe take Grandma to the grocery store before the trip to try out driving a scooter in advance). 

8.  Bring snacks.  You can bring a backpack or bag with snacks--which is good when you don't want to spend $5 on a churro.  Pretty much all the standard motel rooms near the park have fridges and microwaves in every room.  If you have a car (or use Uber) head to Target one mile from the park and pick up drinks, snacks or maybe even stuff for cereal and sandwiches.  Von's Grocery will also deliver.  There is also a really nice Walgreens and CVS on the corner of Harbor and Katella. 

9. Where to stay? Well, that depends on how you want to do Disney and who is in your group.  I like to stay within 1 mile of the park (usually much closer) so that I can walk and not have to do shuttles or pay for parking (because thousands of people all want to use the same shuttle when the park closes).  If you have small kids and plan on a mid-day break, stay close enough to walk back and forth without a shuttle.  If you think you can power through the day without a break, then you can stay a bit further out and get some pretty nice value-add perks for less cost.

Unless you are staying at the Disneyland Hotel (and if budget isn't an issue, its pretty fun--and the pool is great), you will be entering the park at the East pedestrian entrance.  Any of the motels on Harbor Blvd between the Howard Johnson and the Grand Legacy are the closest for walking distance.  Anywhere along Harbor to the Convention Center is still "walkable"--but you won't want to after a long day at the park.  There is a community shuttle called the ART that serves all the motels, but I think its kind of expensive and it can be frustrating to stop at multiple hotels on the way--making the trip 20+ minutes.  I've stayed at Tropicanna, HoJo, Candy Cane, Alpine Inn, Cortona, Marriott, Hilton, Homewood all within the past couple years.  The Candy Cane Inn has their own shuttle and breakfast--so you don't have to stop at every motel on the way to the park and back.  The Hilton Homewood Suites is awesome (huge hot breakfast and free dinner)--and if you don't want to walk the 15 minutes, you could pop into the Toy Story parking lot and ride the Disney parking lot shuttle.  Tropicanna is really close, but they have no value-adds other than being close but they charge for parking.  HoJo has a nice pool for kids, but no free breakfast.  Alpine Inn is close to the Convention Center and its about a 12 minute walk to the crosswalk in front of Disney and offers cold cereal and whole fruit for breakfast.  Check out TripAdvisor.com to look at reviews and photos to see what motels might fit your personality style best.  I've used most of them close to the park and my experience is I can live with any of them.  Some have nicer perks like breakfast and free parking, but I can live with any of them.

10. To rent a car or not? I've done both. Sometimes I want to head to the beach, or I'm only there 1 night, so a cheap rental might be the best way.  My last trip it would have been slightly less expensive to rent a car than use Uber, but the line at the rental desk and the time it takes to return the car made me decide against rental this time.  The Disney Resort Express bus is really easy--and around $40 per adult round trip.  The bus serves the Orange County and LAX airports and goes to the Disneyland Hotel first and then stops at others (on the way back it picks up at the DLH last and then straight to the airport).  The nice thing about the Disney Bus is that you don't need car seats.  I have used Uber and Lyft from the Orange County airport and it was slick--and inexpensive.  If everyone in your group is beyond the car seat stage, Uber can be a good choice.  It cost me about $17 to ride to my motel across from Disneyland.  I used Lyft once to pick me up at my motel that was 1 mile from the park and have them drop me at the drop off lot on Harbor ($4 and no waiting for a shuttle with the hoards--and you can have 4 people in the car).  I used Uber to pick me up too, but I went across the street to the Panera where it was less crowded.
 

 I love going to Disneyland!  I recently returned from Disney World in Florida, and I had a good time--but I still prefer Disneyland!  I hope you have a wonderful Disney trip.


Friday, October 21, 2016

Pom Pom Dish Towels

Pin It
 
I got to spend 3 weeks in Europe this summer.  I highly recommend it!  I enjoyed all the places I visited, but I was surprised at how much I loved Amsterdam!  Oh the canals, and the cheese shops!  I'm not a big souvenir person, but I walked past a fabric shop and I do love fabric.  I bought two small fat quarters and took them home.  I decided that hand towels in the kitchen would be the perfect way to use the fabric.  I picked up flour sack dish towels and some red pom pom trim.  
I cut the fabric down to 4 inches and finished the edges with my serger. Then I sewed the fabric to the bottom of the towel.  (I had to trim the width of the towel because it was wider than my Amsterdam fabric).  Once the fabric was sewn on I started with the pom pom trim.  Its a bit tricky--it has some stretch to it, so I found that using the zig zag stitch on top of the trim worked the best. 
 
Now when I walk into my kitchen, I see the cute tulip and bike towels and remember my fun canal boat ride, the Rijksmuseum or stopping at every cheese shop!


Sunday, April 17, 2016

Aloha-My Top Oahu Vacay Tips

Pin It
Hawaii is a great place.  I spent a semester in college attending school on the North Shore of Oahu taking classes like Marine Biology, Pacific Natural History and Hula!  Hard to believe that I let over 20 years go by before I returned to paradise.  Fortunately for me, I had some good friends move to Oahu and gave me a standing invitation to visit and stay with them--so I did, 3 years in a row!

Oahu is the most populated of the Hawaiian islands, but there are so many great things to see and do there!  Everything in Hawaii has a "just go with it" feel, so most of the time I'd get up in the morning and decide what I felt like doing, and then doing it (Hint, most of the time it included the beach).

Here are some of my favorite things.

Beaches

In general beaches are crazy busy on weekends and quiet during the week, so plan accordingly.

Kaiona Beach Park-This awesome beach park was never busy when I visited (weekday) and it has a parking lot as well as restrooms and showers for rinsing off.  Its on the east side of the island, near Makapu'u lighthouse and Waimanolo.  I've also had great luck picking up sea glass here.  At low tide, there are a couple of tide pools that are perfect for bobbing around in.   Are you a fan of Magnum PI? The house used as the "Master's Estate" is about 3 houses down the beach. Update: Somebody bought the Master’s Estate and tore it down to build 3 mega mansions. 


Kailua/Lanikai beach--My favorite beach on all of Oahu.  The sand is so, so soft.  The water is clear and calm.  I can just sit and stare at the water all day (and I did).  Kailua Beach Park has a couple different parking lots, picnic tables and restrooms.  You can also rent kayaks here.  Lanikai is about 1/2 mile up the road, and also very, very nice--just no services and you have to park in the neighborhood.  The town of Kailua has a really nice shopping center where you can grab lunch at FatBoys or Teddy Burger, stop at Target for bottled water or postcards (and mail them from the post office right next door).  Kailua is super nice and not nearly as crowded as Honolulu beaches since so many tourists never leave Waikiki.


Water Sports

SUP Yoga with Yoga Kai-This was one of my favorite activities all week!  I took the sunset class at Ala Moana Park (near Waikiki, giant free parking lot conveniently nearby).  The beach park was pretty busy, so it wasn't your usually contemplative yoga session, but the sunset was really nice! (And as a bonus, there will probably be several weddings on the shore while you are there).  The morning class looks like it might be nice too.  I highly recommend this company and the activity!  They provided all the equipment and took photos for us too.


Surfing lessons--This is a blast.  I've done it twice and really enjoyed it both times.  My first visit, I used Kai Sallas Surf Pro, which is located in the Marriott lobby at Waikiki.  They provided the board, quick transport to a spot off of Waikiki that was not crowded, as well as a long sleeve rashguard and water shoes.  They had a photographer who was in the water with us.  My group had 5 people in it and I managed to get up and surfing by my second try!  They were a bit spendy, but I loved my photos and my experience.  This trip I did a Groupon with Big Wave Dave, also on Waikiki.  Even though it was a group lesson, I was the only person scheduled for that time (as a bonus, my instructor did all the paddling out for me; he just hooked his foot on my board and towed me out to the wave spot).  I had to provide my own rashguard and shoes (and I wore capri length swim/gym tights--you will be really glad you did).  BWD also had a photographer, but he stayed on the beach and used a long lens--he did shoot video too, but I prefer the photos I got from Kai Sallas.  Next time I go, I'm headed to Costco to buy the $100 surfboard and just go out whenever I want! I promise you'll want to cover up your skin for this adventure--not only for sun protection, but to keep your skin from being rubbed raw by the grippy board and sand.


Stand Up Paddle Boarding-  I did lessons from 3 Friends SUP during my first visit- really great instructor, GoPro attached to your board and a great afternoon.  For my most recent trip, I had arranged for a lesson/rental from another company...and they never showed up (Groupon made it right for me)--and while I was waiting on the beach for the no-show company, I met Matt from Paddle Core Fitness--and I joined their group for their afternoon session.  Paddle boarding is a serious core/arm workout--but I did get to see 2 sea turtles during my paddle time!  If all you want to do is paddle around quiet water, you could arrange for rentals from Aloha SUP Club--they will bring the boards to you at Ala Moana Park and pick them back up and they have good reviews online (and they promptly replied to my text when checking on rentals, sadly they don't do Mondays so it didn't work for my schedule). 


Hanauma Bay snorkeling-It will cost you about $10 (more if you need to rent equipment), but its a convenient and safe place for snorkeling.  Its a really popular place, so you need to plan on getting to the parking lot before 9am or you probably won't get a spot.  I enjoyed watching the sunrise here (I was there at 7am).

Hikes and Views

Makapu'u Lighthouse trail-Get up early and do this hike.  Its paved, 2 miles roundtrip--I've seen folks with strollers on it, but you'd want to be careful not to let the stroller escape!  In the winter/spring you can see whales.  The lighthouse is really pretty and the view of the ocean is great.  Fun fact, you will find cactus growing here--its a windy and dry spot, so the cactus do well.  Do this hike in the morning, then drive the mile or so down the road to Kaiona Beach to swim and relax!

The most popular is probably Diamond Head Hike, you get a great view of Honolulu at the top, but its a pretty brisk uphill hike with no shade and LOTS of tourists.  You have to pay to park and its $1 to do the hike.  As an alternative--drive up to Punchbowl Cemetery of the Pacific; in addition to the many military graves, it has a super view.  You could also drive all the way up to Tantalus Round Top for a great view with no hike required.

Another scenic spot is Pali Lookout (on the way to Kailua)--you have to pay to park there too, but you'll probably only be there 15-20 minutes, so its a cheap thrill.


Manoa Falls Hike-A fairly short hike near the Lyon Arboretum near Honolulu.  Pay $5 for parking (but there is an attendant, so that makes it nice for security).  You will want insect repellent and shoes that you don't mind getting muddy.


Places to Visit

Kamaka Ukelele factory tour.  This family owned company has been making ukuleles for 100 years.  Uncle Fred, the original owner's son is your 91-years-young tour guide (and he's awesome).  Its daily at 10:30am and free--but get there about 20 minutes early because there are only 5 parking spots in front of the store (Note:  The company is going to be moving locations summer of 2016, so check the website for details).


Pearl Harbor-This is a must do.  You make reservations to go out to the USS Arizona Memorial.  It will cost you $1.50 to make the reservations online (its near the Aloha Stadium swap meet, so maybe plan it for the same day)

Royal Hawaiian Shopping Center cultural activities--This is a fancy shopping mall right on Waikiki, but in addition to the high end stores, they offer free cultural classes every weekday.  Hula and ukulele lessons, and lei making (my favorite) and others.


Dole Pineapple Plantation-If you are either driving back from the North Shore or have been out at Pearl Harbor area, the plantation is a good side trip.  There are gardens where you can see real pineapple growing and some fun photo ops.  You can pay to go through a maze or take a train ride (but I've never done that).  I did however go into the store and get a Dole Whip and eat it on the porch.


Aloha Stadium Swap Meet-This is where you buy the cheap souvenirs for the peeps at home who are jealous that you are in paradise.  Its only open Wednesday, Saturday and Sunday.  It costs $1 per person.  All the kitchsy stuff you see at the ABC stores all around Waikiki probably buy their stuff here and then mark it up.  I bought my Hawaiian "slippahs" here as well as plumeria hair clips, swim sarong, fabric, canvas purse and charms for my bracelet AND a ukulele.  They sell T-shirts too, 7 for $20.  Wear a hat and sunscreen, bring a shopping bag and a bottle of water.  The vendors are set up all around the outside of the stadium and you'll notice a mix of "the same stuff" type booths along with some unique local craftsman.  I spent about 90 minutes here and had seen it all/enough.  


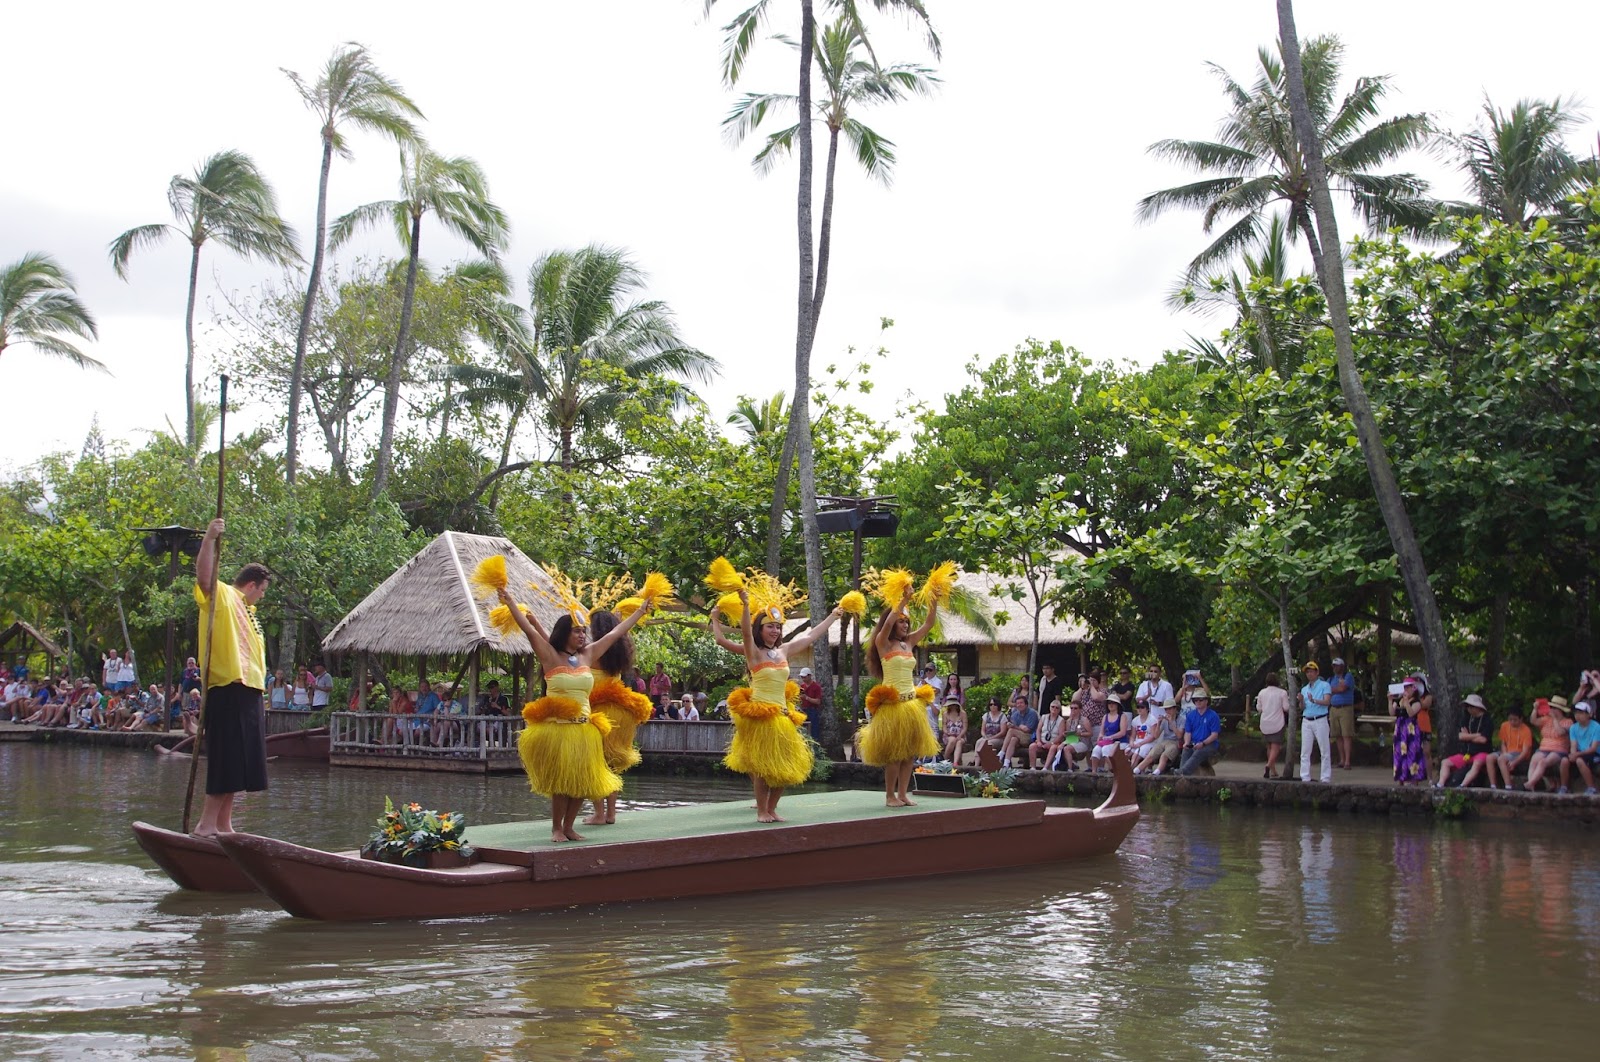
North Shore- There are lots of great places to stop on the North Shore.  If you are there in the winter you can watch giant waves and adventurous surfers at Waimea Bay (in the summer there are no waves and its a giant bathtub for swimming).  Laie is a small town that has the Polynesian Culture Center (PCC for short), BYU-Hawaii and the LDS Hawaii Temple. I visited the PCC this trip; my Alamo rental car magazine that I got for free on the shuttle bus from the airport had a coupon for 1 free entrance.  I visited some of the villages and watched the shows and did some of the crafts.  I watched the longboat dance show and called it a day (there is a big luau night show too).  I went to BYU-H for part of my studies, so it was fun to visit the campus again.  The LDS temple is the first non-Utah temple that the LDS church completed.


Misc

Shave Ice- My personal favorite spot is near to Hawaii Kai/Honolulu--Uncle Clay's House of Pure Aloha.  They make all their own syrups (you must try lilikoi and pineapple) and ice cream.  If you are on the North Shore, stop at Matsumotos in Haleiwa--probably a long line, but its tasty stuff.

Costco-You know how much you like Costco at home?  Here too (and you won't get out the door without spending $100 here either).  Its perfect for buying stuff to take home like macadamia nut treats, but its also good for buying things like swimwear, rashguards and even surfboards!  Be sure to walk through the back deli/meat section--SOOOO different than what my local Costco carries (poi, sushi, haupia cake, dried squid). I also bought some large Costco shopping bags, which are decorated with Hawaiian designs.  I think there are 2 stores on Oahu, but I've only been to the one at Hawaii Kai (near Hanauma Bay) which is east of Waikiki.


Where to stay?  

I stayed with friends, in a great house in a neighborhood near Diamond Head called Kahala-so I ate at home most of the time and walked to the beach. Waikiki is the most famous section of Honolulu, but parking is HORRIBLE (expensive and hard to find--see more below).  If you can rent a condo, I'd recommend the areas of Kahala, Hawaii Kai, Diamond Head, Kailua or Laie on the North Shore).  I haven't had a chance to explore the part of the island called Koolina, which is where the Disney Resort is located, but my friends with small children love it.  

Renting a car

Yes, do it!  All the fun places are only accessible by car.  However, if you are staying in a downtown Honolulu hotel, parking will be outrageously expensive (like $30 a night or more).  I have had great luck renting through Costco.  About 8 weeks before my trip, I get on Costcotravel.com and make my reservation.  Then pretty much every day I check to see if there are better rates--and usually the cost keeps dropping for 2-3 weeks.  I've never paid more than $160 for a full week (that includes all fees and an extra driver if you need it).  The nice thing about Costco is you don't have to pay for your reservation, so each time I found a better rate I made a new reservation and then cancelled the old one.  FYI Hawaii has a law that drivers can't even hold their cell phone while driving. 

Parking

As I mentioned, Honolulu is impossible!  Predatory towing is a real problem--so if a sign says no parking, or the hours are posted when not to park, then don't!  I watched 3 tow trucks hook up cars about 2 minutes past the posted time.  I have always parked at the Waikiki Shell or on the street Monsarrat--its free during the day (no overnight).  You can park at the Honolulu Zoo for $1 an hour.  I hear that the Royal Hawaiian Shopping Center validates parking, so that might be an option.  If you are outside of Honolulu, things get better.  The beach parks have parking lots or you can park along the highway.

Books I've used in the past for planning

Oahu Revealed
Oahu Top 10


Aloha my friends...go to Hawaii! Relax and ignore your email and phone--you won't be sorry!