

As part of my living room redecorating I put up a new shelf, and then I had to figure out what would go on the shelf and on the rest of the wall. I spent lots of time surfing Pinterest for wall art ideas, for quotes etc... I finally decided that I needed a piece that was about 2 feet across and about 30 inches long (I could have probably done closer to 3 feet...maybe next time). When I looked at stores for art, I didn't find what I wanted. I considered buying a canvas at the craft store and using paint and my vinyl cutter. But I thought maybe I could do a faux canvas instead--and for less!

I have been wanting to try out the Engineering prints from Staples since I read about a blogger who did a large print of the Death Star for her boys' room. The engineering prints are inexpensive, but they are in black and white and lower resolution. For the one I did, it cost about $3.50 (I uploaded the .jpg and an hour later got a call from Staples that it was ready for pick up).
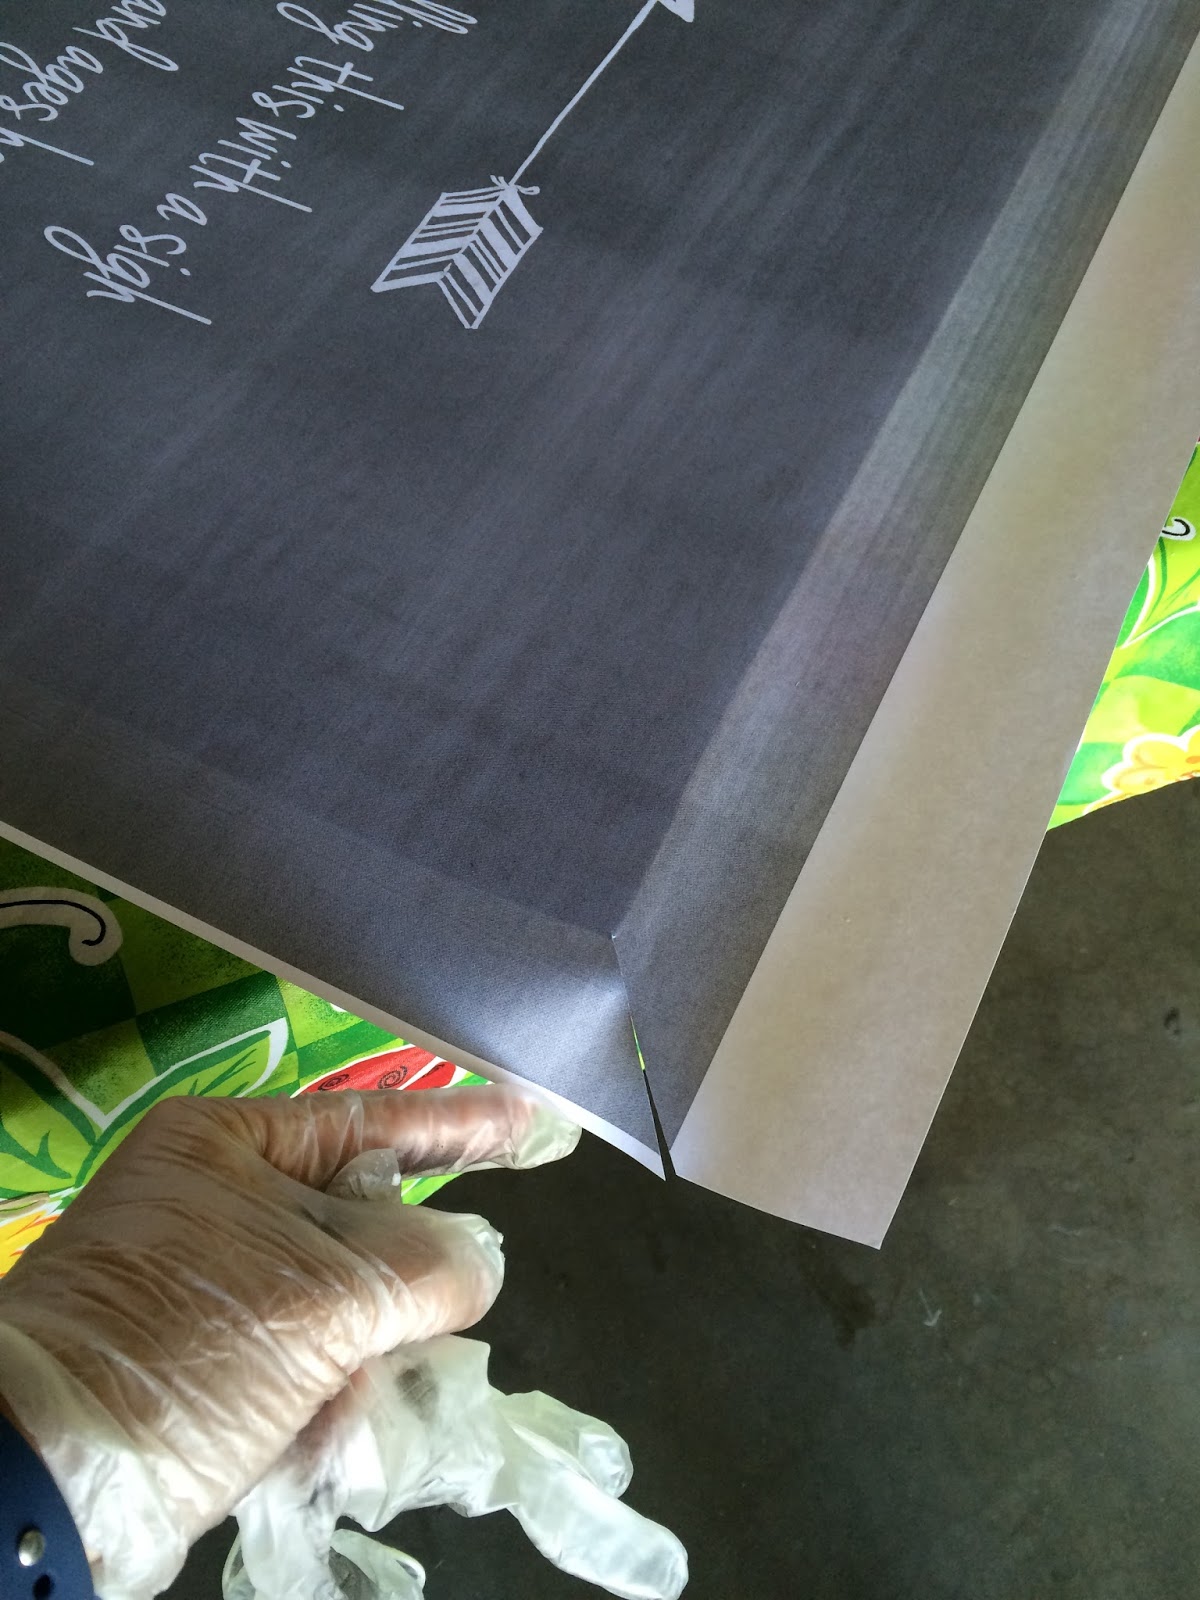
Next, I had to figure out how to make the photocopy look like it was canvas. I like the wrapped canvas look, so I decided I needed something that was about 1 inch thick. I thought about foam core board or cardboard, but I'd have to put layers together. I considered plywood or particle board (and if I had had a scrap big enough in my shed I might had gone that route). Then I landed on rigid foam insulation--cheap, easy to haul home and cut! I didn't want a big sheet of it, but luckily, Home Depot sells it in small 2x2 and 2x4 panels. I chose the 1" thick and it was about $3.50.

So, I brought home my print and my foam. I used a straightedge to trim the foam and sprayed the surface with adhesive. I centered the print over the foam and carefully smoothed it down. I cut the corners of the paper at an angle and flipped the whole thing over and sprayed a bit more adhesive on the foam edges and the paper. I slowly and carefully wrapped the paper around the edge and the back. It looked a lot like a wrapped package.


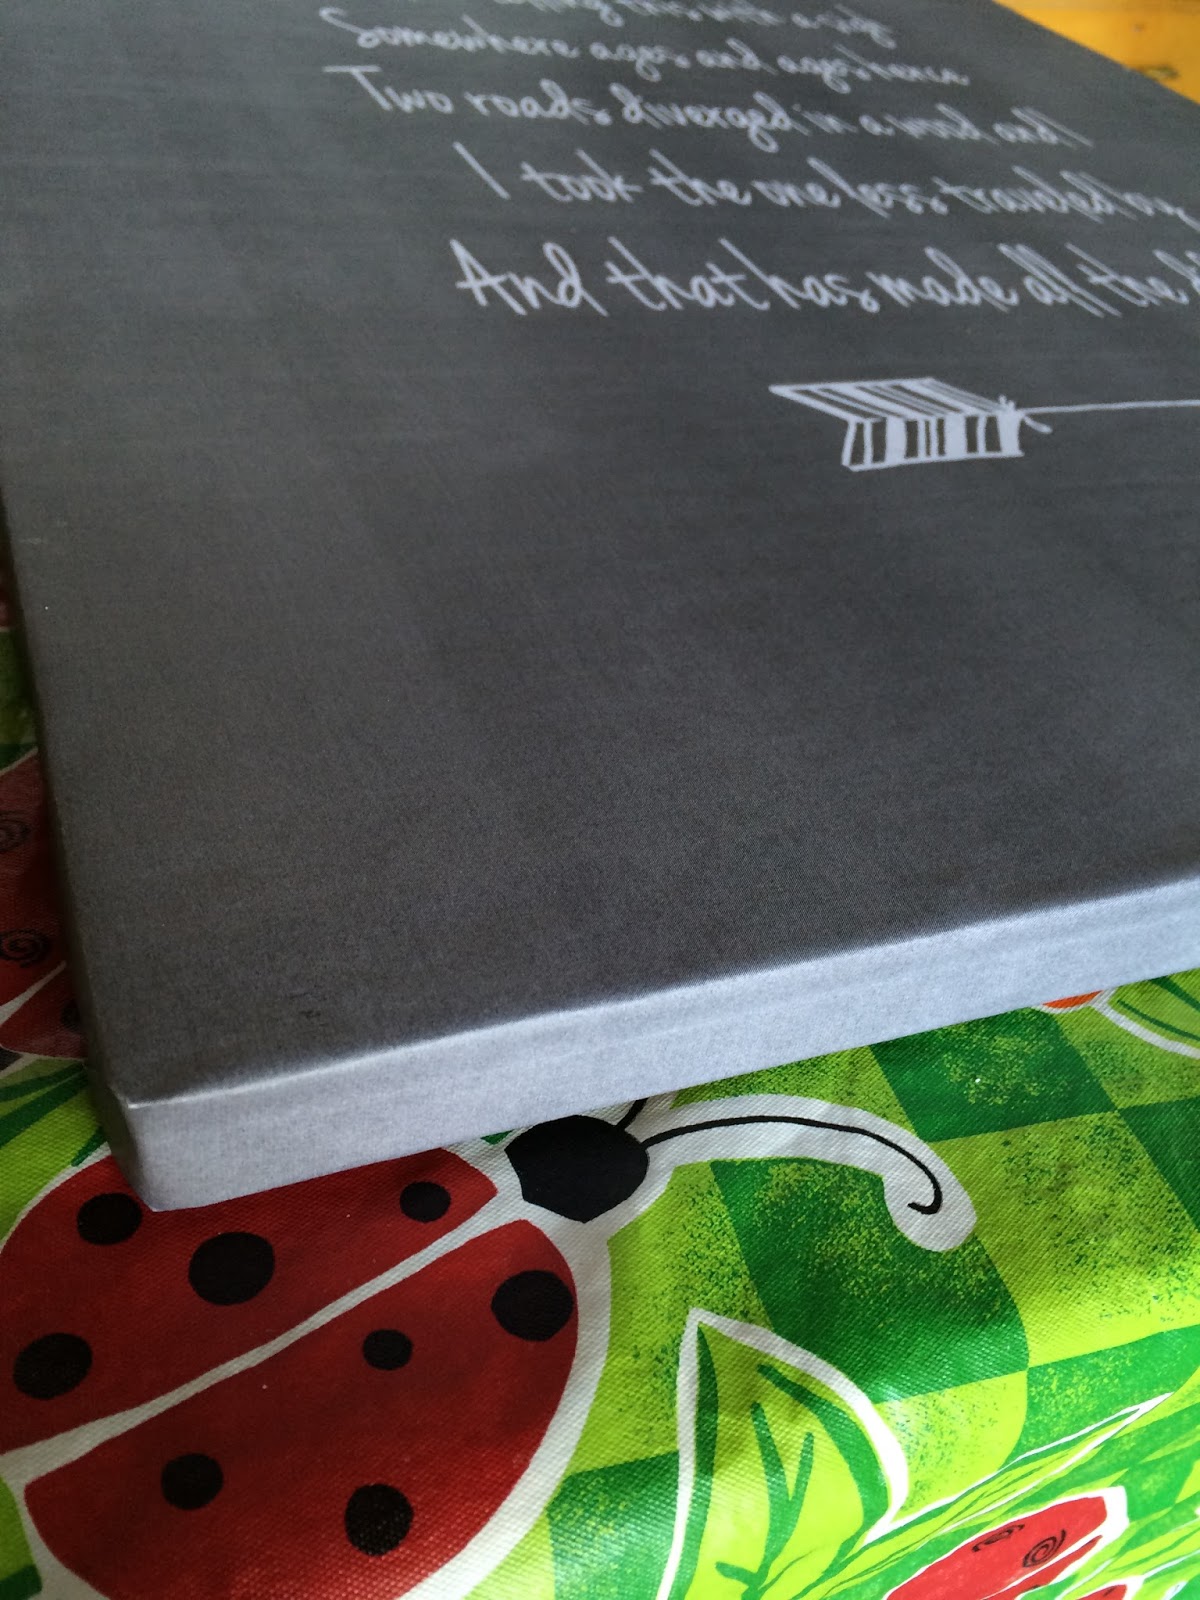
To get the illusion of canvas, I used a big paintbrush (the super cheap bristle brush from the Dollar Store) and dry brushed a bit of Modge Podge in long sweeping strokes both vertically and horizontally. Don't use much of the glue--dab it on the brush, tap most of it off on a rag or paper towel and then lightly brush (if you get heavy handed with the liquid glue, the thin paper will wrinkle up).

Since the foam is so light, I used a loop of twine and some duct tape to make the hanger (tie a knot in the end so the twine doesn't slide out of the tape).


For my quote, I went with Robert Frost's The Road Not Taken. We had sung it at choir a couple months ago and it has just stuck with me.
Two roads diverged in a yellow wood,
And sorry I could not travel both
And be one traveler, long I stood
And looked down one as far as I could
To where it bent in the undergrowth;
Then took the other, as just as fair,
And having perhaps the better claim,
Because it was grassy and wanted wear;
Though as for that the passing there
Had worn them really about the same,
And both that morning equally lay
In leaves no step had trodden black.
Oh, I kept the first for another day!
Yet knowing how way leads on to way,
I doubted if I should ever come back.
I shall be telling this with a sigh
Somewhere ages and ages hence:
Two roads diverged in a wood, and I—
I took the one less traveled by,
And that has made all the difference.

No comments:
Post a Comment
Thank you for taking time to comment!
Note: Only a member of this blog may post a comment.