Tuesday, December 13, 2011

Artisan Bread-Easier than you think!

Pin It

This recipe is tasty! I was sitting next to a friend at choir rehearsal who was describing this super easy and tasty bread recipe and I knew I had to try it out. Apparently the recipe first showed up in the NY Times from Mark Bittman, but I found this version at Steamy Kitchen.

First, I had to hit the store because I did not have bread flour or instant yeast. This recipe is super easy, but it is not super fast. You have to start the dough the night before and you need to have a couple hours of raising time the day that you want to bake it. You don't need a fancy mixer, but you should have an enamel cast iron baking dish with a lid that can handle oven temps of 450 degrees.
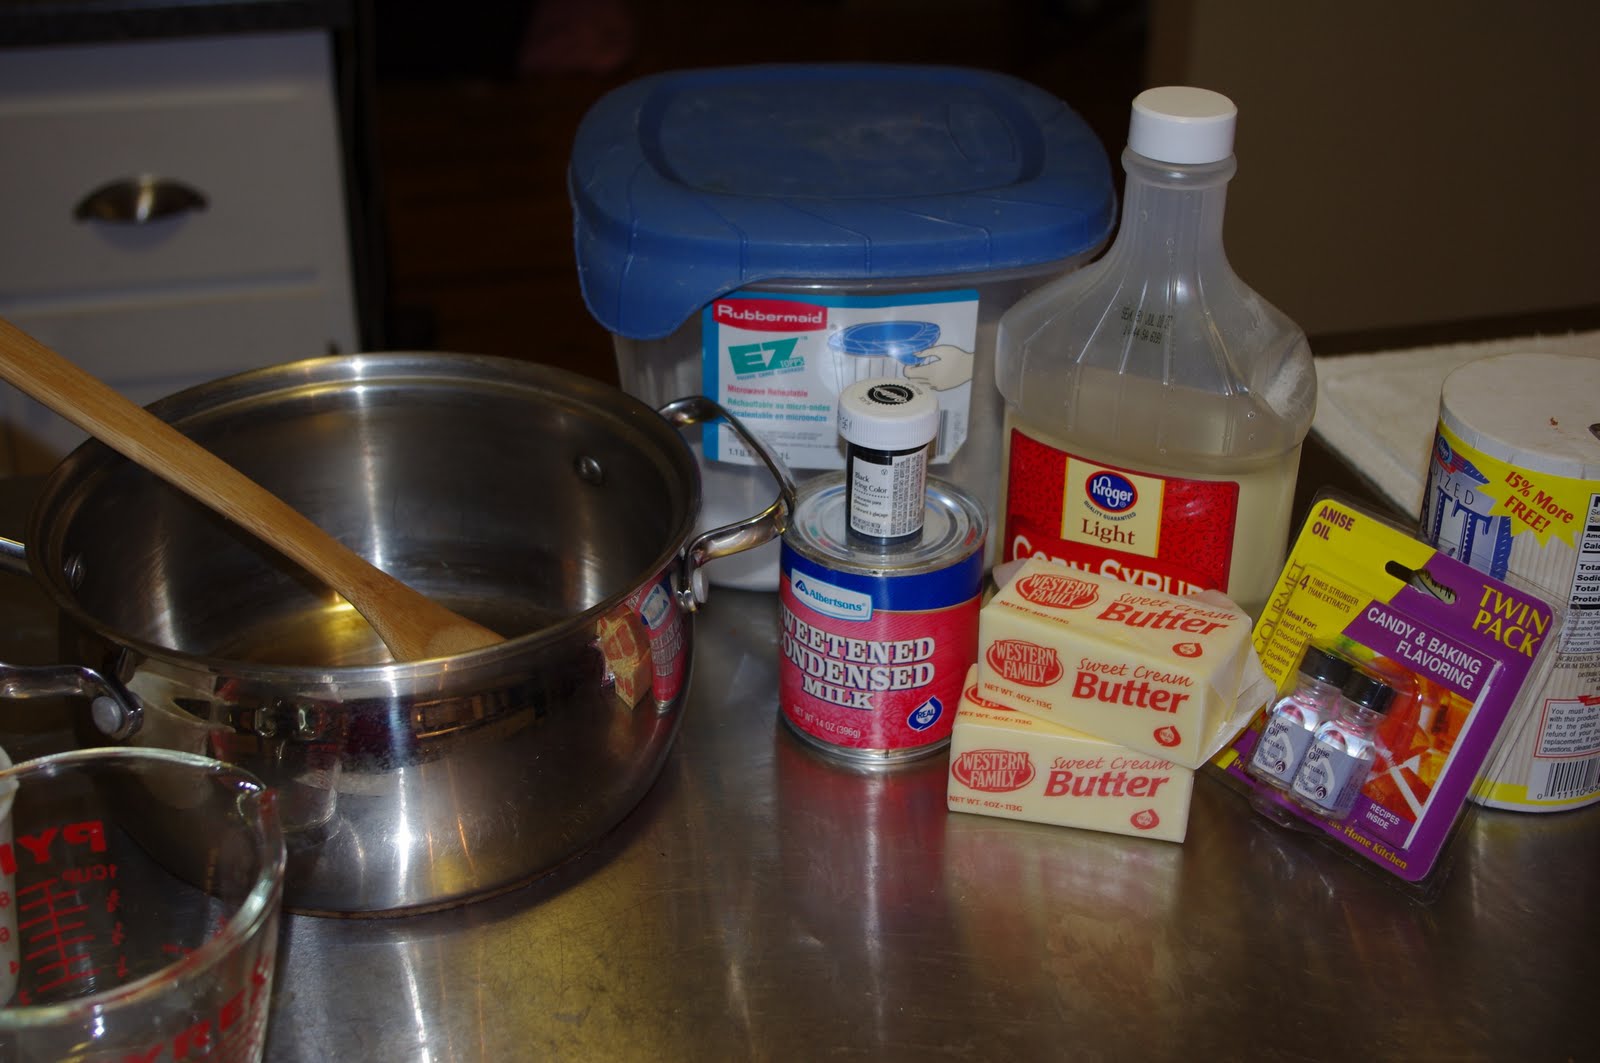

Ingredients

3 C. bread flour (I used King Arthur)
1/4 t. instant yeast
1 tsp. salt (table)
1 1/2 C. warm water


In a med/large bowl add all the dry ingredients and stir. Add the water and stir it up until you get a messy lump of dough. Cover with plastic wrap and set on the counter overnight.


The next day the bowl will have a light and fluffy dough. I laid out a dish towel and sprinkled it generously with flour and then dumped the contents of the bowl onto the towel. I used the edges of the towel to form the dough into a ball, then wrapped the cloth around it to let it rise for a couple hours.


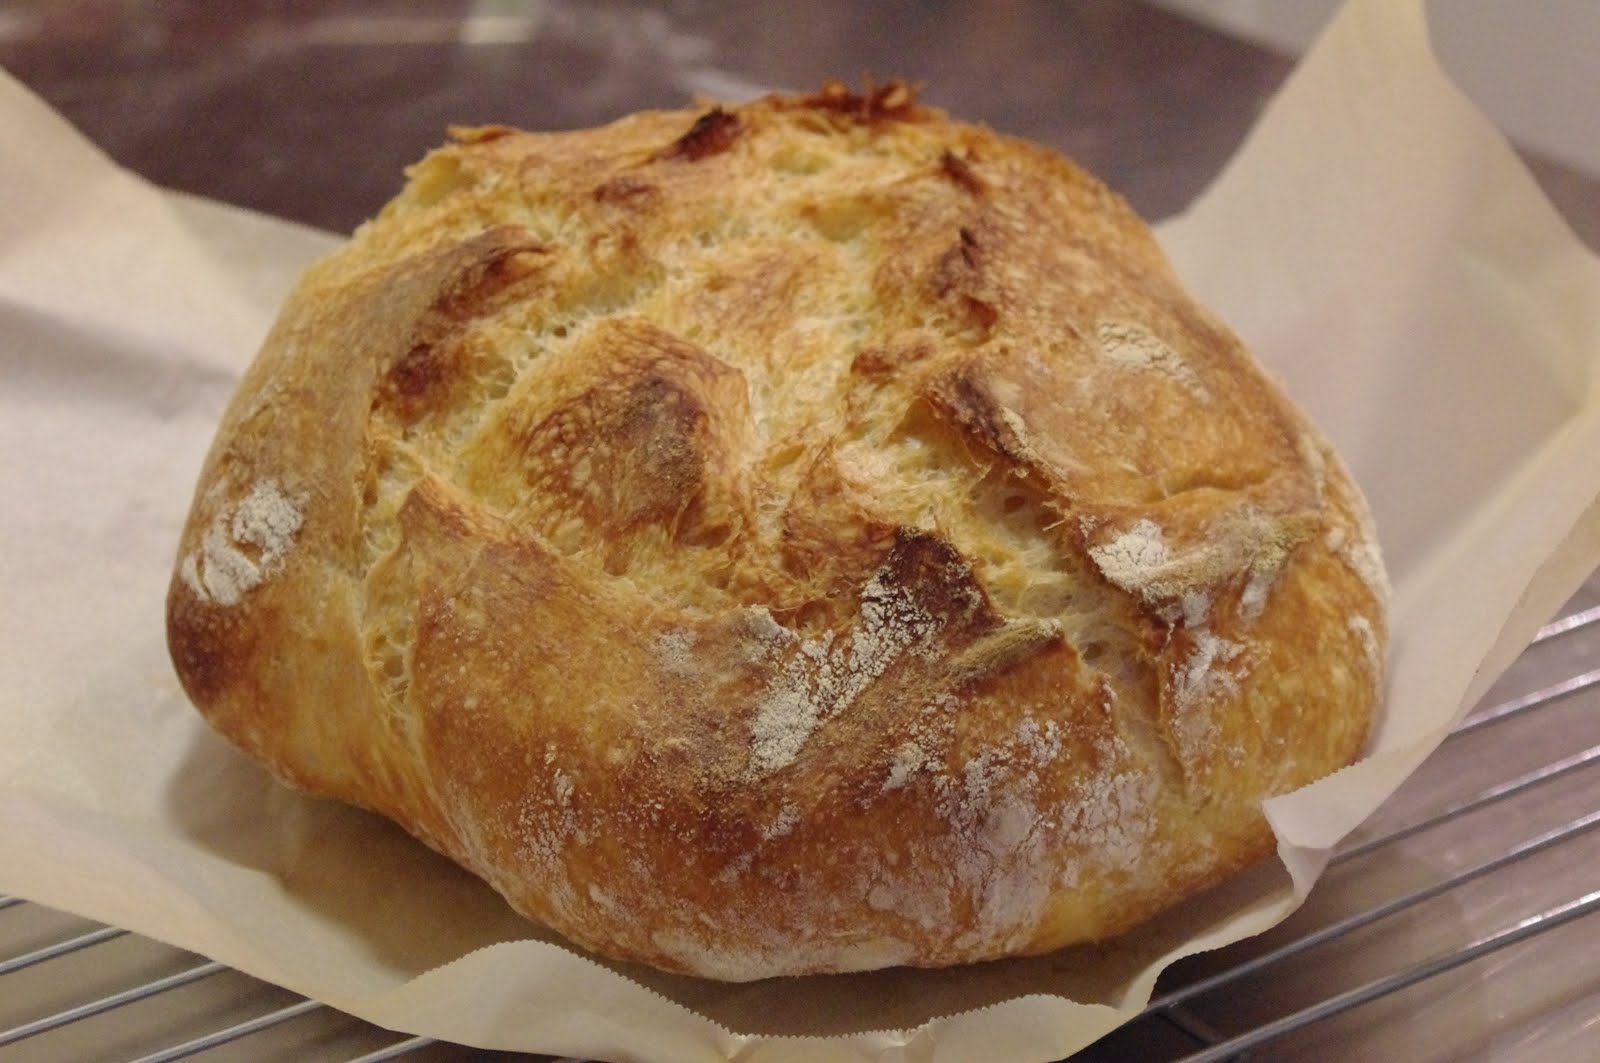
As instructed by the Steamy Kitchen, the last 30 minutes of raising, I preheated the oven to 450 degrees with the baking dish inside the oven. I dumped the dough from the towel onto a piece of parchment paper and slipped it into the pot. Put the lid on the pot and bake at 450 degrees for 30 minutes. After 30 minutes, take the lid off and bake for another 10-15 minutes until it is a beautiful golden color. Remove it from the pot and let it cool on a wire rack.  NOTE:  After seeing America's Test Kitchen do this bread too, they didn't pre-heat the pot and it seemed to work fine.  Last time I did the bread, after I shaped the dough into a ball, I placed it on the parchment and right into my cast iron pot to rise and put it in the 450 degree oven when it was ready.  Seemed fine.  I also had a cold house that day, so I put the pot in the powder room with a space heater...it made it rise nice and fast).


I bundled up this gorgeous loaf of bread up with some homemade strawberry jam and a dishtowel that I imprinted with the Citrasolve method and took it as a gift to some good friends. When she served it at dinner, everyone wanted to know which bakery I had stopped at to pick it up! One friend immediately wanted to know how to make it because it reminded her of the kind of bread her husband loves from Portugal. So, it was a hit! Try it out, you will not be sorry :)

Saturday, December 10, 2011

Licorice Caramels

Pin It

One of my favorite memories of my grandpa is that he always had licorice in his front shirt pocket (he wore those Western style shirts with snaps on the pockets). My brothers and I all love black licorice--so it was no surprise that licorice caramels are a big hit around our house. I first had these tasty treats in college when my roommate made them for me. I'm pretty sure the recipe is from The Lion House Dessert cookbook, but I got it from Melissa and haven't been able to come to a family Christmas without it since. Even if you don't think you like licorice, you very well may love these (you can make the recipe without the anise and just use vanilla...or if you are busy like me, you make one batch of caramel and divide it in half and do both in one fell swoop). On years that I get my act together early, I wrap the caramels individually, other years I cut it into squares and stack in wax paper layers. I usually cut up my wax paper squares while the caramel is cooling in the pan.

Ingredients

1 C. butter
1 1/2 C. light corn syrup
2 C. white sugar
1 can sweetend condensed milk
1/4 tsp salt
1 tsp black food paste
1/2 tsp anise oil (NOT extract)

In a heavy 6 qt saucepan mix the butter, syrup, sugar, sweetened condensed milk and salt. Cook on medium-low heat, stirring constantly until mixture reaches "soft ball" stage and a medium caramel color (around 225-235 on a thermometer...I never use one, I use a bowl of ice water and test it). Don't try and make the process faster by turning up the heat, it will burn.


Remove the caramel from the heat and add the anise oil and food paste. Let the caramel cool a 20-30 minutes in the saucepan before pouring it into a well-buttered cookie sheet/cake pan (if you pour super hot caramel, it will melt the butter and stick to the pan). Do NOT try and pour the mixture directly on wax paper, it will melt the wax and stick to the paper (learned the hard way). I usually use my kitchen shears (sprayed with Pam) to cut them into squares.


Thursday, December 8, 2011

Cake Pops

Pin It
Do you remember the Christmas that you got your Easy Bake Oven? I do. I'm pretty sure its the same year that I got a foot-pedal powered blender that I used to make red Kool-Aid in my bedroom with brand new sunshine yellow carpet (sorry Mom). I loved making cute little cakes. Turns out my demographic are suckers for spending money on things that remind us of our childhood, hence the Babycakes Cake Pop Maker. I got one on Black Friday at Kohl's and I had some fun trying it out!

I made the vanilla cake recipe in the Babycakes recipe book that came with the machine. The batter is a thick one, and with the many other reviews I've seen, apparently that is an important factor. I tested several methods of putting the batter into the wells, and I decided I liked the cookie-dough scoop the best.


I found that filling each well right to the top worked best. My first batch turned out absolutely perfectly...every cake was a perfect sphere...and yet I manged to not take a single picture of them. Sigh. As I continued making batches (cooking for about 5 minutes) they got less and less perfect. I suspect that the device was getting too hot. So next time, I'll unplug the device between batches and plug it back in once I've got the batter in and lid closed.


I put the cake balls in the freezer before decorating. To decorate, I melted the candy chips in the microwave in a small bowl and then sat the bowl in my mini-crock pot. This kept the candy nice and smooth and allowed for easy clean up. I dipped the stick into the melted candy then pushed it into the frozen cake ball. Then I put them back in the freezer to harden the stick. I then dipped and swirled each of the cake pops. You have to tap off the excess and twirl the stick a bit to get it all smooth.


Decorate with sprinkles or drizzling with melted chocolate. Turned out pretty darn good for a first try. I did find this great Youtube video today, AFTER I had already done mine. I think I'll try some of her suggestion too.

I had great fun--I'm thinking cake pops are going to show up at the family Christmas party :)