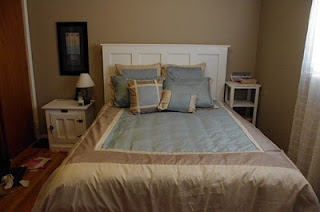
 I always get antsy in January...all the bad air, cold weather etc... keeps me indoors and I start creating projects inside to keep things interesting. The headboard in my bedroom is great--I used a door that I salvaged from an old junior high that was being torn down. I've always liked it, but after 6 years, I wanted to change it up. I thought about painting it black (I've already got the paint leftover from another project)--but then I saw THIS in Good Housekeeping Magazine:
I decided that this was a look I was interested in. I figured I'd just use the headboard I already had and if I ever decide to go back, I can.
Headboard Before:

Supplies you will need:
Piece of particle board (or MDF) cut to size (1/2 inch particle board is cheap at Home Depot and they will cut it to size for you)
1/2 in foam padding (trust me, thicker is not better...just more difficult to work with)
quilt batting
Spray adhesive
staple gun
Nail tack strips (or individual tacks)
Small hammer
Fabric
I found my fabric at Home Fabrics here in SLC (7800 S. State St) in the clearance bin for only $2 a yard! Needed 2 yards of 60" wide fabric.


 Cut the board to the size you need.
 Got the foam at Hobby Lobby (on sale)--but, I wouldn't use the 1" thick again. It was just too thick, so look for 1/2" (I think Hancock Fabrics carries it). Cut the foam to the size of your board. Use the spray adhesive to make the foam stick.
 Smooth the batting (super thin, cheap kind I got for $5 at JoAnns) over the foam and staple it on the back (I only used a few staples to keep it in place).
 Take your time and get your fabric spread over the batting--make sure that it is straight. I started at the center bottom with one staple and then the top center. I then worked slowly across the bottom from the center out, then the top. I did the sides the same way. You'll have to experiement with how tight to pull. If you pull too tight, you end up with a funny "dent" at the edge of the headboard foam, but if you don't pull tight enough you'll end up with wrinkles.
 It looked great without the nailhead trim, but I forged onward.
 Take your time with the corners.
I purchased a nailhead trim that you only have to place a tack every 5th nail to secure it (I ordered it online from Perfectfit.com, with shipping $23 and it got here in 2 days). It is made out of metal (watch out...it can be sharp on the back, I cut my finger and bled on the fabric...drat, but I did get it cleaned up). Even drawing on a straight line to follow didn't make this an easy task. The key is the right hammer (which I didn't have) and going slow. Get a small hammer (like a "lady size" or "kid size") and cover the head with some duct tape so that the metal head doesn't scratch or dent the nailhead trim. Keep the tack straight and gently tap the tack in (no whacking it, you'll just bend the tack and pull it out). I'm still thinking about adding the second row of tacks, but we'll just have to see.
I've also been refurbishing the lamp on the nightstand that I'll showcase later this week. I'm still looking for some new accessories and maybe some new bedding (although my old bedding seems more interesting now that the headboard is "new"). I spent about $50 in supplies, not bad for a new look :)
All in all, I like the headboard, but I'm only about 80% satisfied with the placement of the tacks. So we'll see if I can live with it or if I pull it out and try again.


1 comment:
Post a Comment
Thank you for taking time to comment!
Note: Only a member of this blog may post a comment.